by
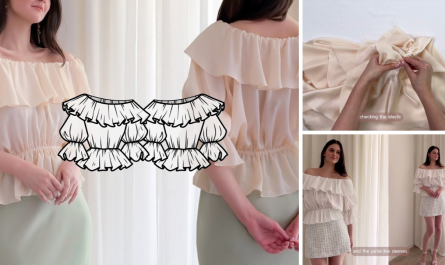
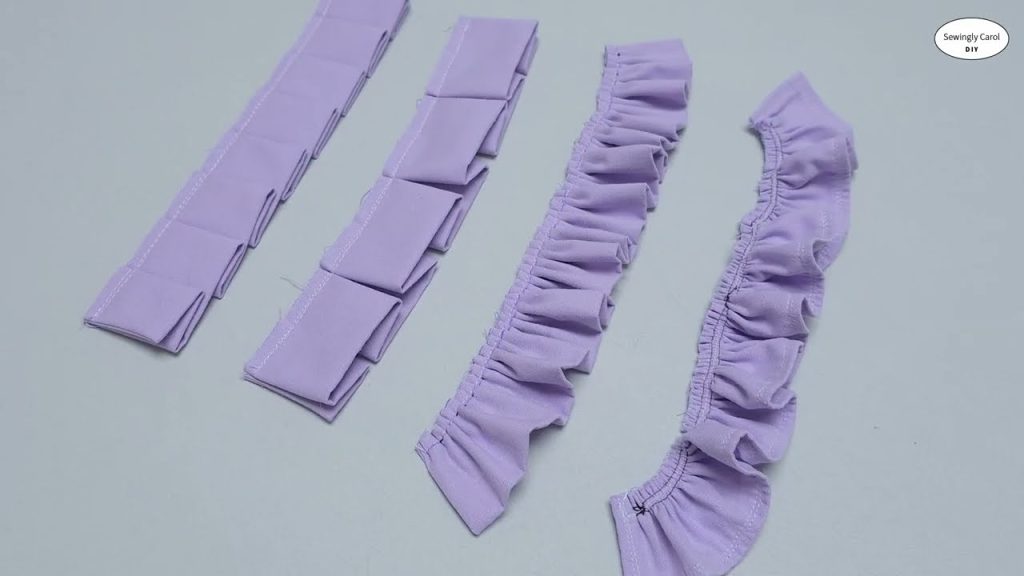
by Ruffles add a touch of playful charm, romantic softness, or dramatic flair to any sewing project. They can transform a simple skirt into a whimsical garment, add a frilly trim to a pillowcase, or create volume and texture on a sleeve. While they may look complex, creating ruffles is a simple technique that every sewing beginner can master.
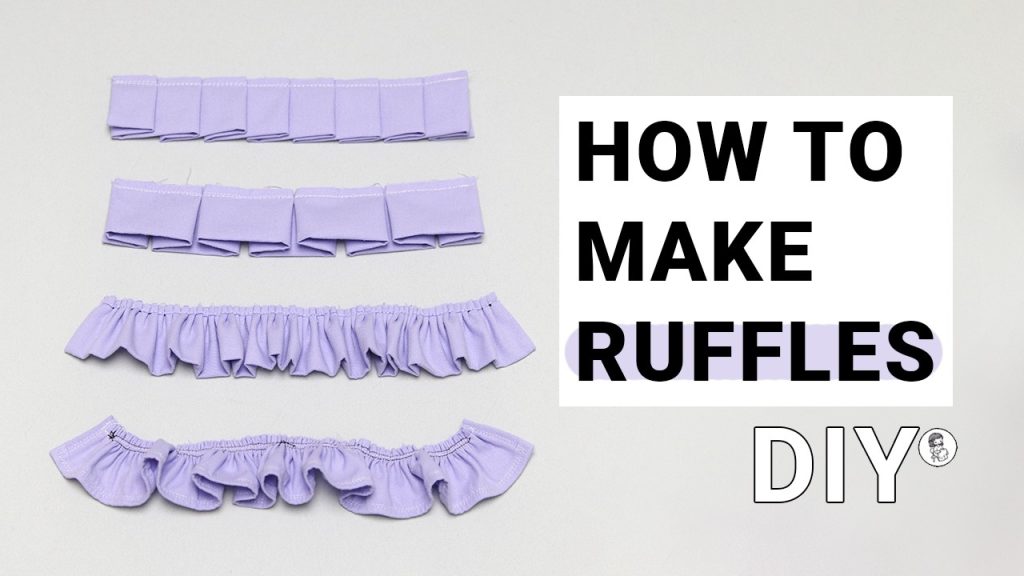
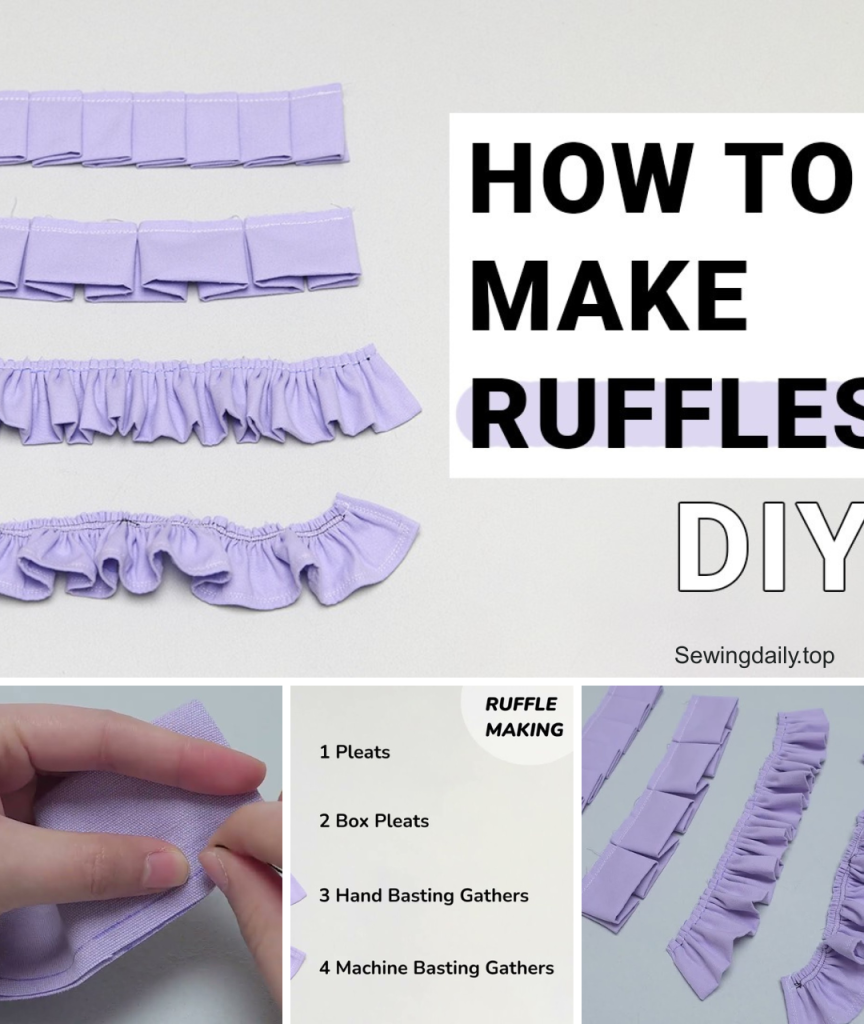
This guide breaks down four easy methods for sewing ruffles, starting with the simplest and moving to slightly more advanced, but equally effective, techniques. You’ll be adding beautiful, gathered details to your creations in no time!
Method 1: The Easiest Method – The Long Stitch
This is the most common and beginner-friendly way to create a ruffle. It uses your sewing machine’s longest stitch setting to create a gathering line.
Step-by-Step Instructions:
- Prepare Your Fabric: Cut a strip of fabric that is 1.5 to 2 times the length of the finished ruffle you want. For example, if you want a 10-inch ruffle, cut a strip 15 to 20 inches long. The extra length is what creates the gathering.
- Adjust Your Machine: Set your sewing machine to its longest stitch length (often 5.0). Do not backstitch at the beginning or end of your seam.
- Sew Your First Line: Sew a straight line along the raw edge of your fabric strip, about 1/4 inch from the edge. Leave a long thread tail at both the start and end of your seam.
- Sew a Second Line: Sew another parallel line of long stitches, about 1/4 inch from your first line. Leave long thread tails.
- Gather the Fabric: Hold the bobbin threads from one end of your fabric strip. Gently pull them. You will see the fabric begin to gather and bunch up. Slide the gathers evenly down the fabric until you have a ruffle of the desired length.
- Secure: Tie off the threads at both ends to secure the ruffle, and then stitch your ruffle to your project.
Pros: No special tools needed, easy to control the gather. Cons: Can be slow on very long ruffles.
Method 2: The Quickest Method – The Serger or Zigzag Stitch
This method is fast and creates an immediate gather. It’s great for light to medium-weight fabrics.
Step-by-Step Instructions:
- Prepare Your Fabric: Cut your fabric strip to the desired length (1.5 to 2 times the final length).
- Adjust Your Machine:
- Serger: Set your serger’s differential feed to a higher number (usually 1.5 to 2.0). A higher differential feed setting causes the fabric to feed faster, automatically gathering it as it’s stitched.
- Standard Machine: Set your stitch to a wide zigzag stitch with a short stitch length.
- Stitch and Gather:
- Serger: Simply serge the raw edge of your fabric. The machine will do all the gathering work for you.
- Standard Machine: Place a piece of dental floss or thin string over the raw edge of your fabric. Stitch over the floss with your zigzag stitch, making sure the needle goes over the floss, not through it.
- Adjust:
- Serger: If the ruffle is too loose, you can gently pull on the serger threads to tighten the gather.
- Standard Machine: Pull on the ends of the floss to gather the fabric.
Pros: Incredibly fast, especially with a serger. Cons: Less precise control over the gathers compared to the long stitch method.
Method 3: The “Set and Forget” Method – The Gathering Foot
If you plan on making a lot of ruffles, a gathering foot is a worthwhile investment. This specialty presser foot does all the work for you.
Step-by-Step Instructions:
- Attach the Foot: Remove your regular presser foot and attach the gathering foot to your machine.
- Adjust Settings: Set your sewing machine to a long stitch length. The longer the stitch length, the more pronounced the gathers will be.
- Feed and Sew: Simply feed your fabric strip through the foot. The unique design of the gathering foot will automatically create a gather as you sew.
- Control the Gather: The amount of gathering is controlled by your stitch length. A longer stitch creates a tighter ruffle, while a shorter stitch creates a looser one. You can also sew a flat piece of fabric and a gathered piece at the same time.
Pros: Consistent, perfect gathers with very little effort. Cons: Requires a specific presser foot for your machine.
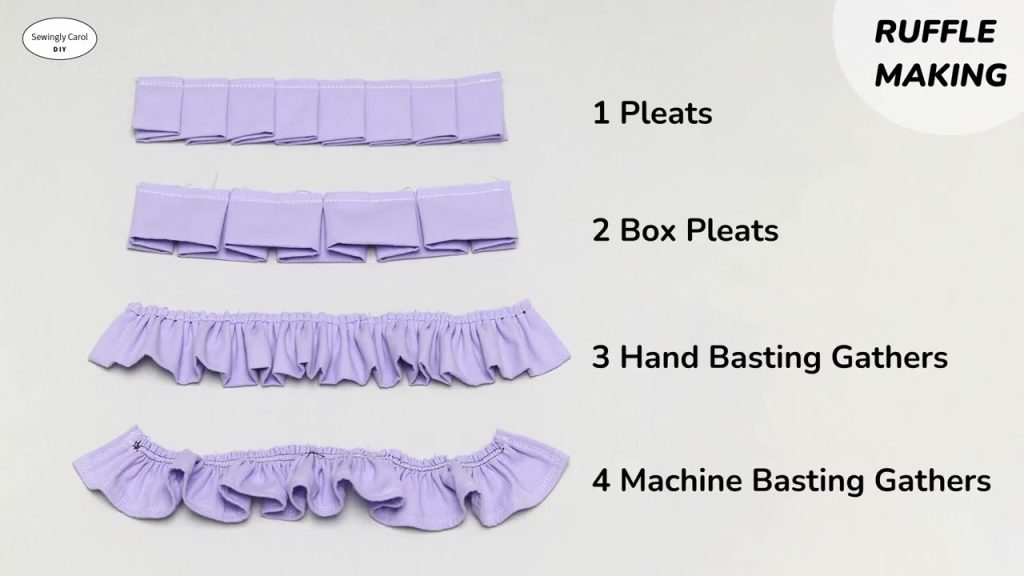
Method 4: The Most Precise Method – The Corded Edge
This method gives you a very neat and uniform gather, as it allows you to pull from a single, strong cord rather than multiple thread ends.
Step-by-Step Instructions:
- Lay the Cord: Place a piece of thin cord or dental floss on top of the raw edge of your fabric strip.
- Sew Over the Cord: Set your machine to a wide zigzag stitch with a short stitch length. Stitch over the cord, making sure the needle does not pierce the cord itself. The stitches should go over the cord, securing it to the fabric.
- Pull the Cord: Hold one end of the cord and gently slide the fabric down the cord to create your ruffle. The cord acts as a strong, smooth guide for your gathers.
Pros: Extremely neat and controlled gathers, less risk of breaking a thread. Cons: Requires an extra material (cord or floss).
Once you’ve mastered these four easy methods, you’ll be able to add beautiful, custom ruffles to any project you can imagine!
Video tutorial: