by
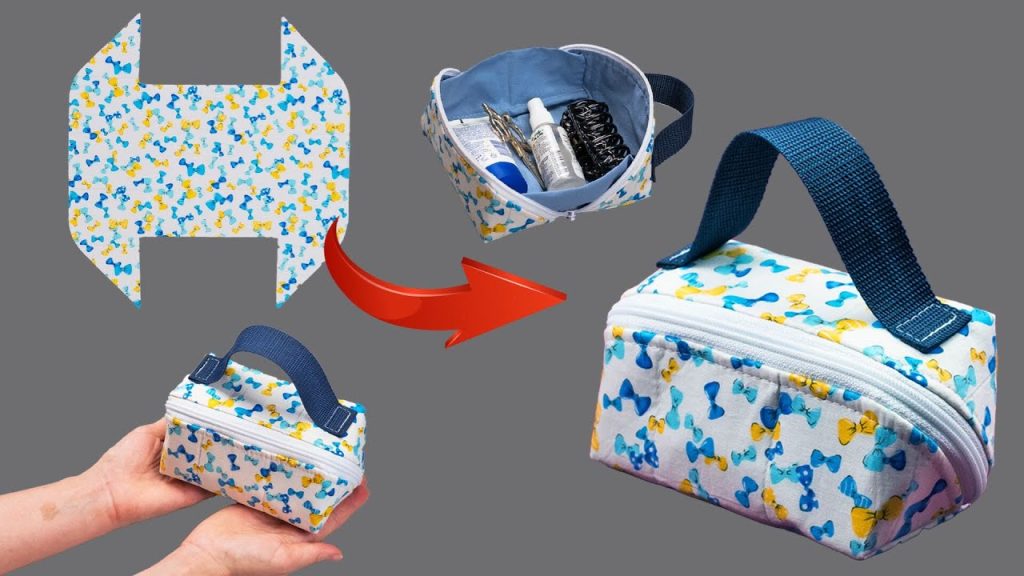
by A zippered makeup bag is a must-have accessory for keeping your cosmetics, toiletries, or other small essentials organized at home or on the go. The “Everyday Essential” Zippered Makeup Bag is a perfect project for any sewing enthusiast, featuring a simple, boxy design that is both stylish and incredibly functional. This detailed tutorial will guide you through creating a durable, lined bag with a professional finish, using a few simple sewing techniques.
This project is an excellent choice for a beginner looking to create a beautiful, practical item or for an experienced sewist wanting a fast and fun project that results in a beautiful, handmade accessory. The rectangular shape and simple construction make it a quick and rewarding sew.
Why Sew the Everyday Essential Makeup Bag?
- Perfect for Beginners: The simple, straight seams and basic construction make this a great first project for sewing with zippers.
- Functional & Practical: The boxy design holds a surprising amount and is perfect for travel or everyday organization.
- Customizable: Easily change the size, fabric, or add decorative elements to make it your own.
- Great for Gifting: A handmade makeup bag is a thoughtful and incredibly useful gift for friends, family, or as a party favor.
- Durable & Professional: The lining and boxed corners give this bag a clean, high-end, finished look.
1. Planning Your Bag: Size & Materials
- Finished Size: The pattern is designed for a versatile makeup bag, approximately 8 inches (20 cm) long, 4 inches (10 cm) tall, and 4 inches (10 cm) deep.
- Fabric Choice: Choose a durable fabric that will stand up to daily use.
- Outer Fabric: A non-stretch, medium-weight fabric like quilting cotton, canvas, or denim is a great choice. A fun print can make the bag pop!
- Lining Fabric: A smooth, lightweight fabric like quilting cotton or a waterproof material is recommended.
- Quantity: You will need approximately 1/2 yard (45 cm) of both outer and lining fabric.
2. Materials You’ll Need
- Outer Fabric: A rectangular piece cut to 12 x 10 inches (30 x 25 cm).
- Lining Fabric: A rectangular piece cut to 12 x 10 inches (30 x 25 cm).
- Zipper: A nylon coil zipper, at least 9 inches (23 cm) long.
- Matching Thread: A color that matches your outer fabric.
- Scissors: Fabric shears and a small pair for snipping threads.
- Ruler or Measuring Tape: For measuring and marking.
- Pins or Clips: For holding fabric pieces together.
- Iron & Ironing Board: For pressing seams.
- Sewing Machine: With a zipper foot attachment.
3. Essential Sewing Techniques
- Straight Stitch: The fundamental stitch for all seams.
- Pressing Seams: Crucial for a professional finish.
- Zipper Installation: The process of sewing a zipper into a seam.
- Boxing Corners: The technique for creating a flat, sturdy bottom on a bag.
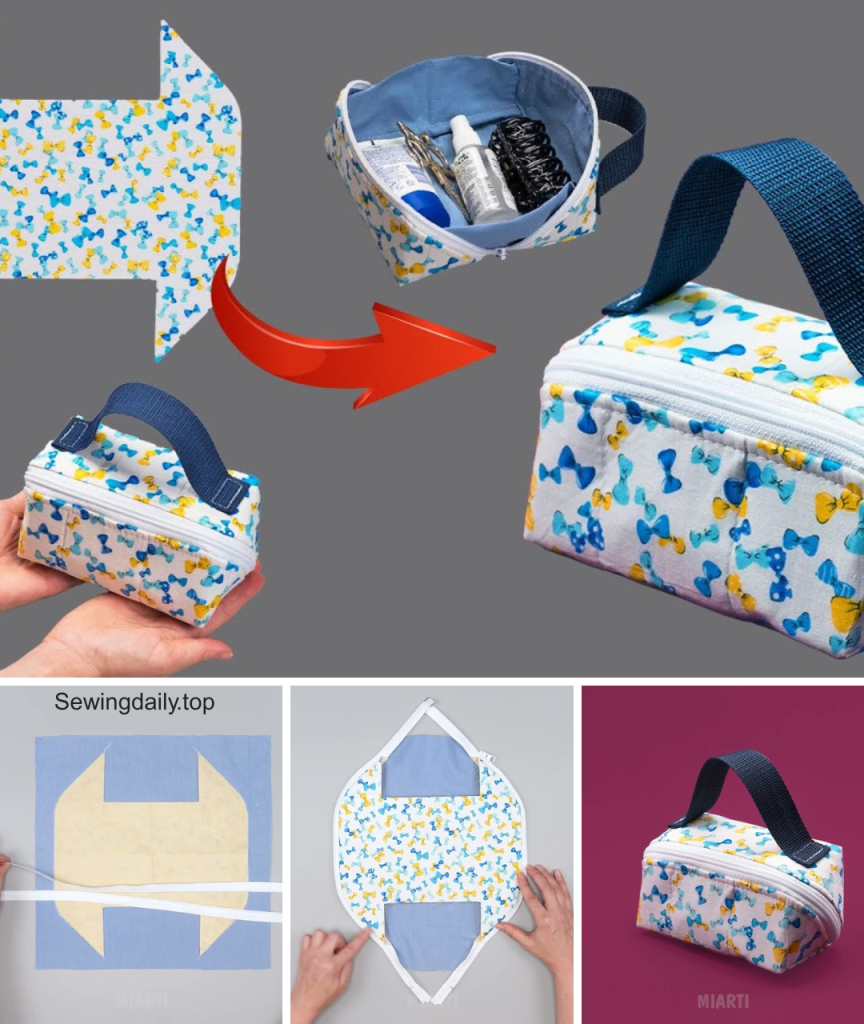
4. Let’s Sew the Everyday Essential Makeup Bag!
We will start with attaching the zipper, then sew the side seams, and finish by boxing the corners.
Part 1: Attaching the Zipper
This is the most important step for a professional-looking bag.
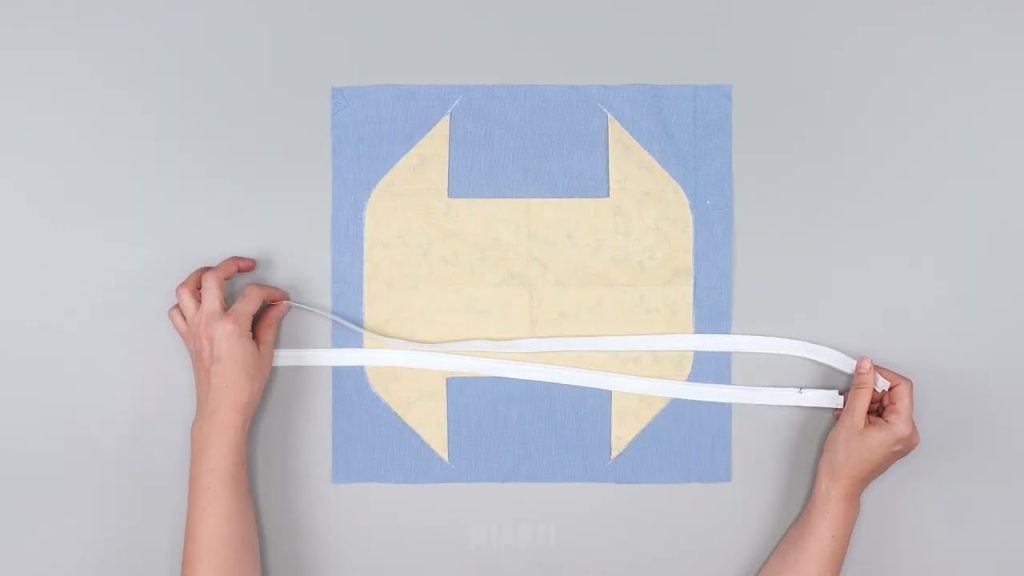
- Prepare the Zipper: Cut the zipper to the length of your bag opening (8 inches).
- Attach Outer Fabric: Lay the outer fabric rectangle right side up. Place the zipper on top of it, right side down, aligning the top long edges. Pin or clip in place.
- Attach Lining Fabric: Lay the lining fabric rectangle on top of the zipper, right side down. The zipper should now be sandwiched between the outer and lining fabrics. Pin or clip in place.
- Sew: Using a zipper foot, sew along the edge of the zipper, with a 1/4-inch seam allowance.
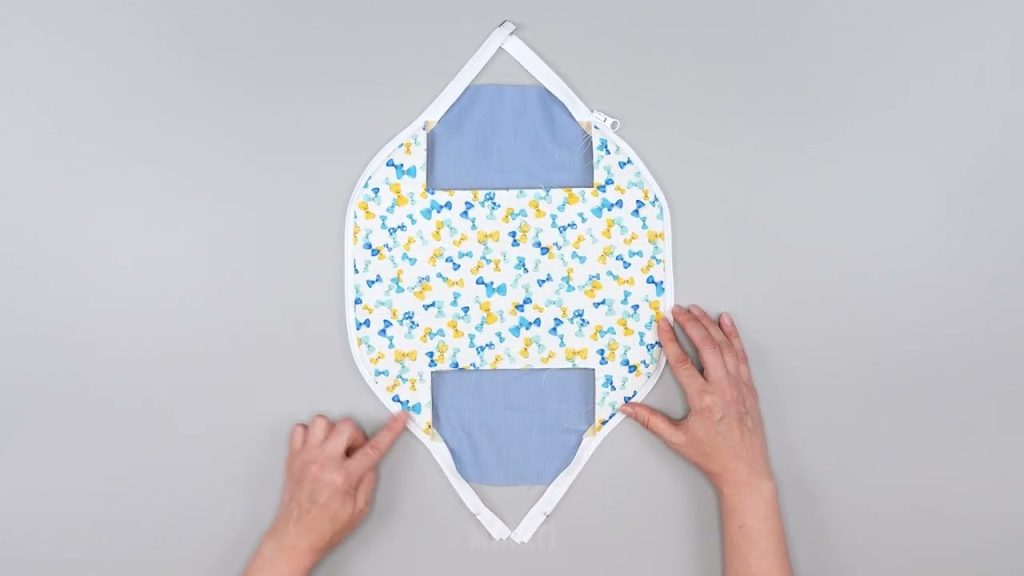
- Press & Topstitch: Fold the outer and lining fabrics away from the zipper, with wrong sides together. Press the seam flat. Topstitch along the seam, about 1/8 inch from the zipper teeth, to give it a neat finish and prevent the fabric from getting caught in the zipper.
- Repeat: Repeat these steps for the other side of the zipper, attaching the remaining raw edges of the outer and lining fabrics.
Part 2: Sewing the Side Seams
- Open Zipper: Open the zipper about halfway. This is crucial for turning the bag right side out later!
- Align Fabrics: Lay the outer fabrics on top of each other, right sides together, with the zipper in the center. Align the side seams and the top edge where the zipper is. Pin in place.
- Sew: Sew along the three raw edges (the two sides and the bottom), leaving a 1/2-inch seam allowance.
- Make sure to backstitch at the beginning and end of each seam for extra security.
- Trim Corners: Clip the corners to reduce bulk.
Part 3: Boxing the Corners
This step gives the bag its boxy shape.
- Flatten Corners: On one of the corners, flatten the fabric so that the side seam aligns with the bottom seam, forming a point.
- Measure & Mark: From the point of the corner, measure 2 inches (5 cm) down and draw a line.
- Sew: Sew along this line.
- Trim: Trim the excess fabric, leaving a 1/4-inch seam allowance.
- Repeat: Repeat this process for all four corners (two outer and two lining corners).
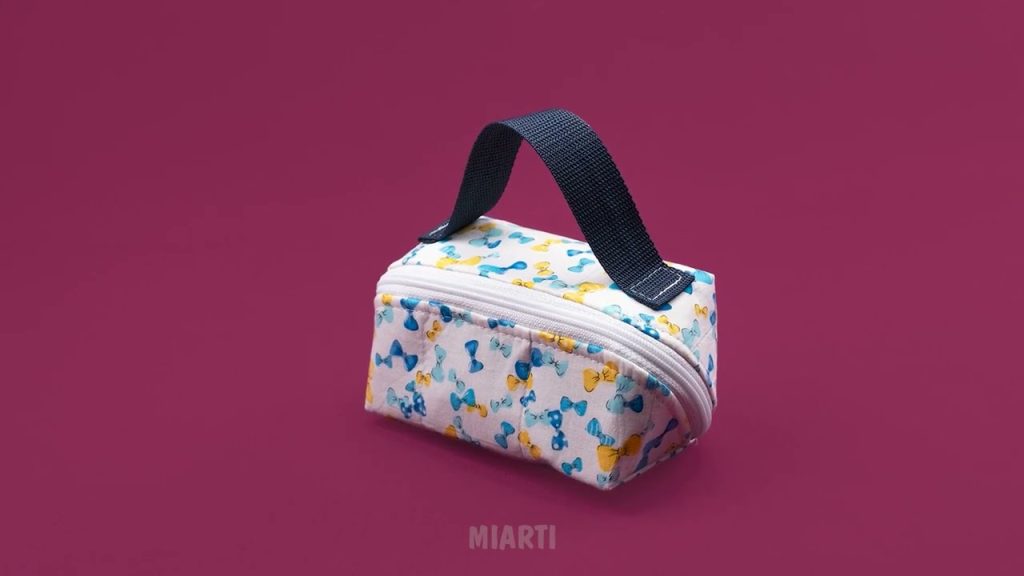
Part 4: The Final Steps
- Turn Right Side Out: Turn the bag right side out through the zipper opening.
- Push Out Corners: Gently push out the corners using your fingers or a blunt tool.
- Press: Give the entire bag a final press.
Enjoy your beautiful, handmade “Everyday Essential” Zippered Makeup Bag. Its classic design and handmade charm are sure to be a go-to accessory!
Video tutorial: