by
by Do you have an old dress in your closet that you just can’t bear to part with, but know you’ll never wear again? Perhaps it’s a sentimental piece, has a gorgeous print, or is made from super soft fabric. Instead of letting it gather dust, why not transform it into a comfy and practical bag? This is a fantastic way to upcycle, reduce waste, and create a unique accessory that carries a special memory.
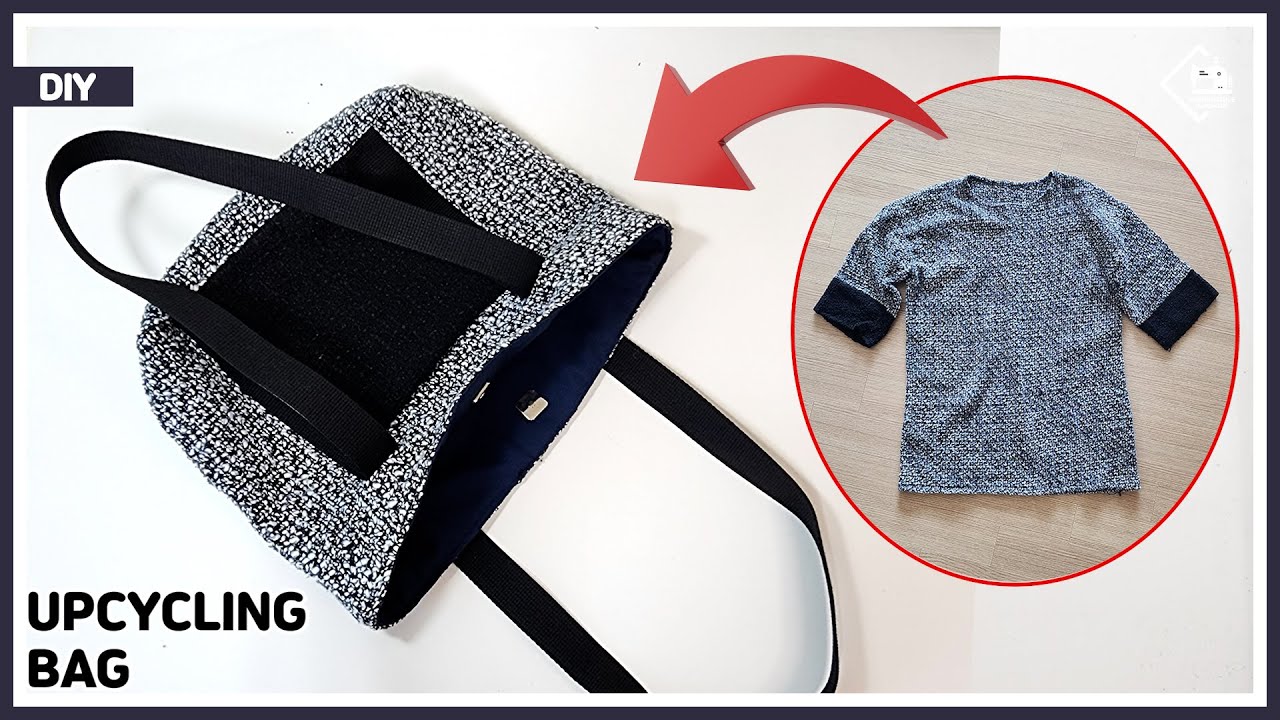
From Dress to Daily Carry: Transforming Old Clothes into a Comfy Bag
Turning an old dress into a new bag is more than just a sewing project; it’s an act of reinvention. It’s about giving new life to a beloved garment and creating something truly personal. Whether you envision a casual tote, a simple drawstring pouch, or a slouchy hobo bag, the process is rewarding and surprisingly straightforward. Let’s dig into how you can achieve this cozy transformation.
Why Upcycle an Old Dress?
- Sustainability: You’re diverting fabric from landfills and reducing the demand for new materials.
- Sentimental Value: Preserve memories by keeping a piece of a special occasion or loved one with you.
- Unique Style: Your bag will be one-of-a-kind, reflecting the original dress’s charm and your personal touch.
- Cost-Effective: It’s a budget-friendly way to get a new bag without spending on new fabric.
Choosing the Right Dress (and Bag Style)
Not all dresses are created equal when it comes to bag making. Consider these factors:
- Fabric Type:
- Cotton, Linen, Denim: These are ideal. They’re easy to work with, hold their shape well, and are durable.
- Rayon, Viscose, Silk: These can work for a softer, more draped bag, but may need interfacing for added structure.
- Knits (Jersey, T-shirt material): Great for a super slouchy, comfy feel, but can be challenging for beginners as they stretch. Use a walking foot and a ballpoint needle.
- Fabric Amount: A midi or maxi dress will offer more fabric for a larger bag or multiple smaller projects. A shorter dress might be better for a small pouch or an accent panel.
- Dress Features:
- Skirts: Often provide the largest continuous pieces of fabric.
- Bodices/Sleeves: Can be used for pockets, straps, or decorative elements.
- Zippers, Buttons, Pockets, Embellishments: These can be incorporated into your bag’s design as functional or decorative features.
Bag Style Ideas:
- Simple Tote Bag: Easy to construct, great for beginners.
- Drawstring Bag: Perfect for a more casual, pouch-like feel.
- Hobo/Slouchy Bag: Embraces the soft drape of certain fabrics.
- Crossbody Pouch: Ideal for smaller dresses or specific fabric sections.
For this guide, we’ll focus on making a simple, comfy tote bag, as it’s versatile and showcases how to maximize your dress fabric.
What You’ll Need:
- Your Old Dress: Washed and ironed.
- Lining Fabric (Optional but Recommended): About 1/2 to 1 yard (0.45-0.9 meters) of lightweight cotton (e.g., quilting cotton). This gives your bag a professional finish and added durability.
- Interfacing (Optional): Fusible interfacing (light to medium-weight) if your dress fabric is thin and you want more structure.
- Thread: All-purpose polyester thread that matches or complements your dress fabric.
- Sewing Machine: With a universal needle.
- Tools:
- Fabric scissors or rotary cutter and mat
- Measuring tape or ruler
- Fabric marker or tailor’s chalk
- Pins or fabric clips
- Iron and ironing board
Step-by-Step Transformation:
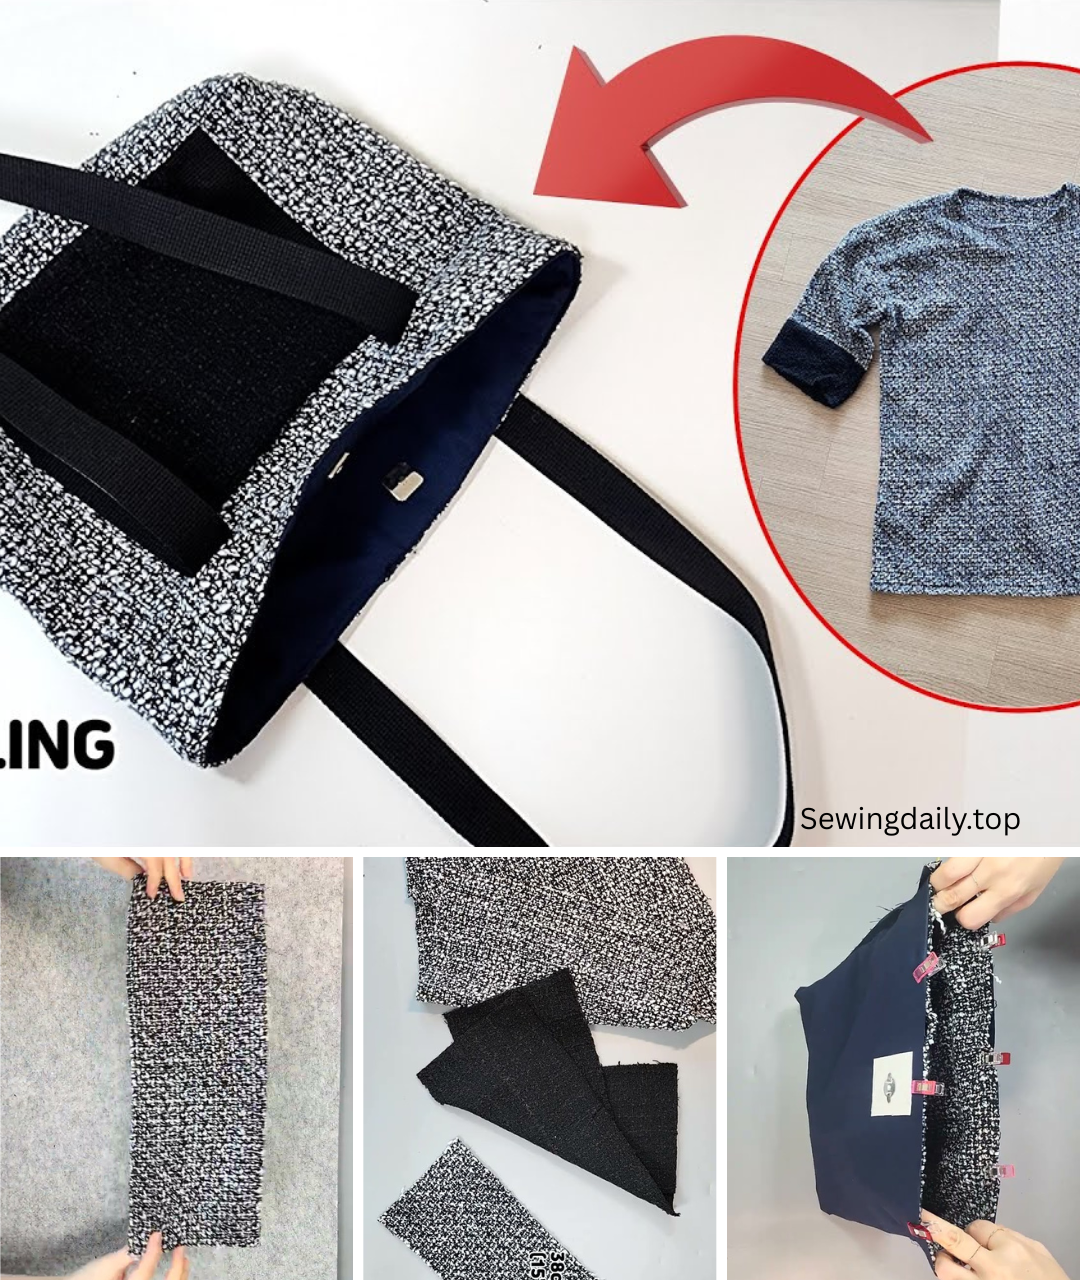
1. Deconstruct the Dress
- Lay it Flat: Spread your dress out on a clean, flat surface.
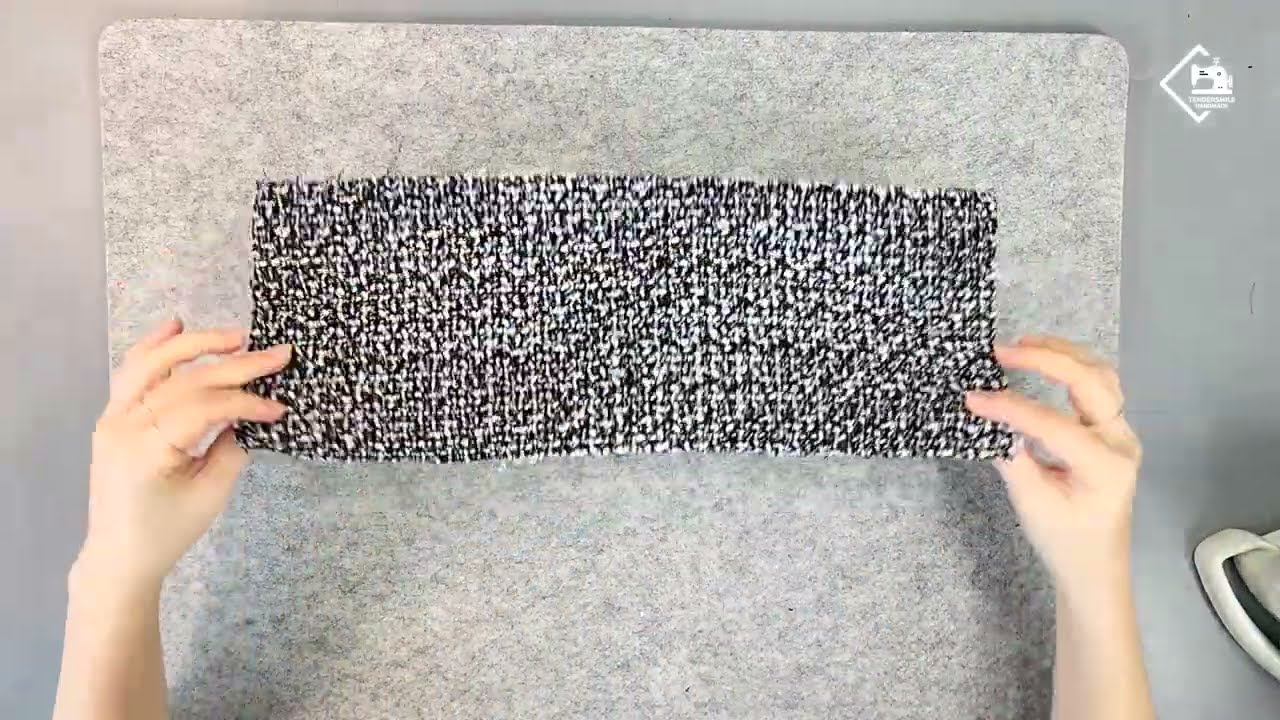
- Assess and Plan: Determine which parts of the dress offer the largest, cleanest sections of fabric. The skirt is usually the best starting point.
- Carefully Cut: Using your fabric scissors, cut away seams, zippers, waistbands, sleeves, and bodices to get the largest possible flat pieces of fabric. Iron any wrinkles.
- Tip: Don’t discard the smaller pieces just yet! They might be useful for pockets or strap accents.
2. Design and Cut Your Bag Pieces
For a simple tote bag, you’ll generally need two main bag body pieces and two strap pieces. If you’re adding a lining, you’ll need identical pieces from your lining fabric.
Example Dimensions (for a medium-sized tote, adjust as needed):
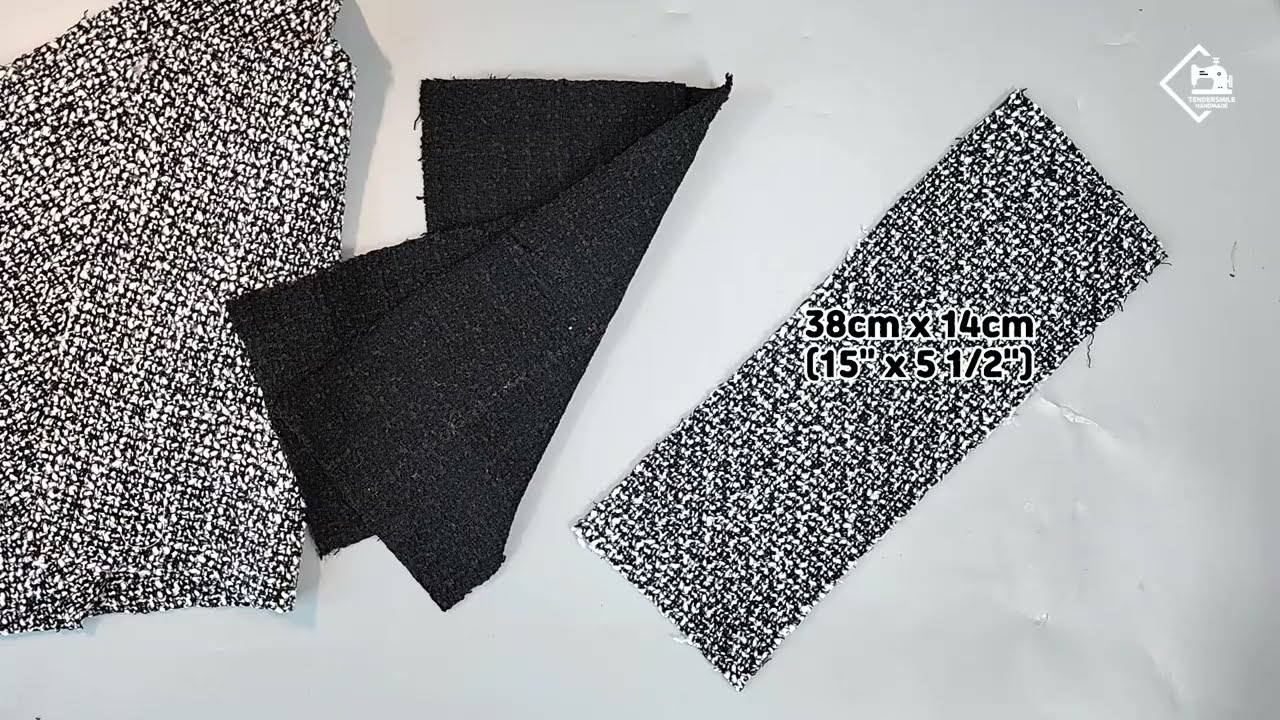
- Main Bag Body (Cut 2):
- From Dress Fabric: 18 inches wide x 16 inches tall (45.7 cm x 40.6 cm)
- From Lining Fabric (if using): 18 inches wide x 16 inches tall (45.7 cm x 40.6 cm)
- Straps (Cut 2):
- From Dress Fabric (or accent fabric if using): 4 inches wide x 25 inches long (10 cm x 63.5 cm)
- Optional: Interfacing: Cut pieces slightly smaller than your main bag body and strap pieces, if using. Fuse to the wrong side of your dress fabric pieces according to manufacturer’s instructions.
Process for Cutting:
- Measure and mark your desired dimensions on the wrong side of your deconstructed dress fabric.
- Carefully cut out all your pieces.
- Repeat for lining fabric if you’re using it.
3. Prepare the Straps
- Take one strap piece. Fold it in half lengthwise, wrong sides together, and press. Open it up.
- Fold each long raw edge inwards to meet the center crease you just made. Press firmly.
- Now, fold the entire strap in half again along the original center crease, enclosing all raw edges. Press well. Your strap should now be 1 inch (2.5 cm) wide.
- Topstitch along both long edges of the strap, about 1/8 inch (0.3 cm) from the edge. This secures the strap and gives it a professional finish. Repeat for the second strap.
4. Sew the Main Bag Body
- Exterior Bag:
- Place your two main bag body pieces (from the dress fabric) right sides together, aligning all edges.
- Pin along the two side edges and the bottom edge.
- Stitch these three edges using a 1/2 inch (1.25 cm) seam allowance. Backstitch at the beginning and end of each seam.
- Optional: Create a flat bottom (boxed corners): At each bottom corner, flatten the corner so the side seam meets the bottom seam, forming a triangle. Measure 2 inches (5 cm) from the tip of the triangle and draw a line across. Stitch along this line. Trim the excess corner away, leaving a 1/2 inch (1.25 cm) seam allowance. This creates depth.
- Leave the top edge open.
- Lining Bag (if using):
- Repeat the exact same steps for your lining fabric pieces.
- Important: When sewing the bottom seam of the lining bag, leave a 4-5 inch (10-12.7 cm) opening in the middle of the seam. This opening will be used to turn the bag right side out later. Remember to backstitch securely at the beginning and end of this opening.
5. Attach the Straps to the Exterior Bag
- Turn your exterior bag right side out.
- Place one of your prepared straps. Measure in 4-5 inches (10-12.7 cm) from each top side edge of the exterior bag.
- Align the raw ends of the strap with the top raw edge of the bag at these marks. Make sure the strap isn’t twisted. The strap will be pointing down into the bag.
- Pin the raw ends of the strap in place. Baste (stitch temporarily) them within the 1/4 inch (0.6 cm) seam allowance to secure them before final assembly. Repeat for the second strap.
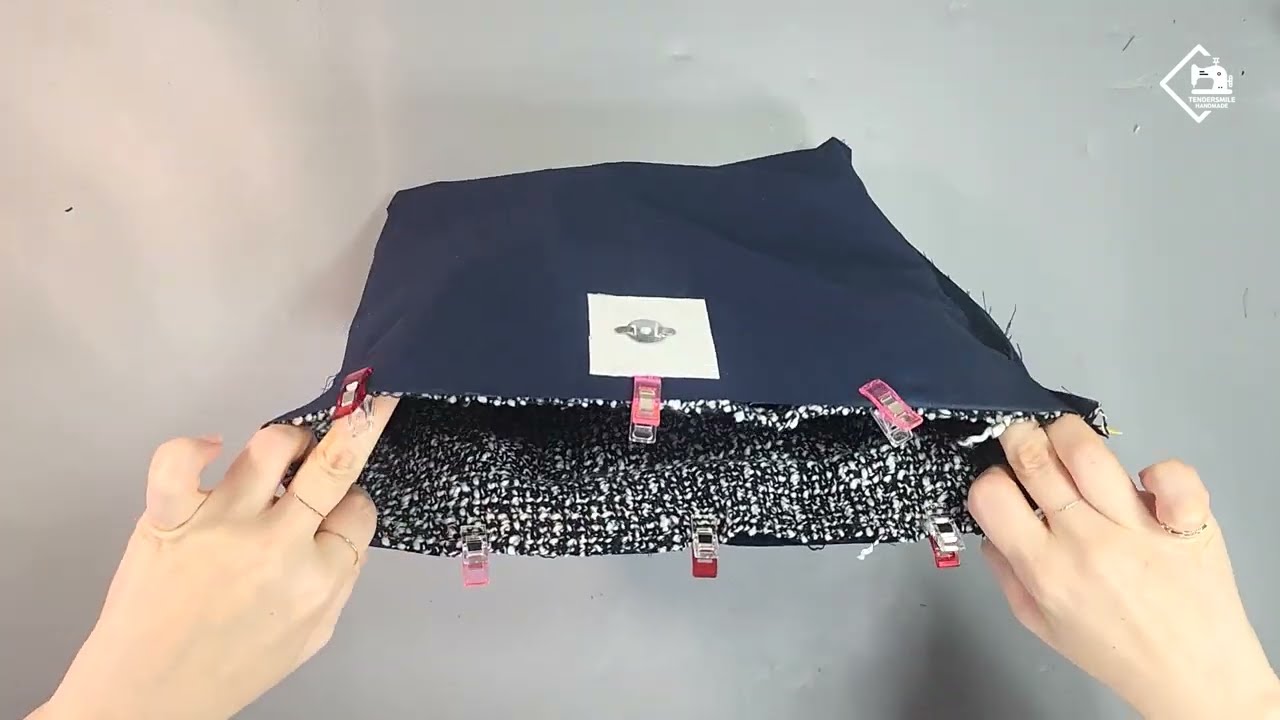
6. Assemble the Bag (Exterior and Lining)
- Keep the exterior bag right side out, with the straps tucked inside.
- Keep the lining bag wrong side out.
- Carefully insert the exterior bag into the lining bag, so their right sides are facing each other. The strap ends should be sandwiched between the exterior and lining.
- Align the top raw edges of both bags perfectly. Match the side seams. Pin all around the top opening securely.
- Stitch around the entire top opening with a 1/2 inch (1.25 cm) seam allowance. Backstitch at the start and end.
7. Finish the Bag
- Reach into the opening you left in the bottom of the lining. Carefully pull the entire bag through this opening until it’s right side out.
- Gently push out all corners and seams to create a neat shape.
- Press the entire bag, especially the top seam where the lining meets the exterior.
- Close the opening in the lining: Press the raw edges of the opening inwards by 1/2 inch (1.25 cm). Stitch the opening closed either by machine (topstitch very close to the edge) or by hand using an invisible ladder stitch for a cleaner finish.
- Push the lining down into the bag. Press the top edge of the bag again.
- Topstitch: For a professional finish and added durability, topstitch around the entire top opening of the bag, about 1/8 to 1/4 inch (0.3-0.6 cm) from the edge. This secures the lining to the exterior and prevents it from rolling out.
Customization and Embellishment Ideas:
- Pockets: Before sewing your main bag panels, add a patch pocket (from a sleeve or bodice piece) to the inside or outside of your bag.
- Closure: Add a magnetic snap or a large button and loop closure to the top center of your bag.
- Decorative Touches: Use fabric scraps from the dress to create appliqué designs, ruffles, or fabric flowers. Buttons from the dress can also be sewn on for decoration.
- Mix and Match: If you have multiple old dresses, combine fabrics for a truly unique patchwork effect.
- Adjustable Strap: Instead of fixed shoulder straps, you can add D-rings and a longer adjustable strap using bag hardware.
Your comfy new bag is ready for its debut! It’s not just a stylish accessory; it’s a testament to your creativity and a wonderful way to carry a piece of your past into your present. What kind of dress did you decide to transform?
Video tutorial: