by
by Do you want to crochet a tote bag that combines classic charm with a touch of whimsy? A heart granny square tote bag is the perfect project! This delightful bag blends the timeless appeal of the granny square with an adorable heart motif, creating a unique and personalized accessory. It’s a fantastic way to practice your crochet skills, use up yarn scraps, and create a truly heartfelt item.
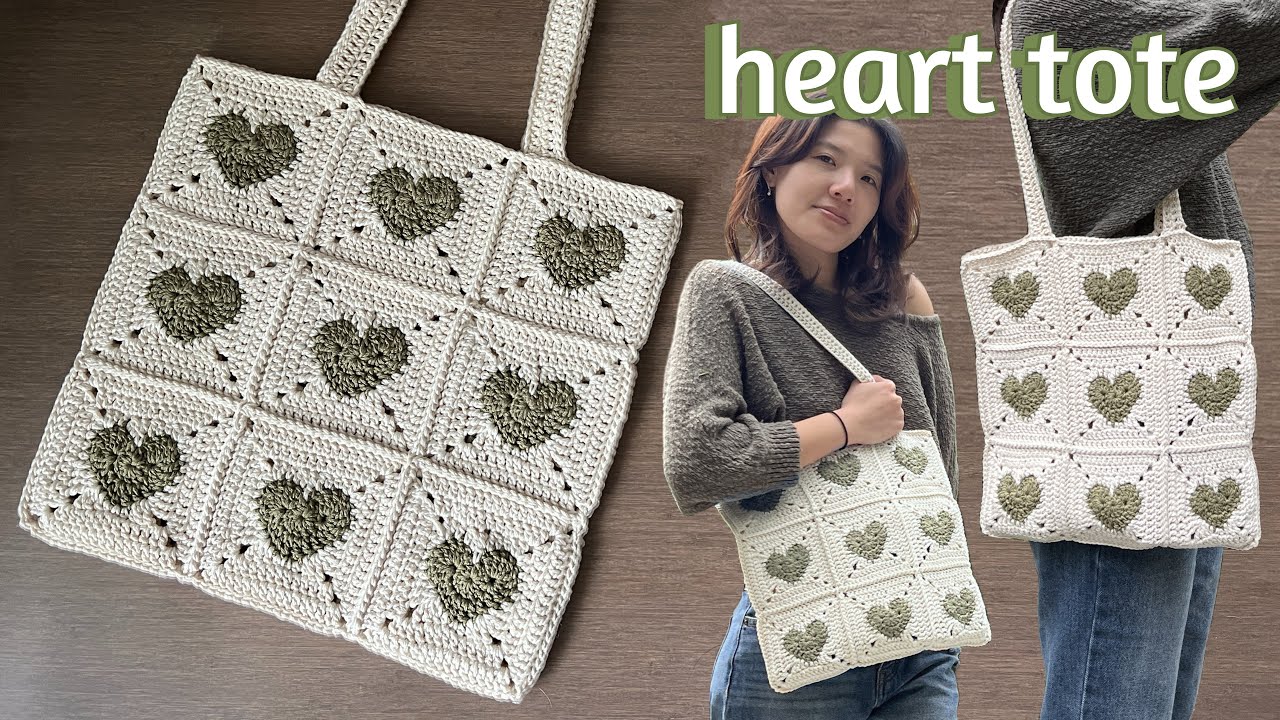
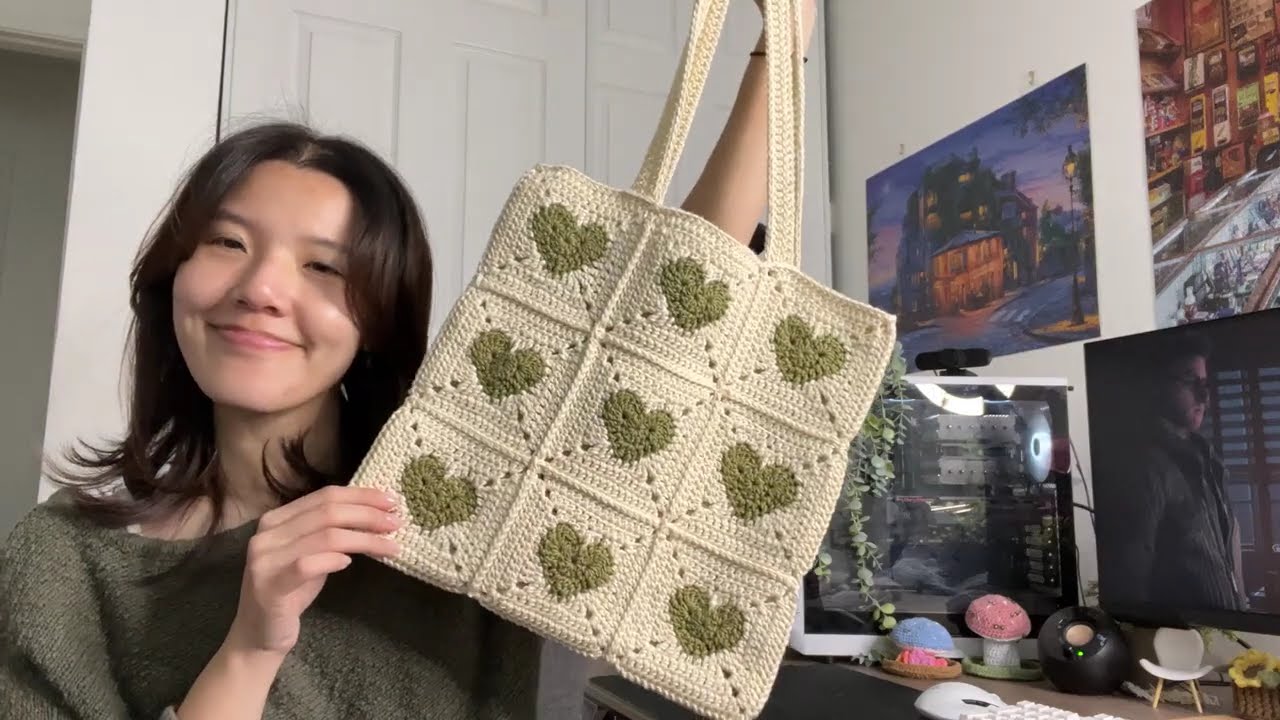
Crochet with Love: Your Heart Granny Square Tote Bag Tutorial
The granny square is a beloved crochet classic, known for its versatility and charming, cozy aesthetic. When you infuse it with a heart motif, you transform a simple square into a canvas of affection. This tutorial guides you through crocheting individual heart granny squares and then assembling them into a beautiful and functional tote bag – perfect for carrying your essentials with a touch of handmade love.
Why Crochet a Heart Granny Square Tote?
- Unique Design: Stand out with a bag that combines traditional granny square charm with a sweet, eye-catching heart.
- Personal Touch: Choose colors that reflect your style or the personality of a loved one for a truly custom gift.
- Skill Building: Practice various crochet stitches, color changes, and joining techniques.
- Stash Buster: A great way to use up those leftover yarn scraps from other projects.
- Sustainable Crafting: Create a reusable bag that’s both beautiful and eco-friendly.
What You’ll Need:
- Yarn:
- Main Color: Worsted weight cotton or acrylic yarn for the main body of the squares and the bag assembly (e.g., cream, white, black, or a neutral tone). Approximately 200-300 yards (180-270 meters), depending on bag size.
- Heart Color: Worsted weight cotton or acrylic yarn for the heart motif (e.g., red, pink, or any contrasting color). A small amount for each square.
- Accent Color (Optional): Worsted weight yarn for the final border around each square, if you want more contrast.
- Crochet Hook: Size H (5.0 mm) or size recommended for your yarn.
- Tools:
- Yarn needle (for weaving in ends and seaming).
- Scissors.
- Stitch markers (optional, but helpful).
- Measuring tape.
Part 1: Crocheting the Heart Granny Square (Make 12-16 for a medium tote)
The number of squares you make will depend on your desired bag size. For a simple tote, you’ll need squares for the front and back, and possibly for the side panels, or you can use a solid piece of crochet for the sides. Let’s aim for a total of 12-16 squares (6-8 for the front, 6-8 for the back).
Common Abbreviations:
- ch: chain
- sl st: slip stitch
- sc: single crochet
- hdc: half double crochet
- dc: double crochet
- tr: treble crochet
- sp: space
- st(s): stitch(es)
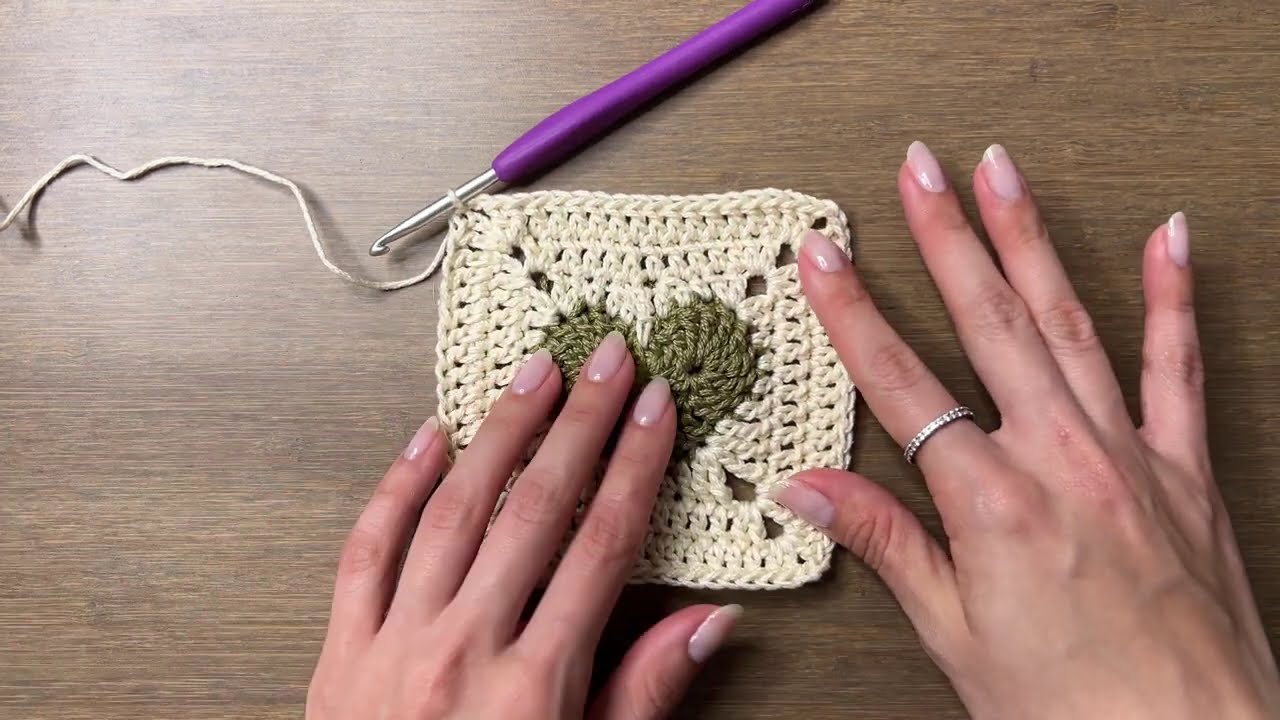
Instructions for One Heart Granny Square:
Start with your Heart Color yarn.
Round 1 (Heart Foundation):
- Make a magic ring (or ch 4, sl st to first ch to form a ring).
- Ch 3 (counts as 1 dc). In the ring, (3 tr, 3 dc, ch 1, 3 dc, 3 tr, ch 3, sl st).
- Pull magic ring closed. Sl st to the top of the initial ch-3. Fasten off heart color.
- You’ve just made half a heart shape. The next rounds will build around it.
Join Main Color yarn to any ch-1 space of the heart.
Round 2 (Square Foundation):
- Ch 3 (counts as 1 dc). In the same ch-1 sp, (2 dc, ch 2, 3 dc). This forms your first corner.
- Dc in each of the next 3 sts.
- Hdc in each of the next 3 sts.
- Sc in the next st.
- Hdc in each of the next 3 sts.
- Dc in each of the next 3 sts.
- In the next ch-3 sp (this is the tip of your heart), (3 dc, ch 2, 3 dc). This forms your second corner.
- Dc in each of the next 3 sts.
- Hdc in each of the next 3 sts.
- Sc in the next st.
- Hdc in each of the next 3 sts.
- Dc in each of the next 3 sts.
- In the next ch-1 sp (this is the other side of your heart’s dip), (3 dc, ch 2, 3 dc). This forms your third corner.
- Dc in each of the next 3 sts.
- Hdc in each of the next 3 sts.
- Sc in the next st.
- Hdc in each of the next 3 sts.
- Dc in each of the next 3 sts.
- In the final ch-3 sp (the last tip of your heart), (3 dc, ch 2, 3 dc). This forms your fourth corner.
- Sl st to the top of the initial ch-3.
Round 3 (Granny Square Formation – Main Color or Accent Color):
- Ch 3 (counts as 1 dc). (2 dc, ch 2, 3 dc) in the same corner sp.
- You are now working traditional granny clusters into the spaces.
- (3 dc) in the space before the next 3 dc group. Repeat until the next corner.
- (3 dc, ch 2, 3 dc) in each corner sp.
- Continue working (3 dc) clusters in each space between the previous round’s 3 dc groups.
- Sl st to the top of the initial ch-3.
Round 4 (Optional Border – Main Color or Accent Color):
- Ch 3 (counts as 1 dc). (2 dc, ch 2, 3 dc) in the same corner sp.
- (3 dc) in each space along the sides, until the next corner.
- (3 dc, ch 2, 3 dc) in each corner sp.
- Repeat around. Sl st to the top of the initial ch-3. Fasten off.
- Weave in all ends securely! This is crucial for a neat finish.
Part 2: Assembling Your Tote Bag
Once you have all your heart granny squares crocheted, it’s time to bring your tote bag to life!
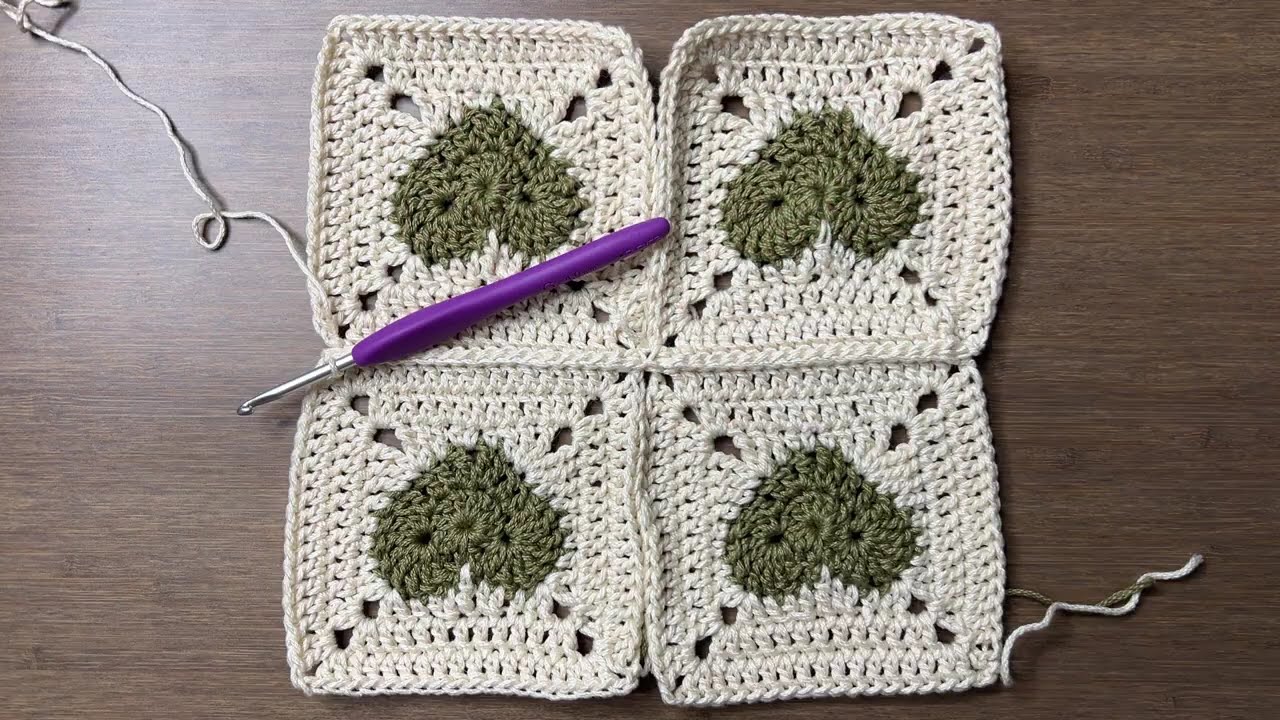
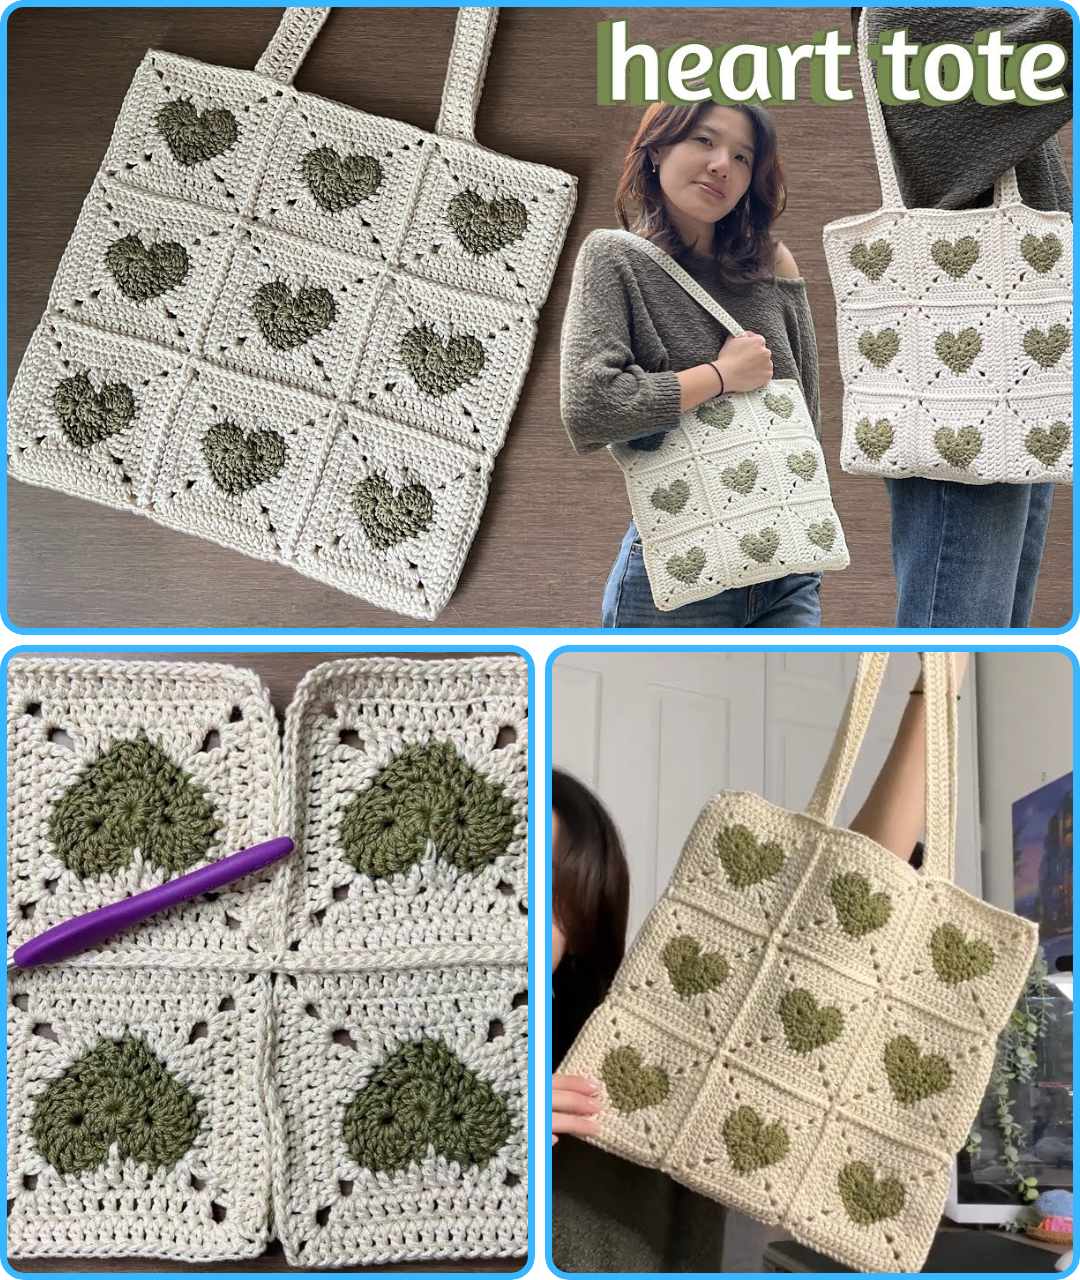
1. Arrange Your Squares
- Lay out your finished squares on a flat surface to plan your layout.
- For the front and back of the bag, you might have a 2×3 or 3×3 grid of squares.
- Decide if you want a solid bottom and sides (crocheted separately) or if you want to use more squares for these parts. For simplicity, we’ll assume crocheted solid sides and bottom.
2. Join the Squares
There are several methods for joining granny squares. The slip stitch join or single crochet join are popular for a defined seam, while the invisible join creates a seamless look.
- For a defined seam (sl st or sc join):
- Place two squares wrong sides together (for a raised seam) or right sides together (for a flat seam).
- Insert your hook into corresponding stitches on both squares.
- Either slip stitch or single crochet across, joining the two squares.
- Repeat until all squares for the front and back panels are joined.
- For a flat seam (mattress stitch or whip stitch):
- Using your yarn needle, stitch the squares together by going under the loops of the stitches on each square. This creates a nearly invisible seam.
3. Create the Bag Body (Front, Back, Sides, Bottom)
- Front Panel: Join your desired number of squares (e.g., 2 rows of 3 squares = 6 squares) to form the front panel of your bag.
- Back Panel: Join an identical number of squares to form the back panel.
- Side/Bottom Panel:
- Measure the perimeter of your assembled front/back panel. This will be the length of your side/bottom piece.
- Decide on your desired bag depth (e.g., 4-6 inches / 10-15 cm). This will be the height of your side/bottom piece.
- Chain the number of stitches equivalent to your desired bag depth.
- Work rows of single crochet or half double crochet until the piece is long enough to wrap around the front, bottom, and back of your bag. This creates a sturdy base and sides.
- Alternatively, you can make 3 more separate single square-width panels (two for sides, one for bottom) and join them.
4. Assemble the Bag
- Join Side/Bottom Panel to Front Panel: Using your chosen joining method, attach one long edge of your Side/Bottom panel to the outer edge of your Front Panel, starting and ending at the corners.
- Join Side/Bottom Panel to Back Panel: Repeat step 4.1, joining the other long edge of your Side/Bottom panel to the outer edge of your Back Panel.
- Close Side Seams: Join the two short ends of your Side/Bottom panel together to form a continuous loop.
- Reinforce (Optional): For extra sturdiness, you can single crochet around the entire top edge of the bag.
5. Add the Handles
There are many ways to make handles:
- Crocheted Straps:
- Chain a long length (e.g., 60-80 stitches for a shoulder strap, 30-40 for a hand strap).
- Work rows of single crochet or half double crochet (e.g., 4-6 rows) until the strap reaches your desired width and thickness.
- Make two identical straps.
- Securely sew the ends of the straps to the inside of the bag’s top edge, making sure they are evenly spaced and not twisted. Reinforce stitching for durability.
- Fabric Handles:
- Purchase pre-made fabric handles from a craft store.
- Securely sew them to the top edge of your bag.
- Wooden/Bamboo Handles:
- Attach these using yarn loops or by sewing them directly to the bag.
Finishing Touches & Care:
- Weave in all remaining ends: This is crucial for a clean, durable bag. Double-check all seams and secure any loose ends.
- Blocking (Optional): If your squares are a bit uneven, gently wet your finished bag and pin it to shape on a blocking mat. Let it dry completely. This will give it a more professional, polished look.
- Lining (Optional but Recommended): For a truly functional bag, consider sewing a fabric lining. This prevents small items from falling through stitches and adds a finished look.
- Care: Refer to your yarn’s care instructions. Cotton is often machine washable, while acrylic is typically easy care.
You’ve now created a beautiful and unique Heart Granny Square Tote Bag! This charming accessory is perfect for showcasing your love for crochet and carrying a bit of joy wherever you go. How will you customize your next one?
Video tutorial: