by
by Sewing a quilted organizer is a fantastic project that blends practicality with the warmth and charm of quilting. Whether you need a place for sewing notions, craft supplies, office essentials, or even toiletries, a custom-made quilted organizer adds a personal touch and keeps your items neatly contained. This guide will walk you through creating a versatile organizer, perfect for decluttering any space.
Stitch by Stitch: Crafting Your Own Quilted Organizer
A quilted organizer isn’t just a container; it’s a cozy, custom-made solution for bringing order to your crafting corner, desk, or bedside table. The quilting adds delightful texture and stability, making it both functional and a joy to look at. This detailed article will guide you through the process of sewing a structured, multi-compartment organizer, perfect for keeping all your bits and bobs in their rightful place.
Why Sew a Quilted Organizer?
- Customization: Choose fabrics that perfectly match your decor or favorite color scheme.
- Organization: Create specific pockets and compartments tailored to your storage needs.
- Durability: Quilting adds strength and body, helping the organizer maintain its shape.
- Personal Touch: A handmade item adds warmth and character to any space.
- Skill Building: Practice your piecing, quilting, and structured sewing techniques on a manageable project.
What You’ll Need:
Gathering your materials before you start will make the process much smoother.
- Fabric:
- Main Exterior Fabric: 1/2 yard (0.45 meters) of sturdy quilting cotton or a light canvas. This will be the outer fabric of your organizer.
- Lining Fabric: 1/2 yard (0.45 meters) of quilting cotton. This forms the interior of your organizer.
- Pocket Fabrics (Scraps): Various quilting cotton scraps for interior or exterior patch pockets, if desired.
- Batting: 1/2 yard (0.45 meters) of low-loft cotton or polyester batting. This gives your organizer its soft, quilted structure.
- Heavyweight Fusible Interfacing (Optional but Recommended for Extra Stiffness): 1/2 yard (0.45 meters) of Pellon 809 Decor-Bond or similar. This can be fused to the exterior fabric pieces (and/or lining) before quilting for a very rigid organizer.
- Binding Fabric (Optional): 1/4 yard (0.23 meters) or a fat quarter, if you prefer a bound top edge.
- Thread: All-purpose polyester thread that matches or complements your fabrics.
- Tools:
- Sewing machine with a walking foot (highly recommended for quilting).
- Rotary cutter, quilting ruler, and cutting mat.
- Fabric scissors.
- Fabric marker or tailor’s chalk.
- Plenty of pins or fabric clips.
- Iron and ironing board.
- Basting spray or safety pins (for layering quilt sandwiches).
Understanding the Organizer’s Structure & Cutting Dimensions:
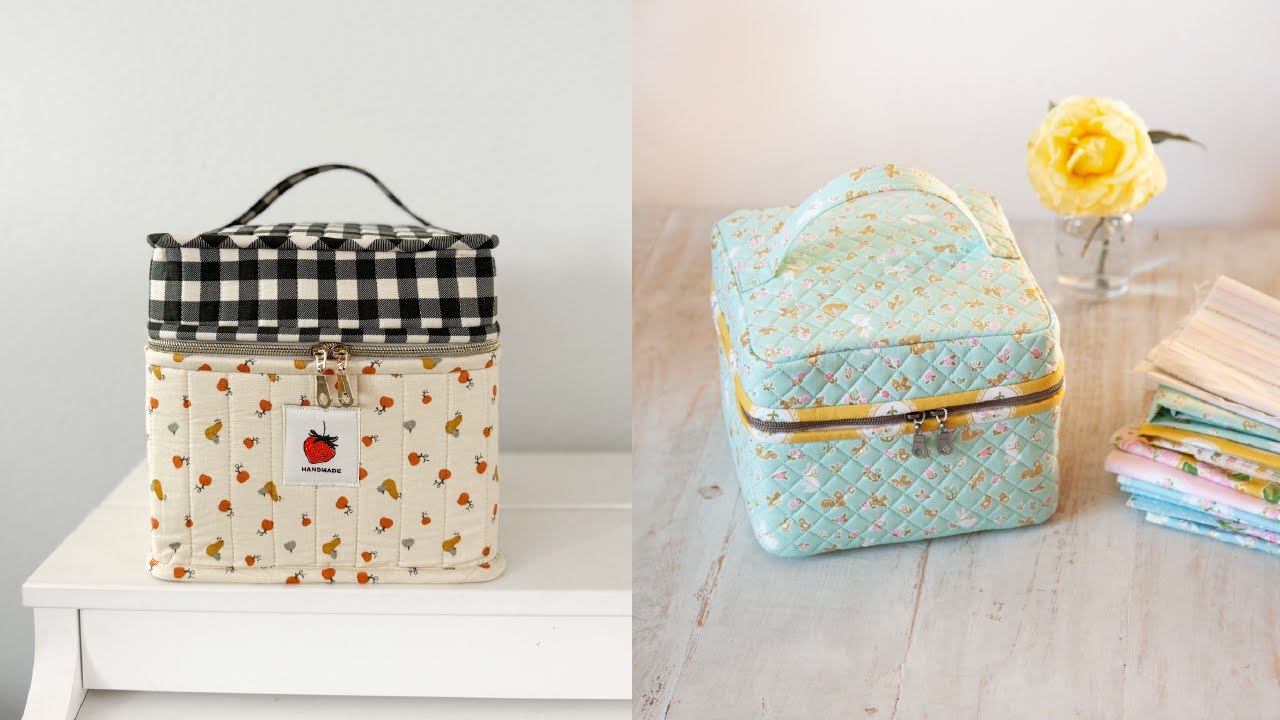
This guide will create a rectangular organizer, roughly 10 inches long x 5 inches wide x 5 inches high (25.4 cm x 12.7 cm x 12.7 cm). The design involves a quilted exterior panel, a quilted base, and a lining.
- Main Exterior Panel (Cut 1): 18″ W x 6″ H (45.7 cm x 15.2 cm) – This will form the long side and short side walls.
- Exterior Base (Cut 1): 11″ W x 6″ H (27.9 cm x 15.2 cm) – This will form the bottom of the organizer.
- Lining Panel (Cut 1): 18″ W x 6″ H (45.7 cm x 15.2 cm)
- Lining Base (Cut 1): 11″ W x 6″ H (27.9 cm x 15.2 cm)
- Pocket Pieces (Optional – various sizes):
- For an interior divided pocket: Cut 1 piece 18″ W x 5″ H (45.7 cm x 12.7 cm) from pocket fabric.
- Batting: Cut pieces to match all exterior panels (Main Exterior Panel, Exterior Base) and any pocket pieces you wish to quilt.
- Heavyweight Fusible Interfacing (Optional): Cut pieces to match all exterior panels and the exterior base. Fuse these to the wrong side of the fabric before layering with batting and quilting.
Note: All seam allowances are 1/2 inch (1.25 cm) unless otherwise stated.
Step-by-Step Sewing Instructions:
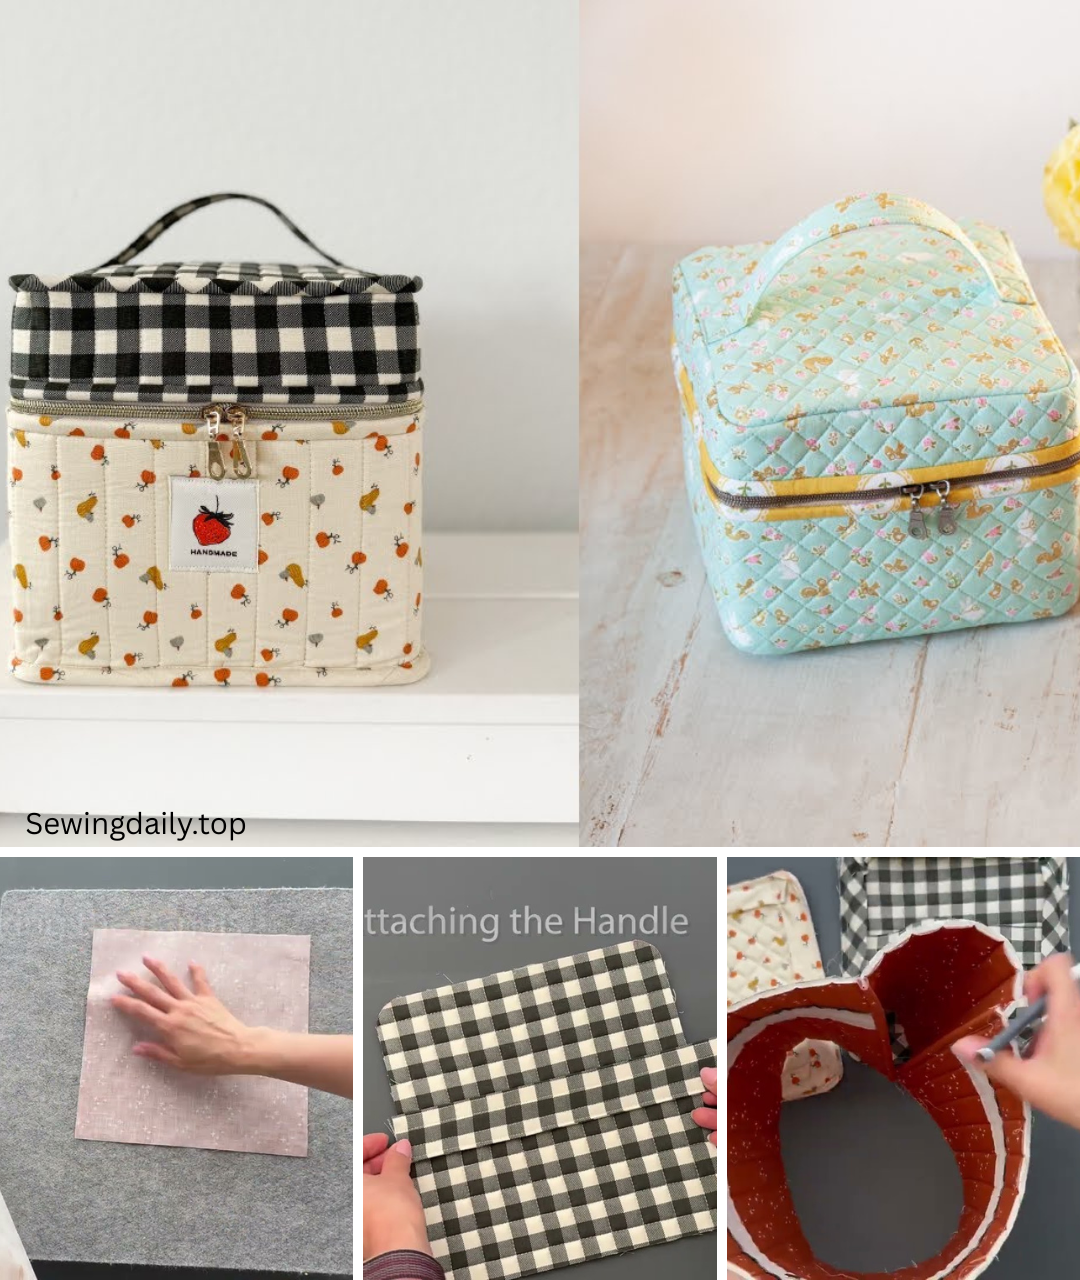
1. Prepare & Quilt the Exterior Panels
- Fuse Interfacing (if using): If you opt for stiffer interfacing, fuse it to the wrong side of your Main Exterior Panel and Exterior Base fabric pieces now.
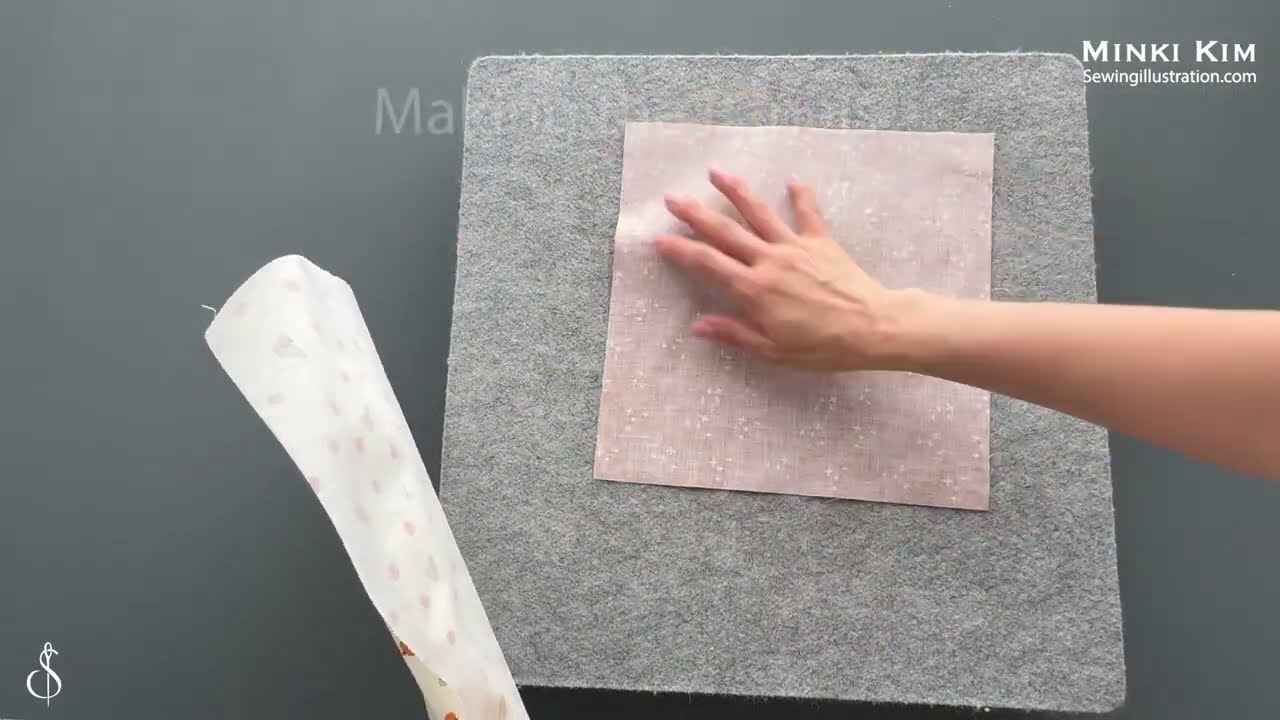
- Create Quilt Sandwiches: For each exterior panel (Main Exterior Panel and Exterior Base):
- Lay a piece of batting on your work surface.
- Place the corresponding exterior fabric piece on top, right side up.
- Baste the layers together using basting spray or safety pins, smoothing out any wrinkles.
- Quilt the Panels: Using your walking foot, stitch your desired quilting pattern onto each panel. Simple straight lines, a crosshatch pattern, or free-motion quilting all work well. The quilting not only adds beauty but also stabilizes the fabric.
- Trim: After quilting, trim any excess batting or uneven edges, ensuring your quilted panels are back to their original cut dimensions.
2. Prepare the Lining & Pockets (Optional)
- Interior Divided Pocket (Optional):
- Take your pocket fabric (18″ W x 5″ H). Fold it in half lengthwise, wrong sides together, so it measures 18″ W x 2.5″ H (45.7 cm x 6.3 cm). Press the fold.
- Topstitch along the folded edge, 1/8 inch (0.3 cm) from the fold, for a neat finish.
- Place this pocket piece on top of your Lining Panel, aligning the raw side and bottom edges.
- Baste the sides and bottom of the pocket to the lining panel within the 1/2 inch (1.25 cm) seam allowance.
- Divide the Pocket: To create compartments, measure and mark vertical lines where you want your divisions (e.g., every 3-4 inches / 7.6-10 cm). Stitch along these lines from the bottom of the pocket up to the top raw edge to create separate slots.
3. Assemble the Organizer Box
This involves creating the “corners” of your box.
- Mark Corners: On both the quilted Main Exterior Panel and the Lining Panel, measure in from each short end and up from one long edge by 5 inches (12.7 cm) to mark two squares at each corner. These are your “cut-out” squares. So, you’ll have four 5″ x 5″ squares marked in total on each piece.
- Example: For the Main Exterior Panel (18″ W x 6″ H), you’ll mark 5″ in from each short side, and 5″ up from the bottom long edge. (Since it’s 6″ tall, you’ll actually be marking 1″ down from the top as well, if you’re marking a full square.)
- Correction for Main Exterior Panel: Since the height is 6″, the 5″ mark should be made from the bottom edge upwards. So, cut out two 5″ W x 5″ H squares from the bottom two corners of the 18″ x 6″ panel. This will leave a 1″ strip along the top edge for the top fold of the side walls.
- Cut Corners: Carefully cut out these four marked squares from both the quilted Main Exterior Panel and the Lining Panel.
- Attach Base to Sides (Exterior):
- Take your quilted Exterior Base (11″ W x 6″ H). Mark the center of each long edge.
- Take your quilted Main Exterior Panel (now 18″ long with two 5″ cutouts from the bottom). Fold it in half lengthwise and mark the center of its remaining long edge.
- Align the center mark of one long edge of the Exterior Base with the center mark of the long bottom edge of the Main Exterior Panel, right sides together. Pin from the center outwards.
- Stitch with a 1/2 inch (1.25 cm) seam allowance.
- Now, you will stitch the shorter side edges of the base to the short sides of the main panel. Fold the fabric to align these edges, right sides together. Stitch with a 1/2 inch (1.25 cm) seam allowance.
- Continue this process, connecting all four sides of the base to the four sections of the side panel to form an open box shape. Press seams open.
- Assemble Lining Box:
- Repeat step 3.3 for your Lining Panel and Lining Base, forming an open box shape with the lining fabric. Press seams open.
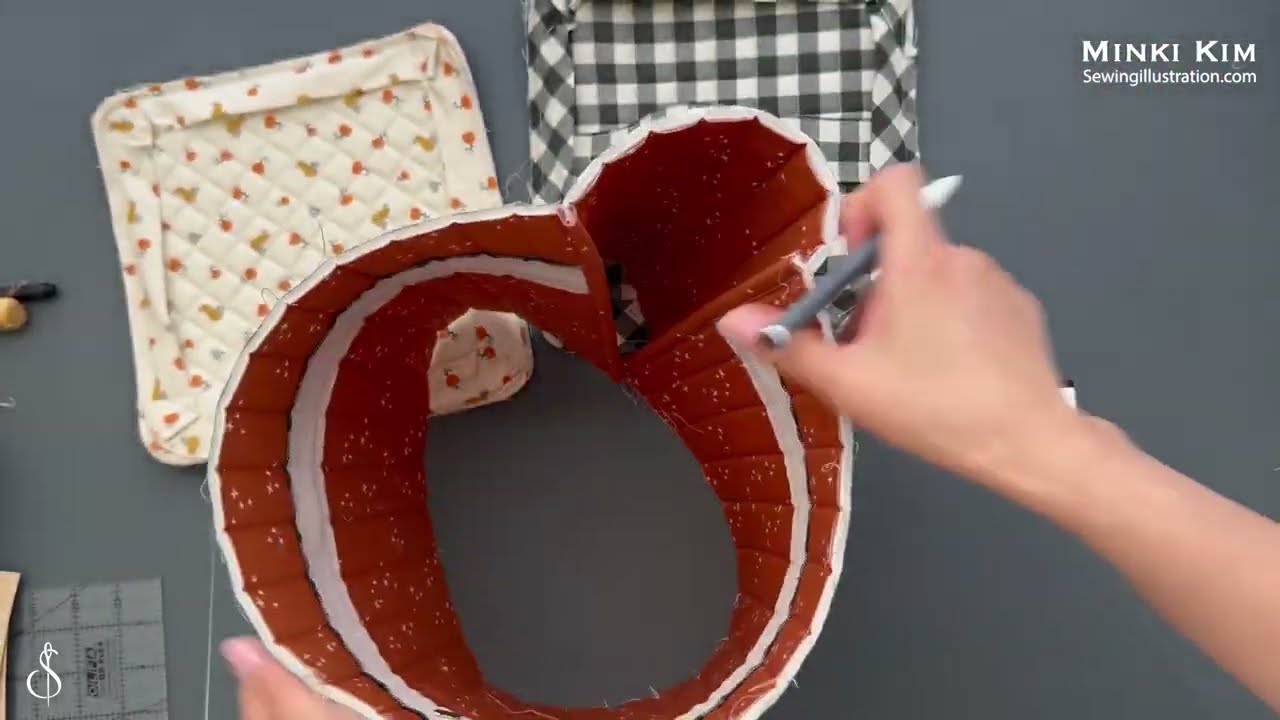
4. Combine Exterior and Lining
- Leave the exterior quilted box right side out.
- Turn the lining box wrong side out.
- Carefully place the exterior box inside the lining box, so their right sides are facing each other.
- Align the top raw edges of both boxes perfectly. Match the side seams. Pin securely all around the top opening.
- Stitch around the entire top opening with a 1/2 inch (1.25 cm) seam allowance. Backstitch at the start and end.
5. Finish the Organizer
- Leave an Opening: You’ll need to leave a gap to turn the organizer right side out. The easiest way is usually to leave a 3-4 inch (7.6-10 cm) gap along one of the side seams of the lining when you assemble the lining in step 3.4. (If you forgot, you can carefully unpick a small section now).
- Reach into this opening and carefully pull the entire organizer through until it’s right side out.
- Gently push out all corners and seams to create a neat, crisp box shape.
- Press the entire organizer, especially the top seam.
- Close the opening in the lining: Press the raw edges of the opening inwards by 1/2 inch (1.25 cm). Stitch the opening closed either by machine (topstitch very close to the edge) or by hand using an invisible ladder stitch for a seamless look.
- Push the lining down into the organizer. Press the top edge again.
- Topstitch (Optional but Recommended): For a professional finish and added stability, topstitch around the entire top opening of the organizer, about 1/8 to 1/4 inch (0.3-0.6 cm) from the edge.
Customization & Embellishment Ideas:
- Dividers: Add internal fabric dividers to create more rigid compartments within the organizer. You can sew these as separate strips and attach them to the base and side walls of the lining.
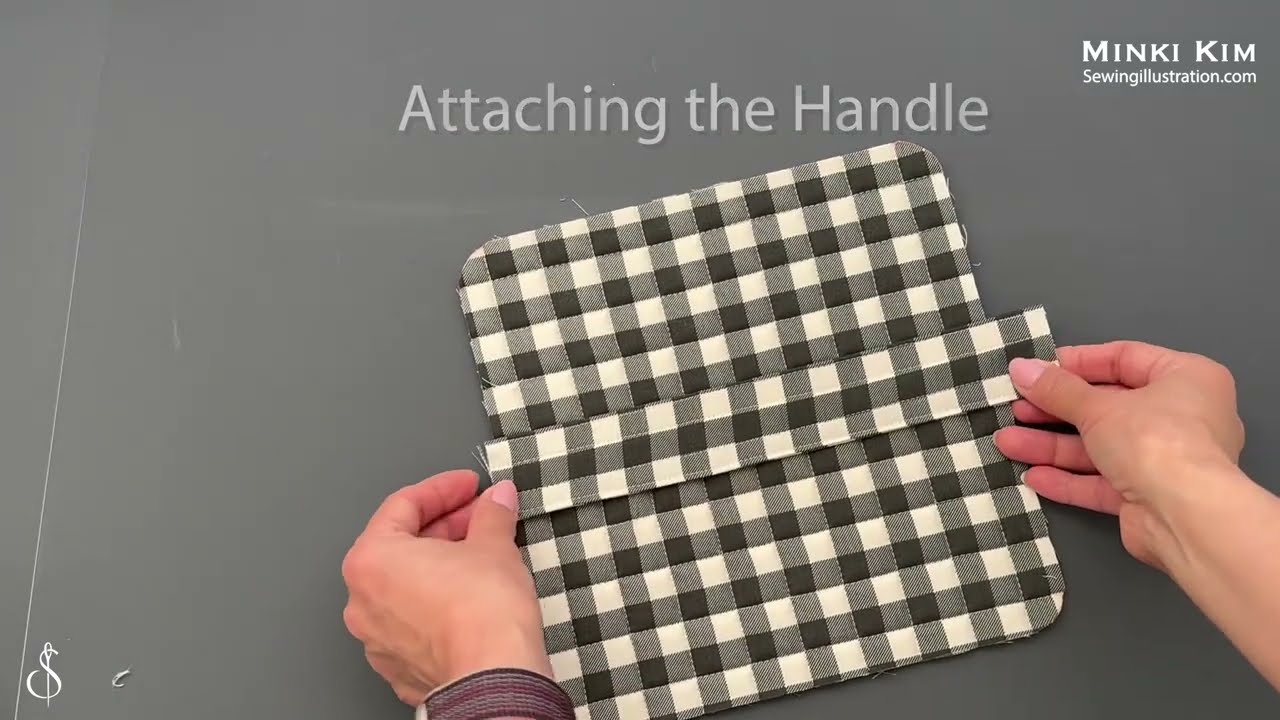
- Handles: Sew two fabric handles and attach them to the top edges of the short sides before combining the exterior and lining.
- Exterior Pockets: Before quilting, add patch pockets to the outer main panel for extra storage.
- Embellishments: Appliqué shapes, add embroidery, or attach decorative buttons for a unique touch.
- Bound Edge: Instead of turning and topstitching the top, you could bind the raw top edge with contrasting fabric for a clean, decorative finish (similar to quilt binding).
You’ve now created a beautiful and functional quilted organizer! This versatile box is perfect for tidying up any space in your home, and its quilted texture adds a touch of handmade charm. What treasures will you fill your new organizer with?
Video tutorial: