by
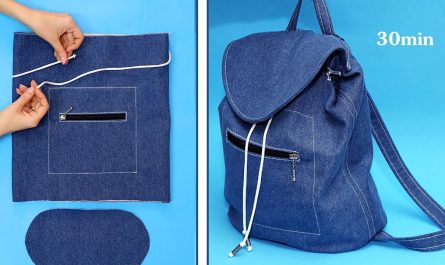
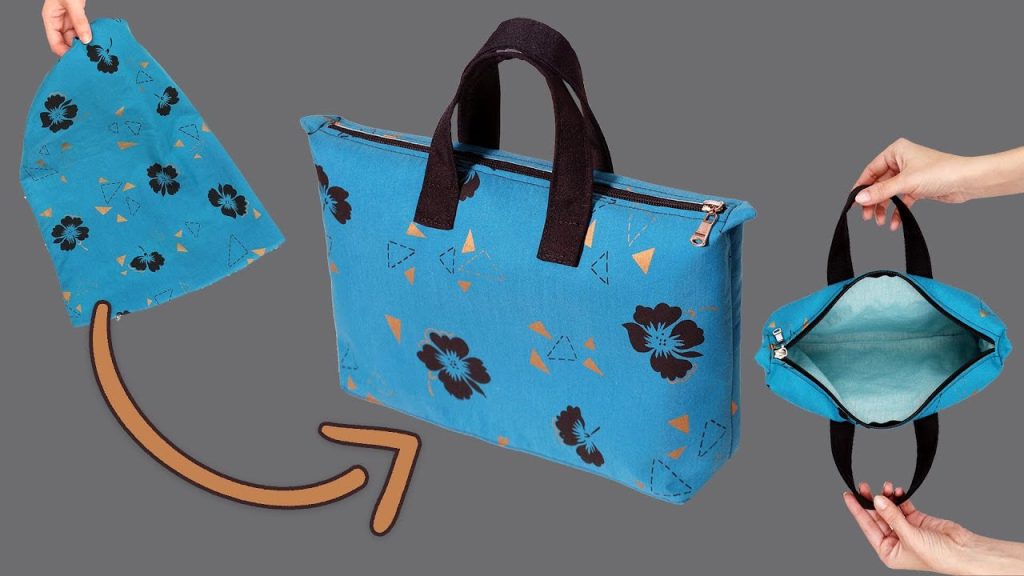
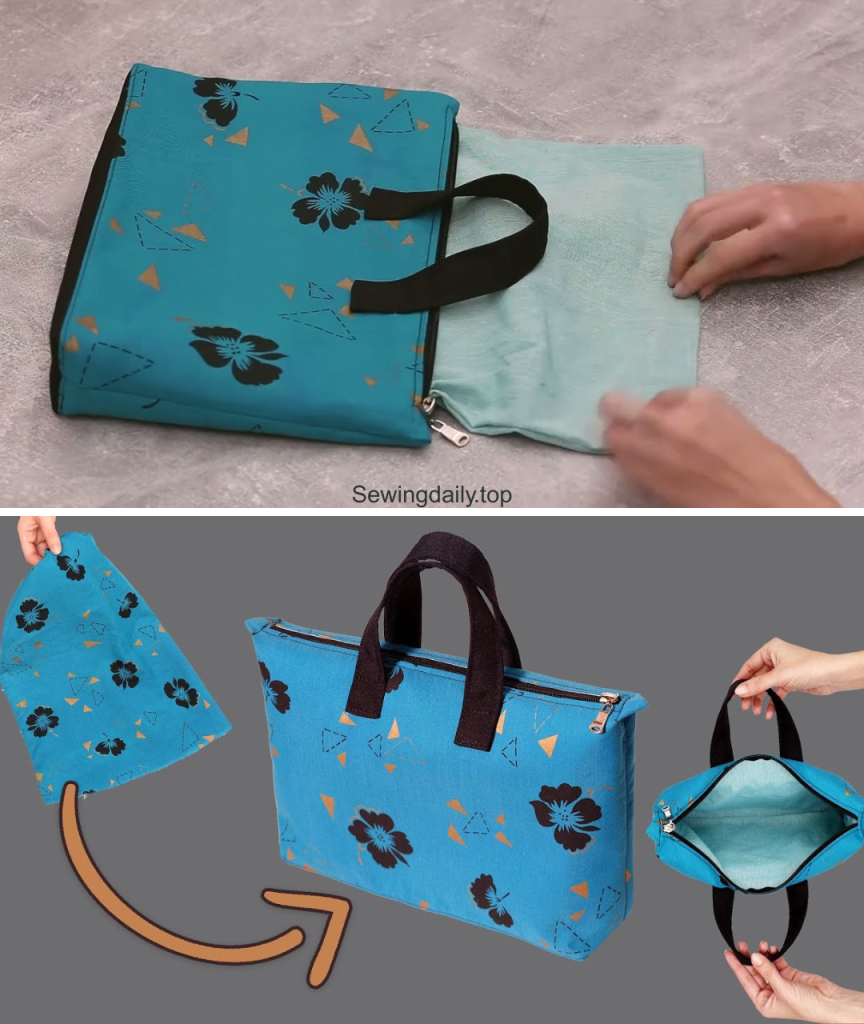
by Hello, sewing superheroes! Do you need a chic, professional-looking accessory that you can whip up in an afternoon? I am thrilled to share the pattern for the Cosmopolitan Clutch—a simple, stunning zipper-top bag that looks far more expensive than the effort you put in!
Inspired by a fantastic tutorial on sewing a quick zipper bag, this pattern uses a clever technique to create a fully-lined, structured bag that is attached directly to the zipper. By using two contrasting fabrics, you can make this clutch reversible or define a distinct top and bottom panel, giving it a high-end, color-blocked look. This is a perfect project for beginners looking to conquer their fear of zippers!
Grab your favorite fabrics and let’s get stitching!
Why You’ll Love Making This Clutch:
- Professional Finish: The method creates a fully lined, boxed-corner bag with no visible raw seams.
- Zipper Made Easy: Attaching the main body directly to the zipper simplifies the construction process significantly.
- Color-Blocked Style: Easily use two different fabrics for a modern, sophisticated look.
- Quick Project: Can be finished in under two hours, making it an excellent last-minute gift.
What You’ll Need:
- Fabric 1 (Main Body): 1/2 yard of sturdy cotton canvas, twill, or linen. (The bottom, largest section).
- Fabric 2 (Accent/Lining): 1/2 yard of contrasting cotton print or a soft cotton for the lining and accent top.
- Fusible Fleece or Interfacing: 1/2 yard of medium-weight fusible interfacing for a crisp, structured finish (highly recommended!).
- Zipper: One plastic coil zipper, 16–18 inches (40–45 cm) long.
- Hardware (Optional): 1 D-ring and 1 small piece of webbing or matching Fabric 1 for a wrist strap loop.
- Tools:
- Sewing Machine and Zipper Foot.
- Sharp Scissors or Rotary Cutter and Ruler.
- Iron and Ironing Board (essential for interfacing and pressing seams).
- Pins or Clips.
Measurements & Cutting List
The final bag size will be approximately 10 inches wide x 7 inches high x 2.5 inches deep. All measurements include a 1/4-inch (6 mm) seam allowance.
| Piece | Fabric | Dimensions (Width x Height) | Quantity | Interfacing? | Notes |
| A: Main Outer Body | Fabric 1 | 12 in. x 18 in. | 1 | Yes | This rectangle folds in half for the main body. |
| B: Accent Outer Top | Fabric 1 or 2 | 12 in. x 3 in. | 2 | Yes | The strip that attaches directly to the zipper. |
| C: Main Lining | Fabric 2 | 12 in. x 18 in. | 1 | No | The lining piece. |
| D: Accent Lining Top | Fabric 2 | 12 in. x 3 in. | 2 | No | Lining for the zipper accent. |
| E: Strap Loop | Fabric 1 or Webbing | 1.5 in. x 4 in. | 1 | No | For attaching the optional wrist strap. |
Construction: Building the Zipper Clutch
Part 1: Preparing the Fabric
- Fuse Interfacing: Apply the fusible interfacing to the wrong side of all four Outer Pieces: (A) Main Body, and both (B) Accent Tops. This gives the bag structure.
- Make the Strap Loop (Optional): Take (E). Press the long edges into the center, then fold in half and press again. Topstitch along both long edges. Set aside.
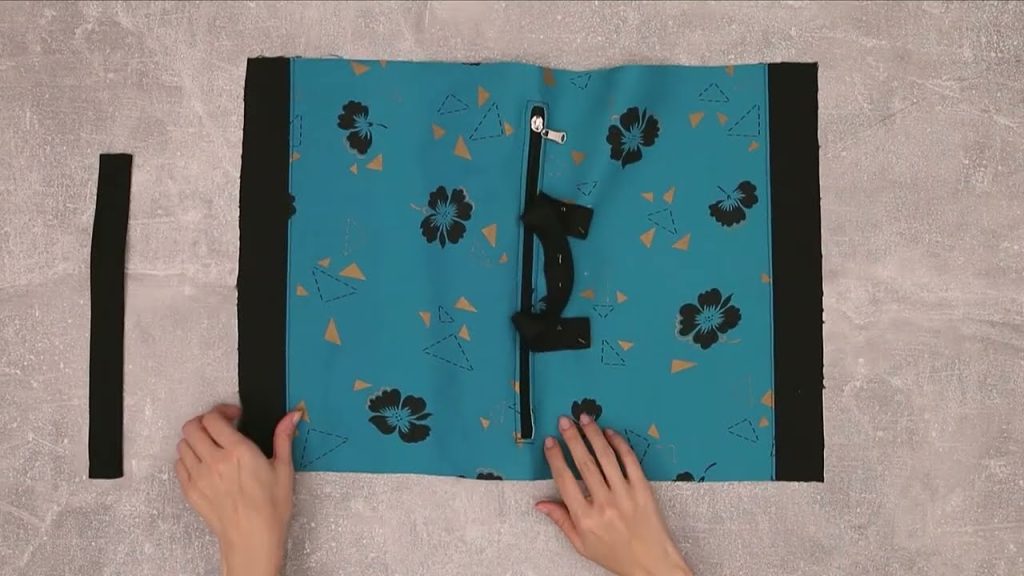
Part 2: Attaching the Zipper and Accent
- Zipper Sandwich: Place one (B) Accent Outer Top right-side up. Lay the zipper right-side down along the long 12-inch edge. Now, lay one (D) Accent Lining Top on top, aligning all raw edges. The zipper is sandwiched between the outer fabric (right side up) and the lining (right side down).
- Stitch: Using your zipper foot, sew along the edge with a 1/4-inch seam allowance.
- Press and Topstitch: Flip the fabric pieces open so the lining and outer fabric are facing away from the zipper tape. Press the seam flat. Topstitch along the folded edge of the outer fabric, close to the zipper, to secure the fabric away from the zipper teeth.
- Repeat: Repeat steps 1–3 with the remaining (B) Accent Outer Top and (D) Accent Lining Top on the other side of the zipper.
Part 3: Assembling the Outer Bag
- Attach Main Body: Take the combined zipper panel. Lay it flat, open side up.
- Pin the bottom 12-inch raw edge of one (B) Accent Outer Top to the top raw edge of the (A) Main Outer Body piece. This piece will be folded in half later.
- Sew and press the seam open.
- Attach Strap Loop (Optional): Open the zipper halfway. Fold the (E) Strap Loop in half, sandwiching the D-ring (if using) in the loop. Pin the raw ends of the loop to the top edge seam, about 1 inch (2.5 cm) down from the zipper end on the side you want the strap to be. Baste securely.
- Sew Outer Seams:
- Fold the entire outer piece in half, right sides together, aligning the long 18-inch edges and the two Accent Outer Top panels.
- Starting from the Accent Top, sew the two short side seams (12 inches long). Do not sew the bottom edge.
Part 4: Assembling the Lining
- Sew Lining Seams: Take the (C) Main Lining piece and the two (D) Accent Lining Tops.
- Join the lining pieces together exactly as you did the outer pieces (Steps 1 and 2 of Part 3), but DO NOT use the zipper. Simply sew the Accent Lining to the Main Lining piece to form one large rectangle.
- Fold this lining rectangle in half, right sides together.
- Sew the two short side seams (12 inches long).
- Crucial: When sewing the bottom 12-inch seam, leave an unstitched opening of about 4 inches (10 cm) in the center for turning the bag later.
Part 5: Boxing the Corners (Optional but Recommended)
This step gives the bag its rectangular depth.
- Outer Bag: Pinch the side seam and the bottom edge seam together to form a point. Measure 1.25 inches (3 cm) from the point and draw a straight line. Sew along this line. Trim the excess fabric. Repeat for all four corners of the outer bag.
- Lining Bag: Repeat the exact same boxing process for all four corners of the lining bag.
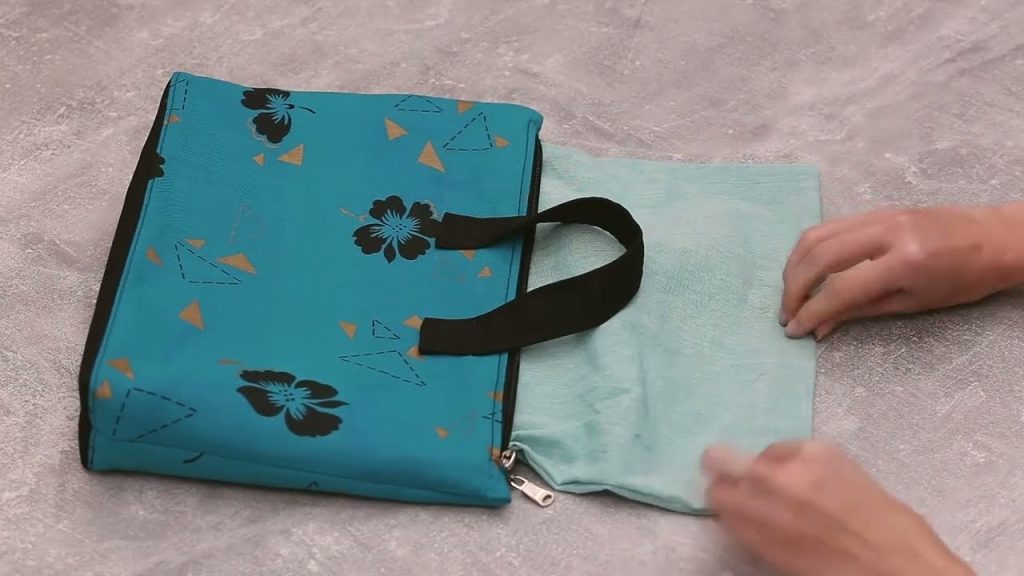
Part 6: Combining and Finishing
- Insert: Turn the Outer Bag right-side out. Keep the Lining Bag inside out.
- Nest: Slide the Outer Bag inside the Lining Bag, aligning the top raw edges perfectly (right sides facing). Ensure the side seams and the zipper ends line up. Pin securely around the top perimeter.
- Final Seam: Sew the top edges together with a 1/4-inch seam allowance all the way around.
- Turn Right-Side Out: Reach into the 4-inch opening in the lining bottom. Gently pull the entire bag through this hole.
- Close: Stitch the opening in the lining closed (by hand slipstitch or machine stitch).
- Press and Finish: Tuck the lining neatly inside the outer bag. Press the top edge flat and give the whole clutch a final press.
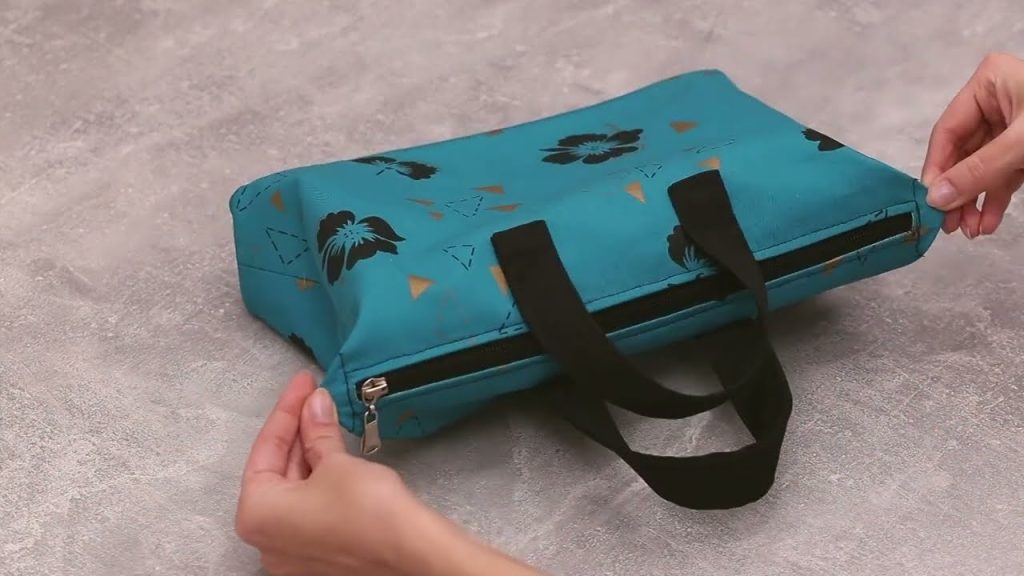
Congratulations! Your Cosmopolitan Clutch is complete—a stylish, structured bag that looks store-bought!
Video tutorial: