 by
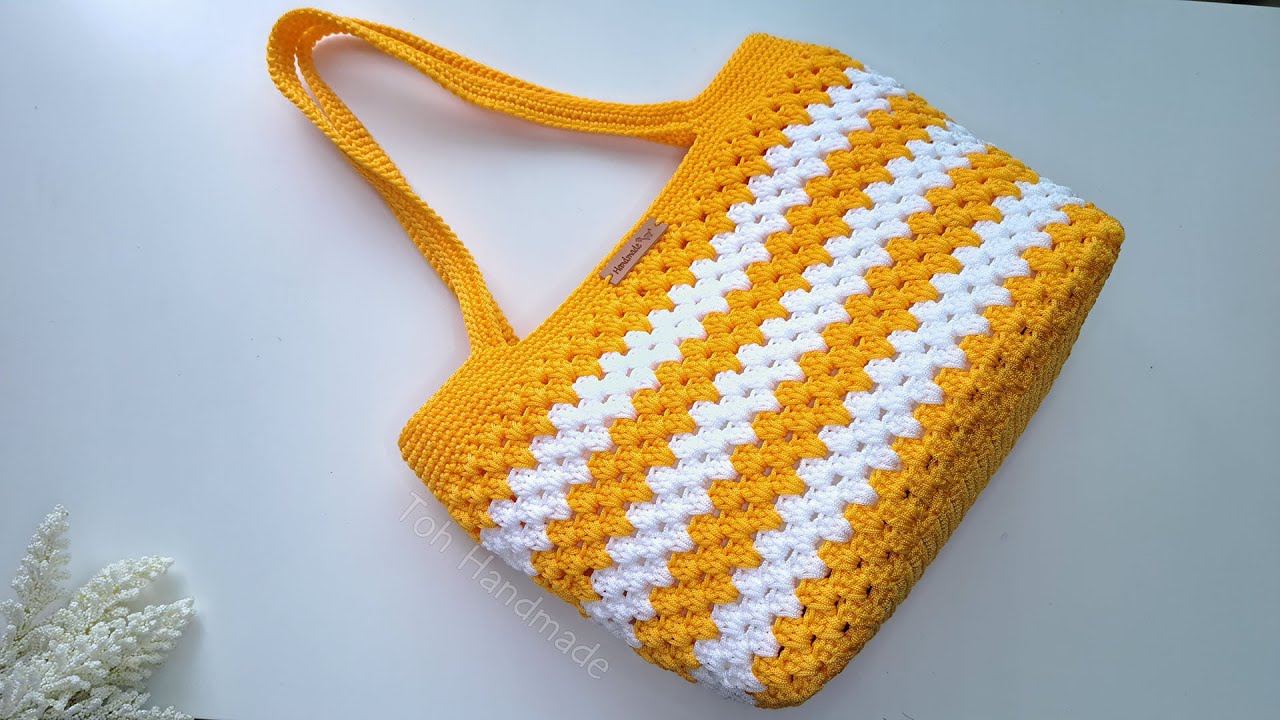
by Imagine carrying a stylish, sturdy tote bag that not only reflects your personal flair but also boasts the satisfying touch of being handmade. This detailed tutorial, inspired by the fantastic “How to Crochet Tote Bag | Crochet bag tutorial | Toh Handmade 💖💖💖” video from Toh Handmade, will guide you through crocheting a beautiful two-toned granny stripe tote. Perfect for market trips, beach days, or simply adding a vibrant accessory to your everyday look, this pattern is designed to be accessible and incredibly rewarding for anyone who loves to crochet.

Get ready to transform simple yarn into a functional piece of art that you’ll be proud to carry!
Why This Granny Stripe Tote Will Be Your New Favorite
This isn’t just another bag; it’s a statement piece crafted with love and practicality in mind:
- Vibrant Two-Tone Design: The alternating colors create a classic granny stripe pattern that is eye-catching and easy to customize.
- Sturdy Construction: Built with durable polypropylene rope yarn and a tightly crocheted single crochet top, this bag holds its shape beautifully.
- Customizable Size: While the video’s finished dimensions are D10 x W38 x H26 cm with a 54 cm strap, you can easily adjust the size to fit your needs.
- Skill-Building Project: Practice essential techniques like working in the round, color changes, and creating sturdy handles.
- Eco-Friendly & Practical: A reusable bag is a smart choice for shopping, reducing waste, and showcasing your handmade talent.
Materials You’ll Need:
Gathering your materials before you begin will ensure a smooth and enjoyable crocheting experience. The video specifically recommends polypropylene rope for its durability and structure.
- Yarn:
- Polypropylene 2.0mm Rope: Approximately 400g total (200g of Color A and 200g of Color B). The video uses yellow (Color A) and white (Color B).
- Tip: This type of yarn provides excellent stiffness and durability, making it ideal for bags. If you prefer a softer bag, you can substitute with a sturdy worsted weight cotton or T-shirt yarn, adjusting hook size and yardage as needed.
- Polypropylene 2.0mm Rope: Approximately 400g total (200g of Color A and 200g of Color B). The video uses yellow (Color A) and white (Color B).
- Crochet Hook: 3.0mm hook.
- Other Tools:
- Scissors
- Yarn needle (for weaving in ends and seaming)
- Stitch markers (optional, but helpful for working in rounds and marking strap placement)
Stitch Guide (Common Abbreviations):
Familiarize yourself with these basic crochet terms before you start.
- ch: chain
- sl st: slip stitch
- sc: single crochet
- dc: double crochet
- sk: skip
- sp: space
- MR: magic ring
- [ ]: repeat instructions within brackets
- ( ): total stitch count for the round/row
Step-by-Step Tutorial: Crocheting Your Granny Stripe Tote Bag
This tote bag is crocheted in separate sections: the base, the body (worked in rounds), the top border, and the handles.
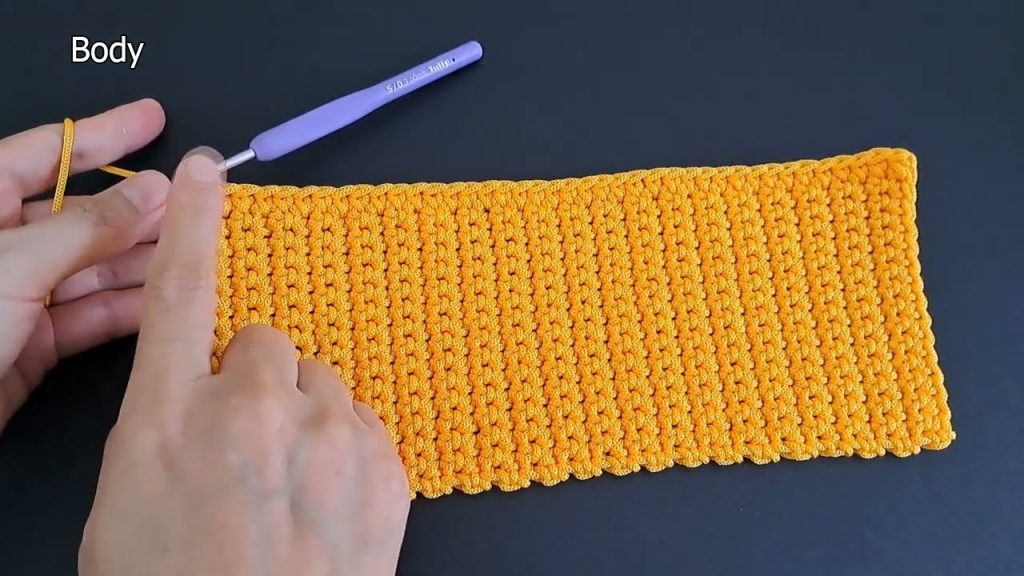
Phase 1: The Base – Creating a Sturdy Foundation
The base is worked in rows of single crochet to create a flat, oblong shape. This portion is worked in Color A (yellow in the video).
- Starting Chain (Color A): Make a slip knot. Chain 15.
- Row 1: Sc in the 2nd ch from the hook and in each ch across (14 sc). Turn.
- Row 2: Ch 1, sc in each sc across (14 sc). Turn.
- Repeat Rows: Continue repeating Row 2 until your base reaches the desired length. The video continues until it forms an oblong base.
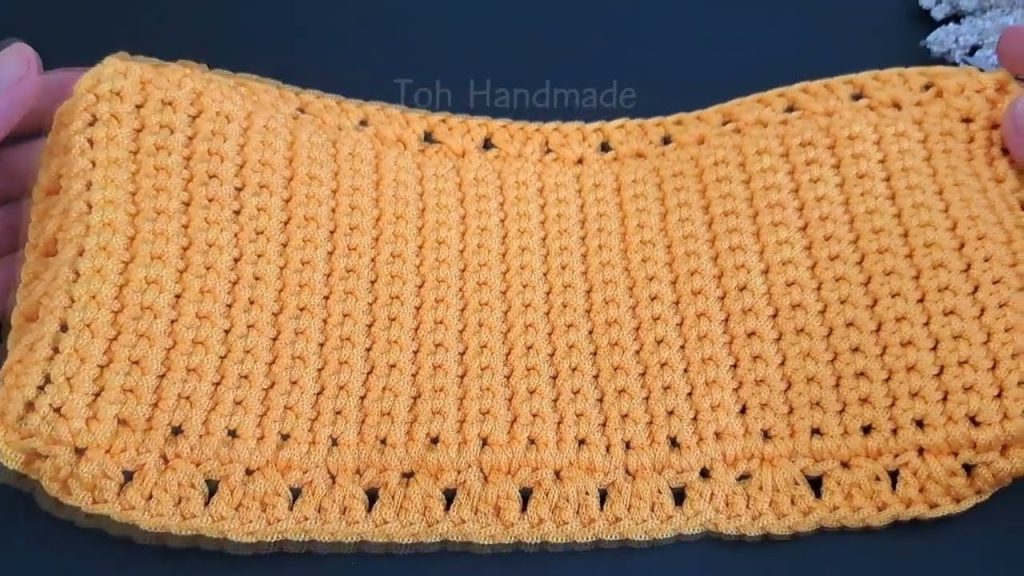
- Edging the Base: Sc evenly around the entire perimeter of the base. In the corners, work 3 sc in one stitch to create a rounded turn. Join with a sl st to the first sc.
Phase 2: The Body – Building the Granny Stripes
The body is worked in rounds using the iconic granny stripe pattern, alternating colors.
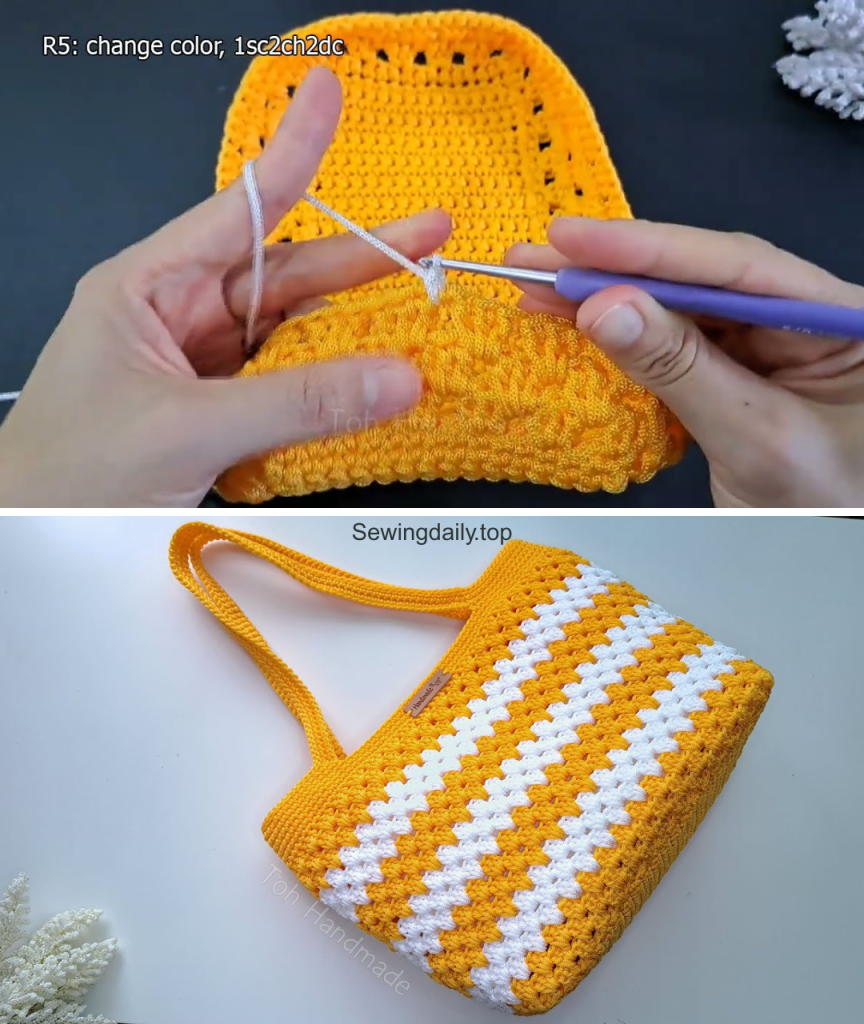
- Round 1 (Color B): Join Color B (white) to any stitch. Ch 3 (counts as 1 dc). Work 2 dc in the same stitch (first granny cluster). Sk 2 sc, [3 dc in next sc] repeat around. Join with a sl st to the top of the initial ch 3.
- Round 2 (Color A): Join Color A (yellow) in any ch-sp from the previous round. Ch 3, 2 dc in the same ch-sp. [3 dc in next ch-sp] repeat around. Join with a sl st to the top of the initial ch 3.
- Repeat Rounds: Continue alternating Color A and Color B for the granny stripe pattern, working [3 dc in each ch-sp] around. The video shows approximately 10-12 rounds of granny stripes to achieve the desired height for the body of the bag.
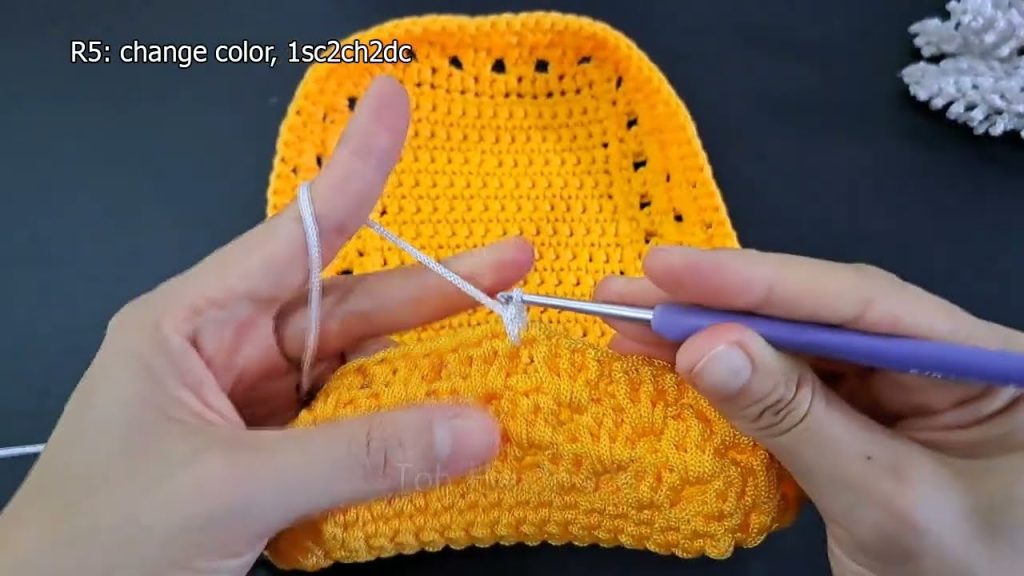
Phase 3: The Top Border – Creating a Sturdy Opening
A few rounds of single crochet create a firm and functional opening for the tote. This is worked in Color A.
- Round 1 (Color A): Join Color A to the top of the last granny stripe round. Ch 1, sc in each dc and each ch-sp around. Join with a sl st to the first sc.
- Round 2: Ch 1, sc in each sc around. Join with a sl st to the first sc.
- Repeat Rounds: Continue repeating Round 2 for 2-3 more rounds, or until the top border is as sturdy as you desire. Fasten off, leaving a long tail for weaving in.
Phase 4: The Handles – Durable and Integrated
The handles are crocheted directly onto the top border, ensuring strength and a seamless look. This is worked in Color A.
- Determine Placement: Lay your bag flat. Mark the placement for your handles on the front and back of the bag. The video shows placing the handles about 8-10 stitches apart, centered on the front and back.
- Handle 1 (Starting): Join Color A to the top border at the first marked point. Ch 1. Sc in the next few stitches, then chain a length for your handle (e.g., 54 cm for a longer strap or fewer for a shorter handle). Sk the stitches between the first and second marked points. Sc into the third marked point, and continue sc to the fourth marked point.
- Handle 2 (Second Side): Repeat the chain for the second handle, skipping the stitches of the bag opening.
- Reinforce Handles (Sc around chain): Ch 1, sc in each sc across the top border. When you reach a chain handle, sc evenly around the chain itself to create a sturdy handle. Continue until both handles are reinforced. Join with a sl st to the first sc.
- Final Handle Rounds: Ch 1, sc in each sc around the top and handles for 1-2 more rounds, to further reinforce and define the handles. Join with a sl st, fasten off, and weave in all remaining ends securely.
Your beautiful, functional, and effortlessly chic Two-Tone Granny Stripe Tote Bag is now complete! Take a moment to admire your work. You’ve created a sturdy, stylish bag that’s ready to accompany you on all your adventures, all while making a fashionable and eco-conscious statement.
Enjoy the versatility and the immense satisfaction of carrying your unique, handmade creation!
Video tutorial: