 by
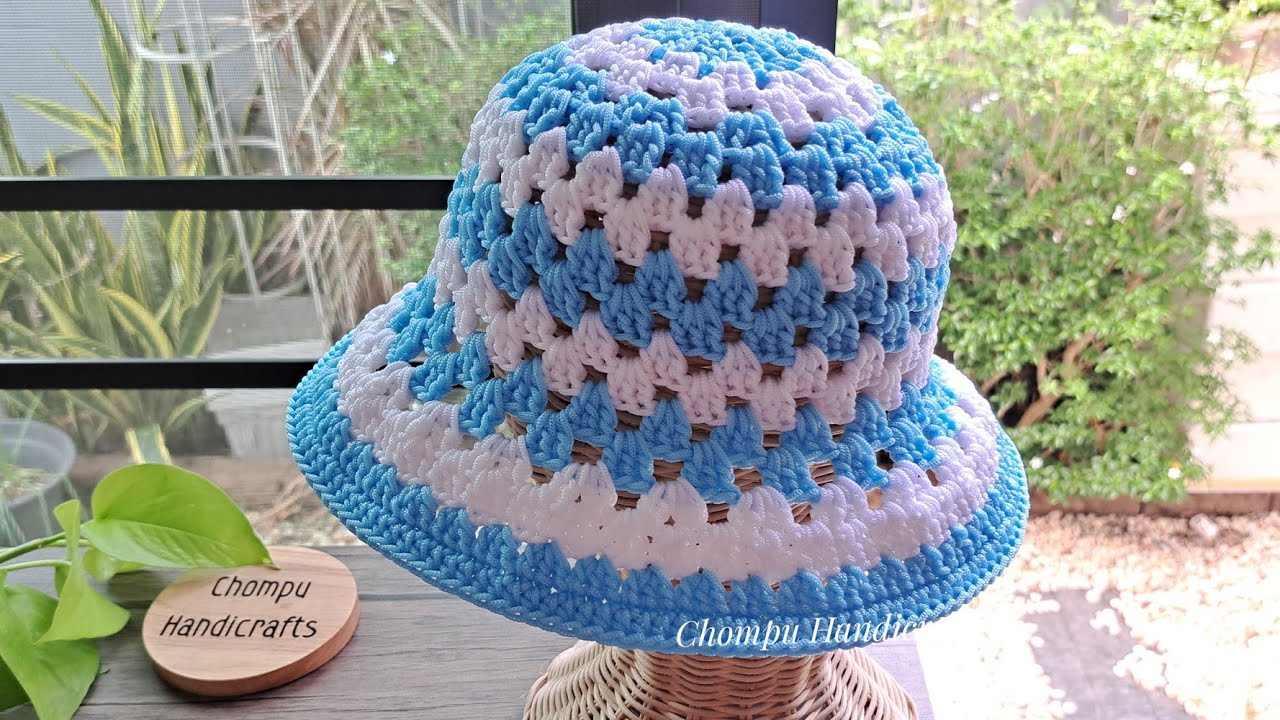
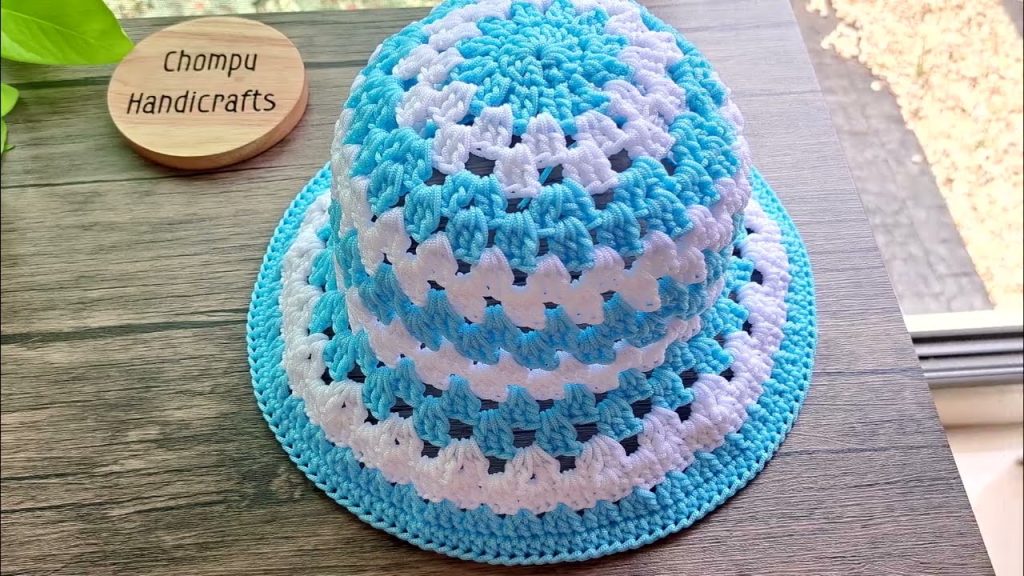
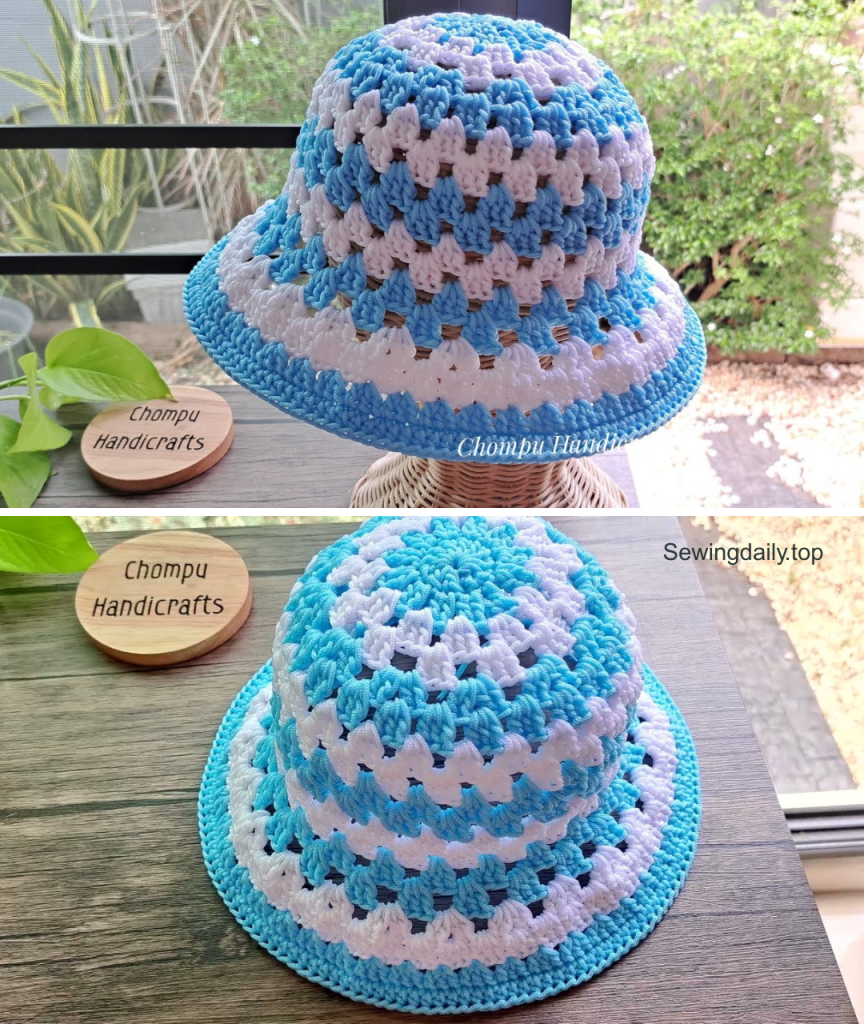
by Hello, fellow makers! Ready to soak up some sunshine in style? I’m excited to share this detailed pattern for the Sunny Day Bucket Hat, a cheerful and easy-to-make crochet sun hat that’s perfect for warm weather. This hat features a classic bucket hat shape with a lovely open-work stitch pattern, making it breathable and comfortable. It’s a fantastic project for beginners and a great way to add a pop of color to your summer wardrobe!

The beauty of this hat lies in its simple construction and repeating stitch pattern. We’ll start at the crown, working in a spiral to form a flat circle, then transition to the body of the hat, and finally expand for a stylish brim. The two-tone color scheme, as seen in the video, adds a playful touch, but you can easily customize it with your favorite colors or even a single shade. Let’s grab our hooks and yarn and get ready to crochet some sunshine!
Why You’ll Love Crocheting This Hat:
- Beginner-Friendly: Uses basic crochet stitches and simple shaping techniques.
- Quick to Make: The repeating stitch pattern works up surprisingly fast.
- Stylish & Practical: A trendy bucket hat design that offers sun protection.
- Customizable: Easily change colors, yarn weights, and hook sizes to create a unique look.
- Comfortable: The open-work stitch keeps the hat light and breathable.
What You’ll Need:
- Yarn: PP rope 2.0mm (100g each for two colors), or a similar light to medium-weight cotton/synthetic blend yarn that holds its shape well.
- Color A: Light Blue (as seen in the video)
- Color B: White (as seen in the video)
- Crochet Hook: Hook No. 4 (2.5mm), as indicated in the video. You might adjust to a 3.0mm if your tension is very tight.
- Yarn Needle (Tapestry Needle): For weaving in all loose ends.
- Scissors:
- Stitch Marker (optional): To mark the beginning of each round.
Essential Crochet Abbreviations:
- ch: chain
- sl st: slip stitch
- dc: double crochet
- sp: space
- magic ring: magic adjustable ring
- FO: fasten off
The Pattern: The Sunny Day Bucket Hat
This hat is worked from the top down, starting with the crown. The finished hat will be approximately 54-58 cm in circumference.
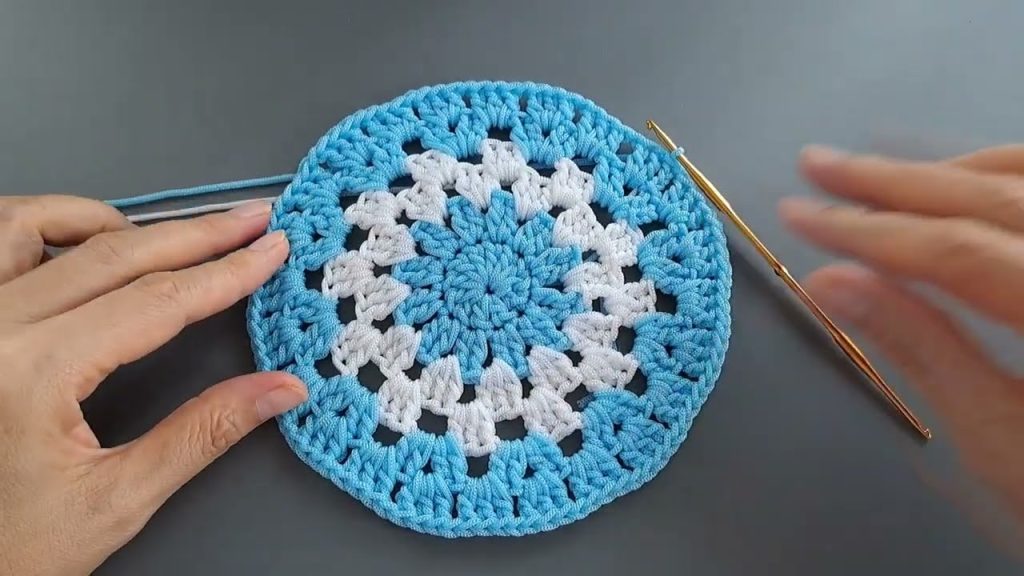
Part 1: The Crown (Color A – Light Blue)
The crown is worked in continuous rounds to form a flat circle.
- Round 1: Start with a magic ring.
Ch 3(counts as firstdc). Work11 dcinto the magic ring. Pull the tail to close the ring tightly.Sl stto the top of the initialch 3to join. (12 dc) - Round 2:
Ch 3(counts as firstdc). Work1 dcin the same stitch.Ch 1.2 dcin the next stitch,ch 1. Repeat(2 dc in next st, ch 1)around the entire round. You should have 12(2 dc, ch 1)clusters.Sl stto the top of the initialch 3to join. (24 dc, 12 ch-1 spaces) - Round 3:
Ch 3(counts as firstdc).Dcin the nextdc.Ch 1. In the nextch 1space, make(3 dc, ch 1). Repeat(3 dc in next ch-1 sp, ch 1)around the entire round.Sl stto the top of the initialch 3to join. (36 dc, 12 ch-1 spaces) - Round 4 (Color B – White): Attach Color B.
Ch 3(counts as firstdc).Dcin the nextdc.Ch 1.4 dcin the nextch 1space,ch 1. Repeat(4 dc in next ch-1 sp, ch 1)around the entire round.Sl stto the top of the initialch 3to join. (48 dc, 12 ch-1 spaces)
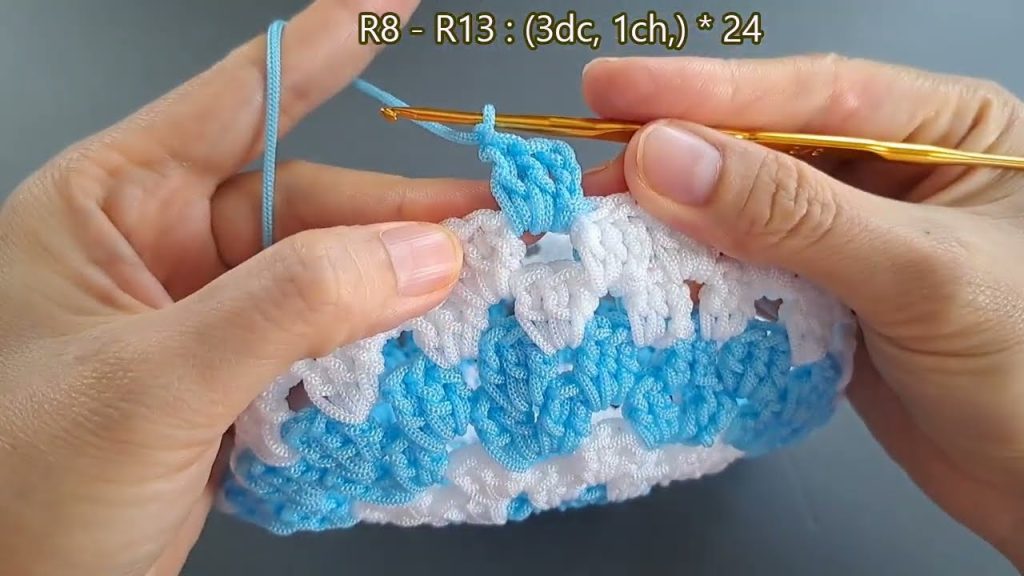
Part 2: The Body of the Hat
The body of the hat continues in alternating colors, creating the “granny stitch” open-work pattern. Each color block will be 2 rounds.
- Round 5 (Color A – Light Blue): Attach Color A.
Ch 3(counts as firstdc).Dcin the next 2dc.Ch 1. In the nextch 1space, make(3 dc, ch 1). Repeat(3 dc in next ch-1 sp, ch 1)around the entire round.Sl stto the top of the initialch 3to join. (60 dc, 12 ch-1 spaces) - Round 6 (Color A – Light Blue):
Ch 3(counts as firstdc).Dcin each of thedcfrom the previous round andch 1in each of thech 1spaces. You will continue to increase evenly to maintain the circular shape. The video shows 24(3 dc, 1 ch)clusters.Sl stto the top of the initialch 3to join. - Round 7 (Color B – White): Attach Color B.
Ch 3.Dcin each of thedcfrom the previous round andch 1in each of thech 1spaces. The video shows 24(3 dc, 1 ch)clusters.Sl stto the top of the initialch 3to join. - Round 8 (Color B – White):
Ch 3.Dcin each of thedcfrom the previous round andch 1in each of thech 1spaces. The video shows 24(3 dc, 1 ch)clusters.Sl stto the top of the initialch 3to join. - Continue: Repeat Rounds 5-8 (alternating two rounds of each color) until the hat body reaches approximately 8 cm from the crown. The video continues this pattern for several rounds, maintaining a consistent number of
(3 dc, ch 1)clusters, which appear to be 24 per round.
Part 3: The Brim
The brim uses similar increases to the crown but with a slightly wider spacing to create the flared shape.
- Round 14 (Color A – Light Blue): Attach Color A.
Ch 3(counts as firstdc).Dcin the nextdc.Ch 2.3 dcin the nextch 1space,ch 2. Repeat(3 dc in next ch-1 sp, ch 2)around the entire round.Sl stto the top of the initialch 3to join. (72 dc, 24 ch-2 spaces) - Round 15 (Color A – Light Blue):
Ch 3(counts as firstdc).Dcin each of the next 2dc. In the nextch 2space, make(2 dc, ch 1, 2 dc). Repeat this increase pattern around the entire brim.Sl stto the top of the initialch 3to join. - Round 16 (Color B – White): Attach Color B.
Ch 3(counts as firstdc).Dcin eachdcaround. In thech 1space of each increase from the previous round, make(3 dc, ch 1). Repeat this pattern around.Sl stto the top of the initialch 3to join. - Round 17 (Color B – White):
Ch 3(counts as firstdc).Dcin eachstaround, working(3 dc, ch 1)in eachch 1space.Sl stto the top of the initialch 3to join. - Continue: Repeat a similar increasing pattern, or simply work straight
dcrows for a few rounds, until the brim reaches your desired width. The video shows a few more rounds of the two-color pattern to create a substantial brim.
Part 4: Finishing the Brim (Color A – Light Blue)
- Last Round (Light Blue): Attach Color A.
Ch 2(does not count as a st). Work1 hdcin each stitch around the entire edge of the brim.Sl stto the firsthdcto join. - Weave in All Ends: Use your yarn needle to weave in all loose ends securely.
Congratulations, you’ve created a beautiful and unique Sunny Day Bucket Hat! It’s now ready to wear and enjoy. Happy hooking!
Video tutorial: