by
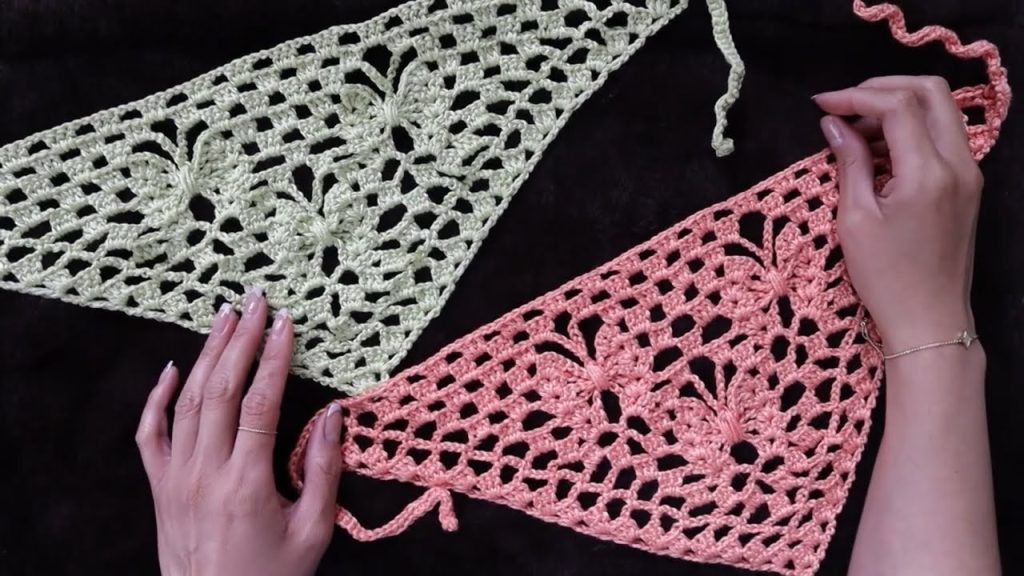
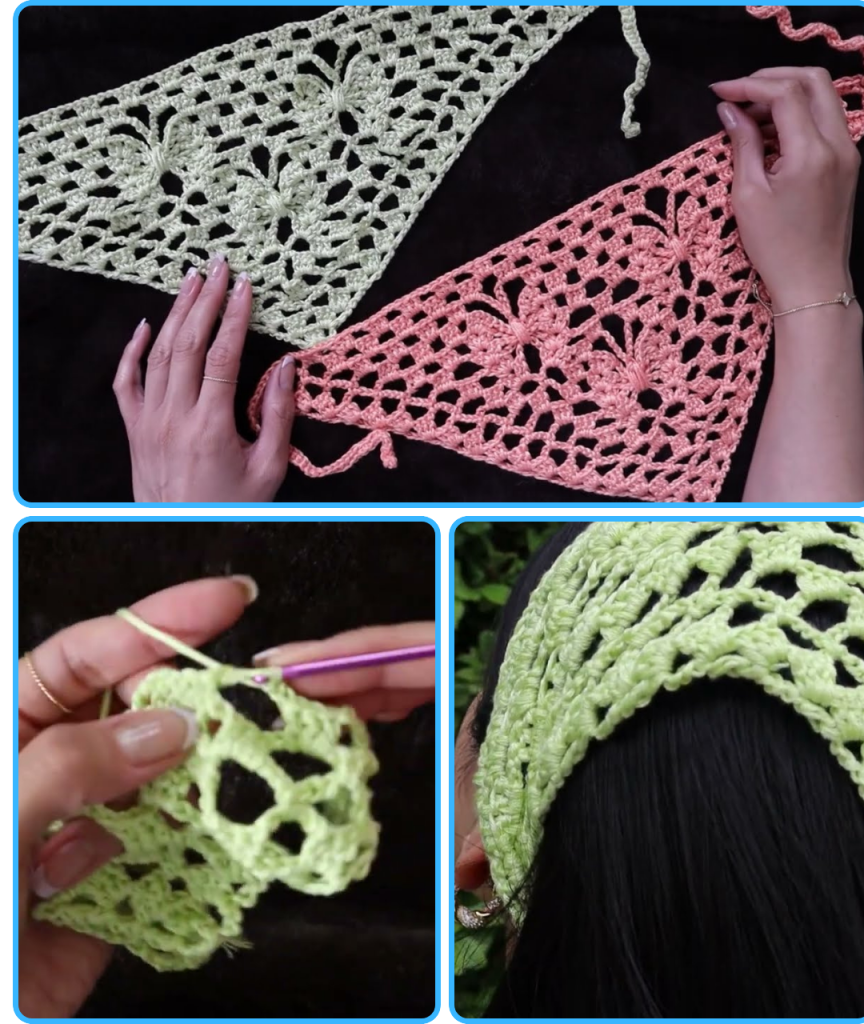
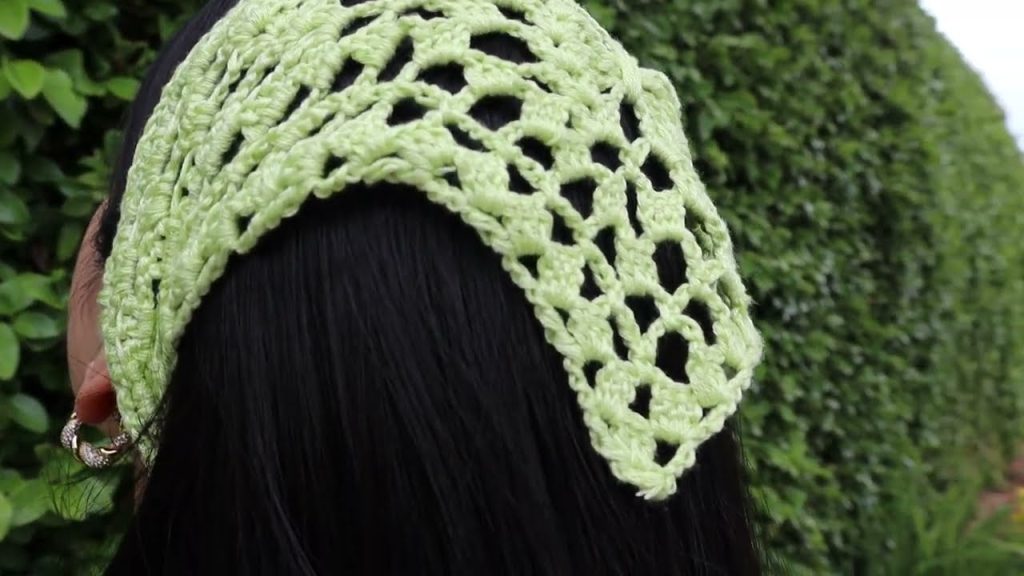
by A crocheted bandana is the perfect accessory for a whimsical, bohemian look, and incorporating a butterfly motif takes that style to a new level. The Crochet Butterfly Bandana is a beautiful project that combines a classic triangular bandana shape with a delicate butterfly design worked right into the fabric. This creates a stunning piece that’s lightweight, airy, and perfect for adding a touch of handmade charm to your hair or outfit. This tutorial is a fantastic way for intermediate crocheters to practice reading a chart or graph, and for ambitious beginners to learn a new motif with a beautiful result.
Why Crochet a Butterfly Bandana?
- Elegantly Unique: The butterfly motif is a sophisticated, eye-catching element that makes your bandana truly special.
- Light & Breezy: The open-stitch pattern makes this accessory incredibly comfortable and breathable, ideal for warmer weather.
- Skill-Building: This project is a great way to hone your skills in working with color changes and following a chart, which are essential for more complex crochet projects.
- Perfectly Custom: Easily adjust the size to create a larger shawl or a smaller neckerchief.
- Versatile Styling: Wear it as a headband, around your neck, or tie it to a bag for a pop of personalized flair.
What You’ll Need:
- Yarn: Approximately 100-150 yards of a DK (light worsted) or sport weight yarn. A cotton or cotton blend is highly recommended for its excellent stitch definition and breathability.
- Crochet Hook: A hook size appropriate for your yarn. A G (4.0 mm) or H (5.0 mm) hook is a good starting point for DK weight yarn.
- Tools:
- Yarn needle (for weaving in ends).
- Scissors.
- Stitch markers (optional, but very helpful for marking the center).
Understanding the Butterfly Pattern
The butterfly motif is created by a simple chart or graph, where each square represents a stitch. This pattern uses a tapestry crochet technique, meaning you will work with two colors at once, carrying the unused color inside your stitches. This creates a solid, clean design with no long yarn floats on the back of your work.
Common Abbreviations:
- ch: chain
- ch-sp: chain space
- sl st: slip stitch
- sc: single crochet
- dc: double crochet
- st(s): stitch(es)
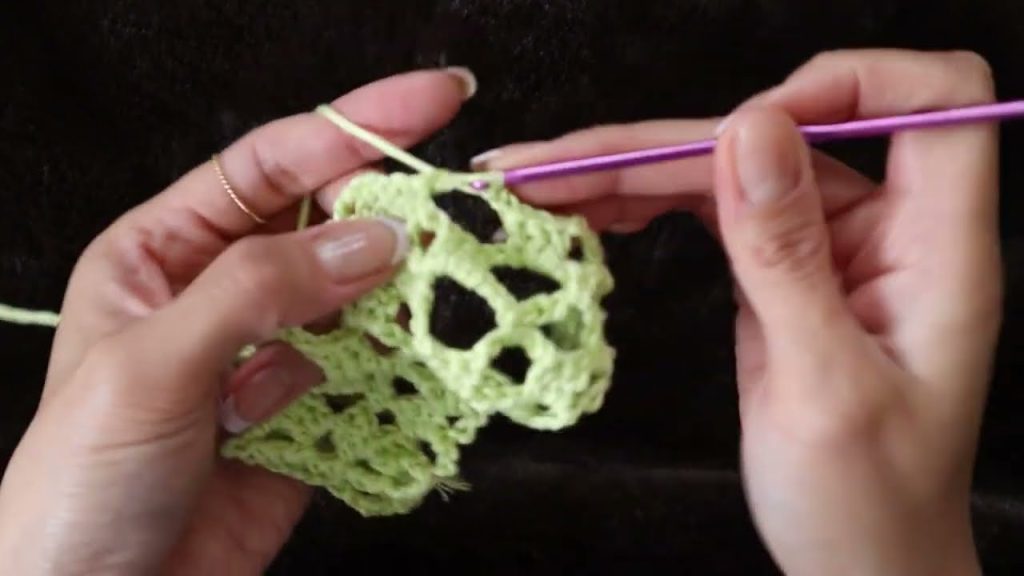
Step-by-Step Tutorial: The Butterfly Bandana
This bandana is worked in joined rows from the top point down, with increases at the center and at both ends to form a triangular shape.
Part 1: Starting the Bandana
- Chain 4.
- Row 1: Work a V-stitch (1 dc, ch 1, 1 dc) into the 4th chain from your hook. (This forms the top point of your bandana).
- Alternatively, you can start with a magic ring or a chain 2, with the first V-stitch in the first chain.
- Row 2 (Right Side): Ch 3 (counts as first dc). Turn. Work a V-stitch in the first dc. V-stitch in the center ch-1 sp of the V-stitch below. V-stitch in the last dc.
- You have now increased from one V-stitch to three.
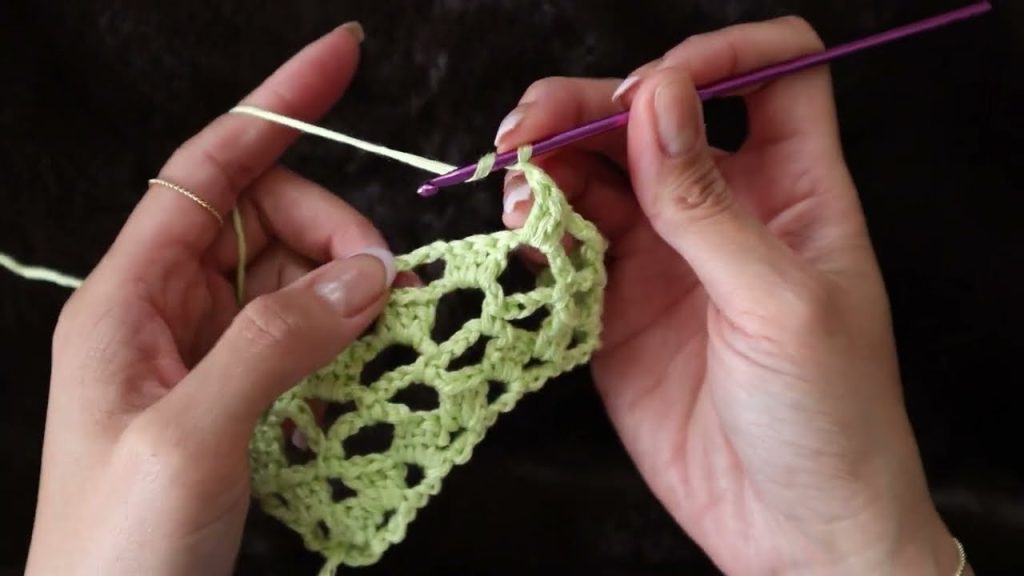
Part 2: Working the Butterfly Motif (Graph-Based)
From here, you will follow a graph. Each row of the graph corresponds to a row of your work. When you change colors, you will pull the new color through the last two loops of the final stitch of the old color.
Note: Since I cannot display a visual graph, here is a simplified text representation of the pattern logic. Each A represents a stitch in your main color, and each B represents a stitch in your contrasting color.
The Repeat:
- Row 3: Ch 3. Turn. 1 dc in first ch-1 sp. Start following the graph from here. The pattern will widen with each row.
- Color Changes: When the graph shows a color change, pull the new color through the final two loops of the stitch you are completing. You will carry the unused color along the top of your stitches, crocheting over it to hide it inside your work.
- Center Increase: Each row will have a center increase to maintain the triangular shape. This is typically a V-stitch or a (2 dc) increase in the middle of the row.
- Outer Increases: Each row will also have increases at the beginning and end. This is what widens the bandana.
A Simplified Butterfly Graph Logic (for a small butterfly):
- Rows 1-5: Gradually increase the number of stitches, always working your increases at the ends and center.
- Rows 6-8 (Start of Body): Introduce a small cluster of Color B stitches in the center of the row.
- Rows 9-11 (Wings): The cluster of Color B will widen, and then split into two distinct sections, creating the wings of the butterfly.
- Rows 12-14: The clusters of Color B will narrow and then meet at the center to form the body.
- Rows 15-20: Continue to work in your main color (Color A) with increases to build the top of the bandana.
Tips for Tapestry Crochet:
- Keep it Taut: Make sure the yarn you are carrying inside your stitches is held at an even tension. If it’s too loose, the fabric will be bumpy; if it’s too tight, it will pucker.
- Practice: Don’t worry if your first few color changes aren’t perfect. With a little practice, your color transitions will become seamless.
Part 3: Finishing Touches
- Once your bandana is the size you want, fasten off your yarn, leaving a long tail.
- Using your yarn needle, carefully weave in all loose ends into the back of your bandana.
- Optional: You can add a decorative border of single crochet or picot stitches along the sides of the bandana for a more finished look.
- Blocking: Gently wet the bandana, pin it to a foam board to the desired shape, and let it dry. This will open up the lace pattern and give your bandana a professional finish.
Customization & Styling Ideas:
- Size: Continue the pattern repeat for a larger shawl or scarf. Stop a few rows in for a smaller neckerchief.
- Yarn Choice: Use a cotton-linen blend for a more rustic feel, or a bamboo yarn for a silky, drapey look.
- Color: Play with color combinations! A neutral main color with a bright contrasting butterfly can be very striking.
- Styling:
- Headband: Tie it around your head with the point facing down your back.
- Neckerchief: Wear it around your neck with the point facing forward.
- Tie it to a Bag: For an instant pop of color and texture on a simple tote bag.
Your elegant Crochet Butterfly Bandana is now complete! It’s a testament to your growing crochet skills and a beautiful addition to your accessory collection. What’s the next motif you’ll try?
Video tutorial: