by
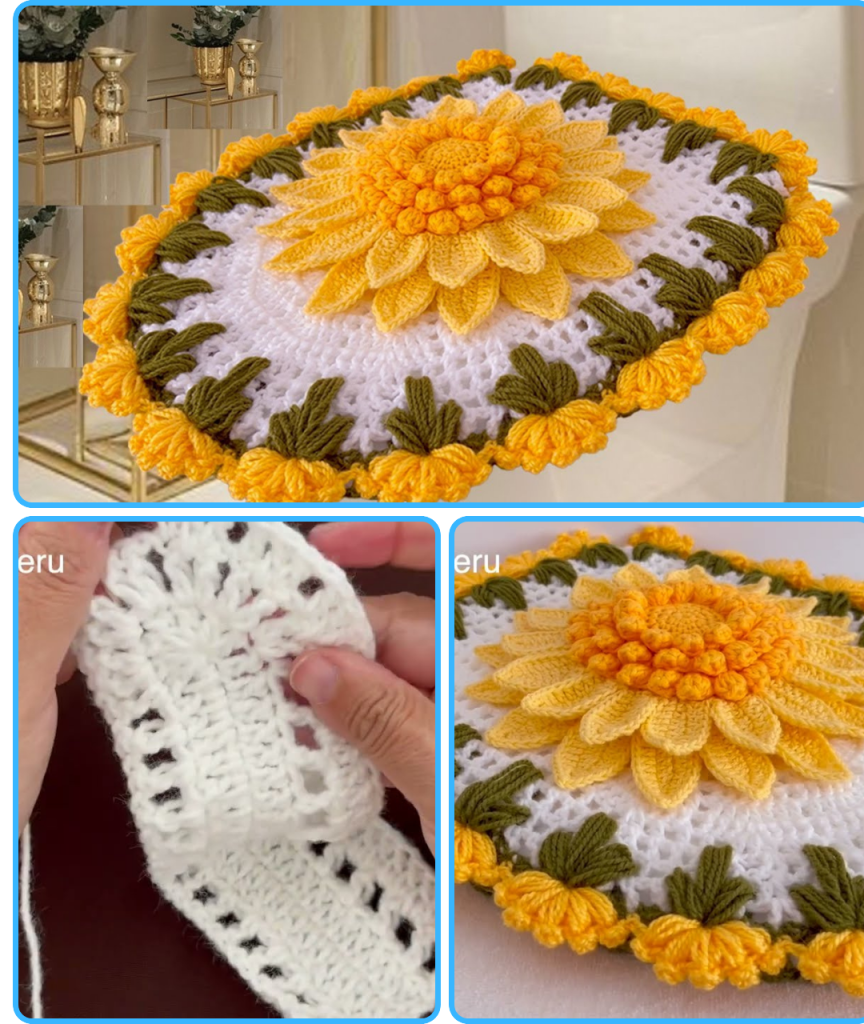
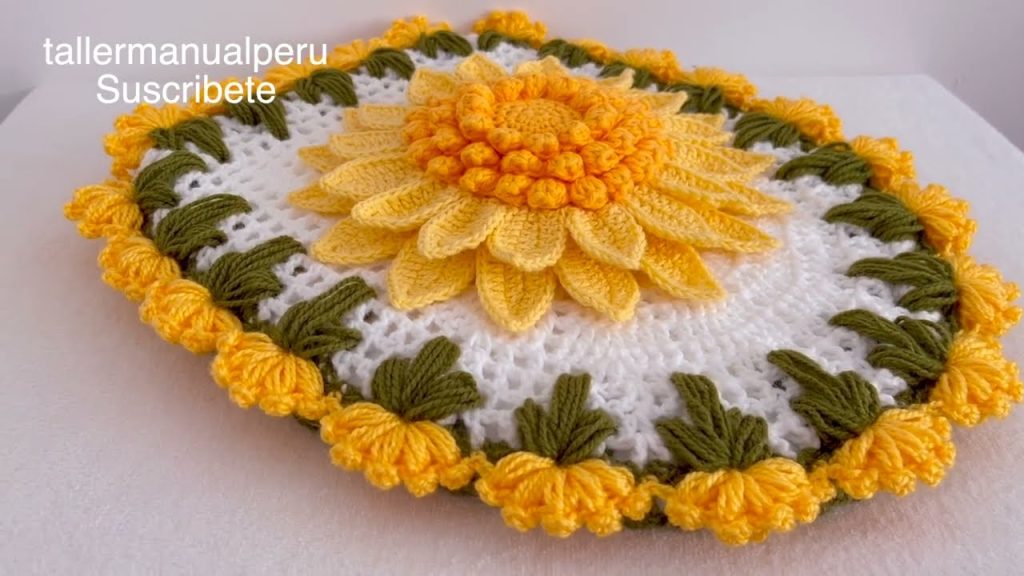
by Hello, fellow makers! Are you ready to add a unique, charming, and colorful touch to your bathroom decor? I’m excited to share this detailed pattern for the Sunset Sunflower Toilet Lid Cover, a one-of-a-kind piece that features a beautiful 3D sunflower and a decorative border. This project is a fantastic way to combine different crochet techniques and create a truly special, handmade item.
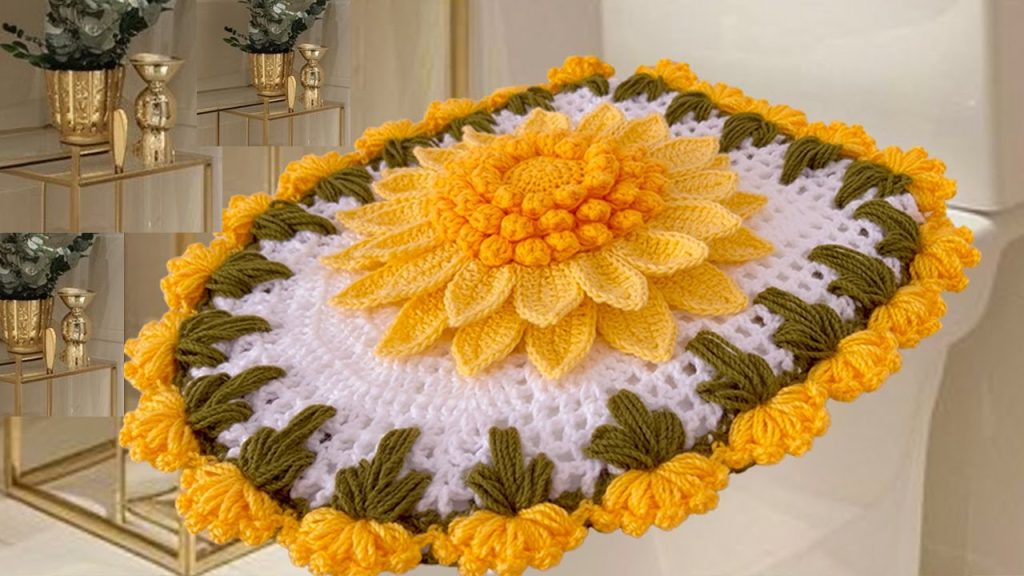
This pattern is designed for an intermediate crocheter who is comfortable with a variety of stitches, including double crochet, puff stitches, and working in the round. We’ll start with the base of the lid cover, then add a lovely leaf-like border, and finally, create the stunning 3D sunflower to top it all off. Let’s grab our hooks and yarn and get ready to create something beautiful!
Why You’ll Love Crocheting This Cover:
- Stunning Design: The combination of the decorative border and the vibrant 3D sunflower creates a unique and eye-catching piece.
- Skill-Building: You’ll get to practice a variety of stitches and techniques, from puff stitches to working in the round.
- Unique Decor: This is a fantastic way to add a personalized and charming touch to your bathroom.
- Customizable: Easily change the yarn colors to match your home decor or favorite color palette.
What You’ll Need:
- Yarn: Medium-weight yarn in the following colors:
- White: For the base of the lid cover.
- Green: For the decorative border and the back of the sunflower.
- Yellow: For the sunflower petals and center.
- Crochet Hook: A 3mm crochet hook.
- Yarn Needle (Tapestry Needle): For weaving in all loose ends.
- Scissors:
- Synthetic Fiber: For stuffing the 3D sunflower.
Essential Crochet Abbreviations:
- ch: chain
- sl st: slip stitch
- sc: single crochet
- dc: double crochet
- puff: puff stitch (explained in the pattern)
- st(s): stitch(es)
- sk: skip
- inc: increase (2 stitches in the same space)
- cl: cluster (
5 dcin the same space) - FO: fasten off
The Pattern: The Sunset Sunflower Toilet Lid Cover
This project is worked in sections, and then assembled at the end.
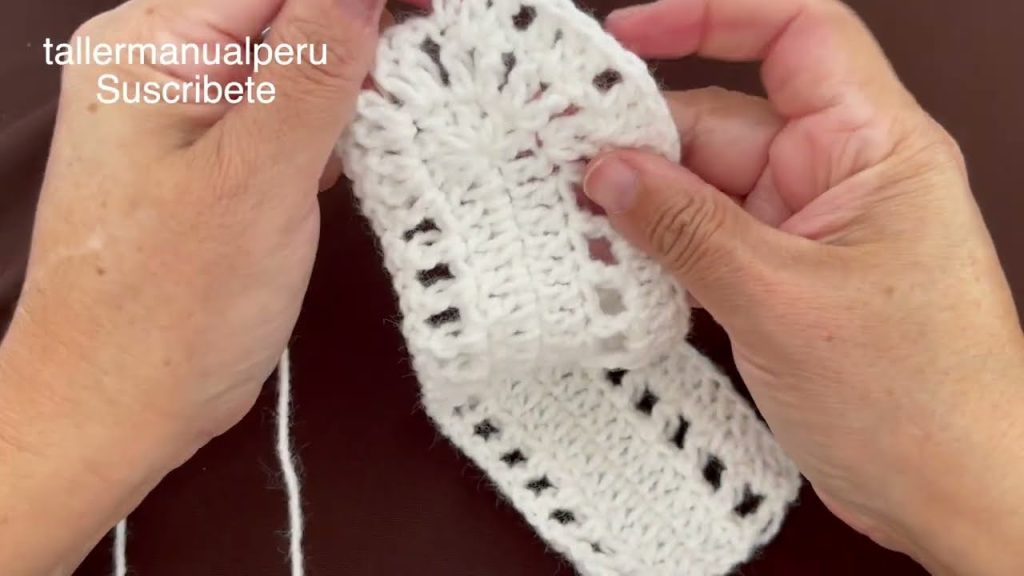
Part 1: The Base of the Lid Cover (White Yarn)
- Foundation:
Ch 27. - Row 1:
Dcin the 3rdchfrom the hook.Dcin each of the next 26ch. Work6 dcin the very lastchto create the rounded corner. Continue todcback up the other side of the chain, making onedcin each of the 26 chains. - Row 2 (Open Work):
Ch 3(counts as firstdc), turn.Dcin the firstst.Ch 1,sk 1 st.Dcin the nextst. Repeat this(ch 1, sk 1 st, dc)pattern until you reach the rounded corner. For the rounded corner, continue toch 1, sk 1 st, dcin the increases from the previous row. Then,ch 1, sk 1 st,dcuntil the end of the row. - Rows 3-8: Alternate between a
solid dcrow and anopen workrow. On the rounded side of the cover, you will continue to increase to ensure a nice, rounded shape that fits a standard toilet lid. Continue until you have a total of eight rows.
Part 2: The Decorative Border (Green Yarn)
- Attach Green Yarn: Join your green yarn to the last stitch of your base.
- Row 1 (Puff Stitch Leaves):
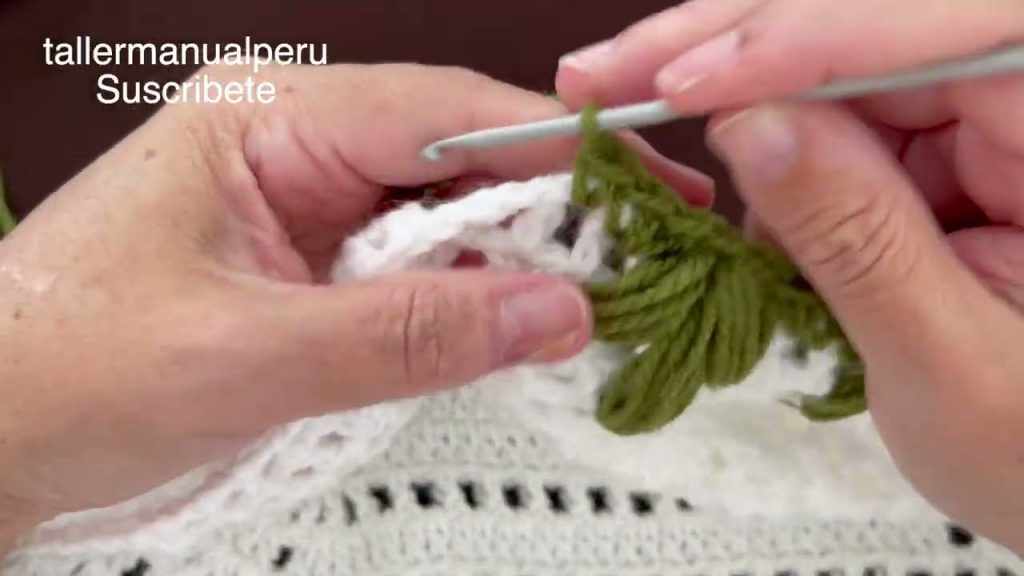
Ch 2(does not count as a st). In the firstst, make apuffby(yarn over, insert hook into st, pull up a loop)for a total of four times. You should have nine loops on your hook.Yarn over and pull through all nine loops.Ch 1to close thepuff. Repeat this three more times in the same stitch. This creates your first “leaf” motif. Sk 2 sts.Scin the nextst. Repeat thepuffleaf motif, followed by asctwo stitches over, around the entire circumference of the cover.
Part 3: The 3D Sunflower
- Sunflower Center (Bright Yellow Yarn):
- Round 1: Make a magic ring.
Sc 6in the ring. Join withsl st. (6 sts) - Round 2:
Incin eachstaround. (12 sts) - Round 3:
(Sc 1, inc)around. (18 sts) - Continue increasing by 6 stitches in each round until you have a total of 48 stitches.
- Work
6 additional roundsof 48scwithout any increases.
- Round 1: Make a magic ring.
- Petals (Yellow Yarn):
- Row 1:
Ch 2(does not count as a st). In the nextst, make acluster(cl) by working5 dcinto the samest.Pull the loop throughto close the cluster.Ch 3,sk 2 sts,sl stinto the nextst. Repeat this petal pattern around the edge of the center piece. - Layering: For a layered look, repeat this process on a different row of your sunflower center.
- Row 1:
- Petals (Light Yellow Yarn):
- Small Petals:
Ch 9.Scin the 2ndchfrom the hook.Hdcin the nextch.Dcin the next 4ch.Hdcin the nextch.Scin the lastch.Sl stto join the petal to the center. Repeat for 16 petals. - Large Petals:
Ch 12.Scin the 2ndchfrom the hook.Hdcin the nextch.Dcin the next 7ch.Hdcin the nextch.Scin the lastch. Repeat to create the second layer of petals.
- Small Petals:
- Assembly:
- Create a flat circular piece in green, similar to the center of the sunflower, to act as the base for the back.
- Sew the two pieces together, stuffing with synthetic fiber before you close the seam.
- Attach the completed sunflower to the center of the lid cover by sewing or gluing.
Part 4: Securing the Cover (Green Yarn)
- Mesh:
Ch 2, turn.Dcin the firstst.Ch 1,sk 1 st.Dcin the nextst. Repeat this pattern for a total of seven rows. - Tie Strings:
Ch 36on each side of the mesh and secure them to the cover. This will be used to tie the cover to the lid.
Congratulations, you’ve created a beautiful and unique Sunset Sunflower Toilet Lid Cover! Happy hooking!
Video tutorial: