 by
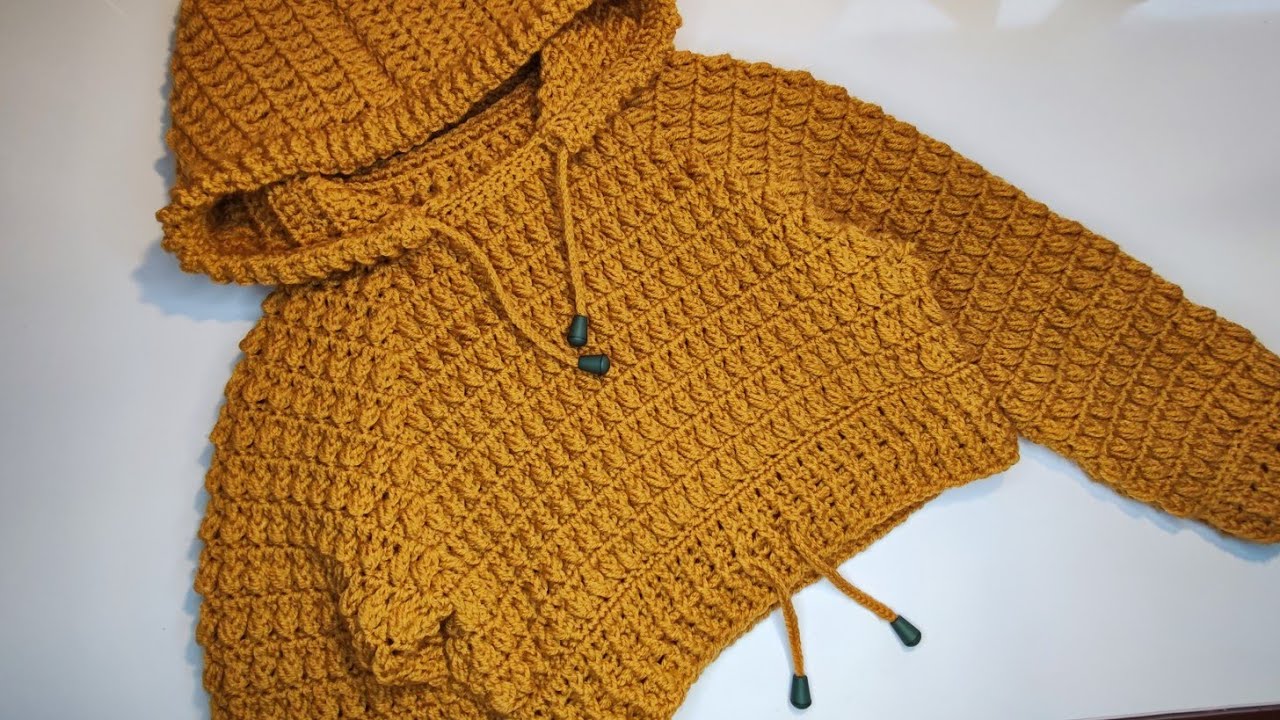
by Hello, fellow makers! As the air turns crisp and the leaves begin to fall, there’s nothing cozier than wrapping a little one in a warm, handmade sweater. I’m excited to share this detailed pattern for the November Hooded Sweater, a classic top-down raglan that’s perfect for chilly days. This project is a fantastic way to create a cherished, one-of-a-kind garment that is as practical as it is adorable.

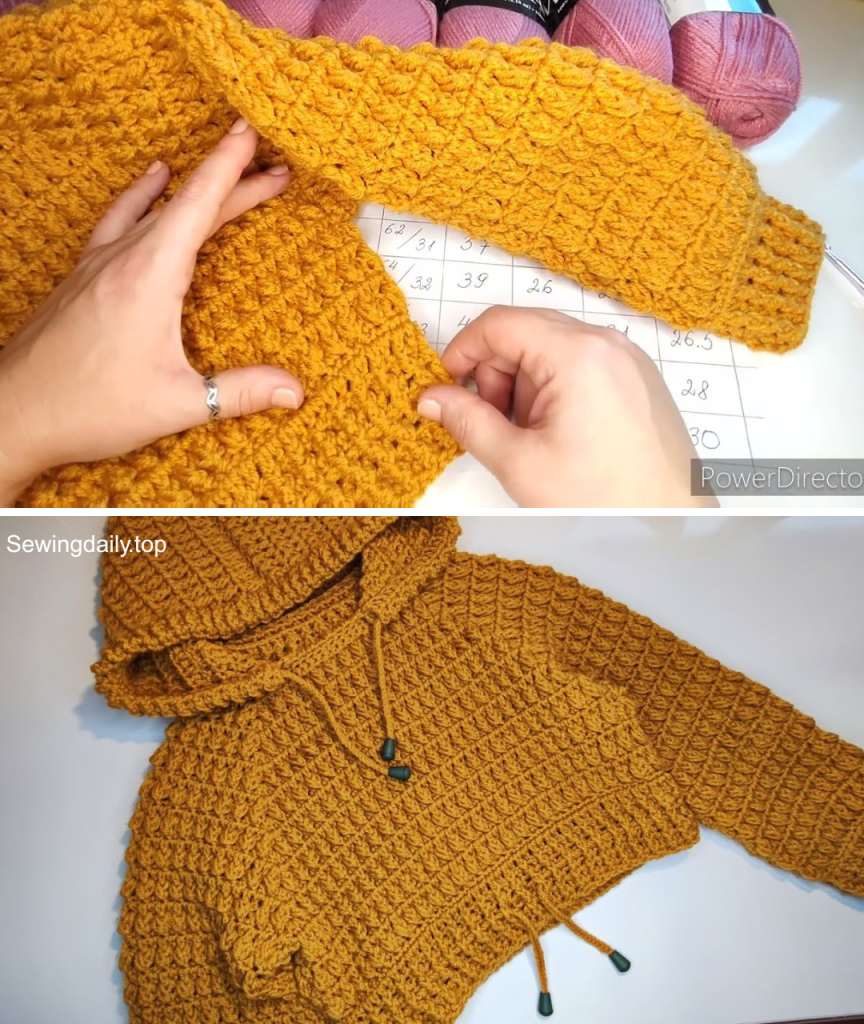
The beauty of this sweater lies in its construction. We’ll start at the top, working the hood and yoke as a single piece. The raglan design means there’s no complicated seaming, and the top-down approach allows you to try it on as you go, ensuring a perfect fit. The simple double crochet stitch gives the sweater a soft drape, while the ribbed cuffs and hem add a touch of professional polish. Let’s grab our hooks and yarn and get ready to create something beautiful!
Why You’ll Love Crocheting This Sweater:
- No Seams: The top-down raglan design means the entire body is worked in one piece.
- Customizable Fit: Easily adjust the size and length as you crochet to fit any child.
- Practical & Cozy: The hood adds extra warmth, making this a perfect layer for autumn and winter.
- Skill-Building: You’ll practice working in the round, creating raglan increases, and making ribbed stitches.
What You’ll Need:
- Yarn: DK weight (#3) or Worsted weight (#4) yarn. Approximately 400-600 yards, depending on the size you are making.
- Crochet Hook: A 4.0mm crochet hook for the main body and a 3.5mm hook for the ribbed sections.
- Yarn Needle (Tapestry Needle): For weaving in all loose ends.
- Scissors:
- Stitch Markers: Four stitch markers to mark the raglan corners.
Essential Crochet Abbreviations:
- ch: chain
- sl st: slip stitch
- sc: single crochet
- hdc: half-double crochet
- dc: double crochet
- FPdc: front post double crochet
- BPdc: back post double crochet
- st(s): stitch(es)
- inc: increase (2 stitches in the same stitch)
- FO: fasten off
The Pattern: The November Hooded Sweater
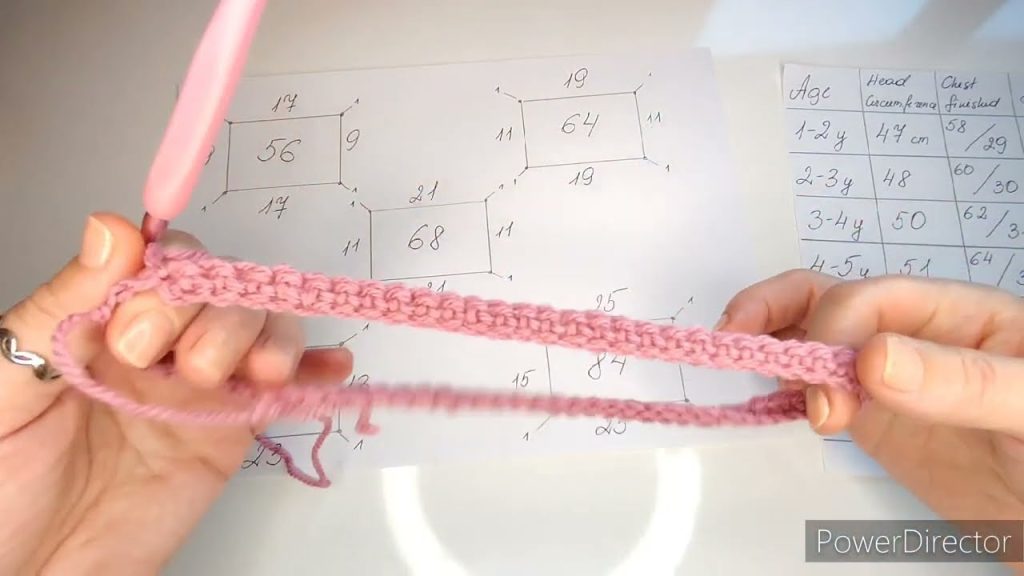
This sweater is worked from the top down, starting with the hood. The size is based on average children’s measurements; you can adjust by adding or subtracting rows.
Part 1: The Hood
- Foundation:
Ch 54(or until your chain measures approximately 14 inches / 35 cm, or the desired depth of the hood). - Row 1:
Dcin the 3rdchfrom the hook and in eachchacross. (52 sts) - Rows 2-20:
Ch 2(does not count as a st), turn.Dcin eachstacross. Repeat for 19 more rows, or until your hood panel measures approximately 8 inches / 20 cm in height.
Part 2: Joining the Hood and Creating the Yoke
- Hood Seam: Fold the hood panel in half.
Sl stthe top edge together to form a seam.FO. - Neckline: Reattach your yarn at the bottom front corner of the hood.
- Round 1 (Neckline): Work a row of
scstitches evenly around the entire hood opening. You should aim for a stitch count that is a multiple of 4, plus 4. (For example, 40 stitches for a smaller size, 44, 48, etc.)Sl stto the firstscto join the round. - Marking Corners: Place a stitch marker in the 1st stitch, and then every 11 stitches after that. (Or divide your total stitch count by 4). The markers will designate the four raglan increase points.
- Round 2 (Yoke):
Ch 2,dcin the samest.Dcin eachstuntil you reach the first stitch marker. At the stitch marker,(dc 2, ch 1, dc 2)in the marked stitch. Repeat this increase pattern at each stitch marker.Dcto the end of the round.Sl stto the top of the initialch 2to join. - Round 3:
Ch 2.Dcin eachstaround, making sure to work(dc 2, ch 1, dc 2)in eachch 1sp from the previous round. - Repeat Round 3 until your yoke measures approximately 5-7 inches / 13-18 cm from the neck. The width of the yoke should be wide enough to comfortably fit around the chest, under the armpit.
Part 3: Separating for Body and Sleeves
- Next Round:
Ch 2,dcin eachstuntil you reach the first cornerch 1sp.Dc 1in thech 1sp. - Armhole:
Ch 2(or more, depending on your gauge, to create a comfortable underarm gap).Skall stitches until you reach the next cornerch 1sp.Dc 1in thech 1sp. - Body:
Dcin eachstuntil you reach the next corner.Dc 1in thech 1sp.Ch 2.Skall stitches until you reach the last cornerch 1sp.Dc 1in thech 1sp. Dcin eachstuntil you reach the beginning of the round.Sl stto the top of the initialch 2to join.
Part 4: The Body
- Next Round:
Ch 2,dcin eachstaround, including the stitches you chained in the armpit.Sl stto join. - Repeat this round until the body of the sweater reaches your desired length.
- Bottom Hem (Ribbed): Switch to your 3.5mm hook.
Ch 2, and work(FPdc 1, BPdc 1)in eachstaround.Sl stto join. Repeat this row for 3-5 rows.
Part 5: The Sleeves
- Joining: Join your yarn in the center of one of the underarm
ch 2spaces. - Round 1:
Ch 2,dc 1in the same space. Workdcin each stitch around the armhole, including the stitches you skipped.Sl stto join. - Tapering (Optional):
Ch 2,dcin eachstaround.Sl stto join. Every 5-8 rounds, work adc decreaseto taper the sleeve. - Cuffs (Ribbed): Once the sleeve reaches the desired length, switch to your 3.5mm hook.
Ch 2, and work(FPdc 1, BPdc 1)in eachstaround.Sl stto join. Repeat for 3-5 rows. - Repeat for the other sleeve.
Part 6: Finishing Touches
- Weave in all loose ends.
- Block your sweater if desired.
Congratulations, you’ve created a beautiful and unique November Hooded Sweater! Happy hooking!
Video tutorial: