 by
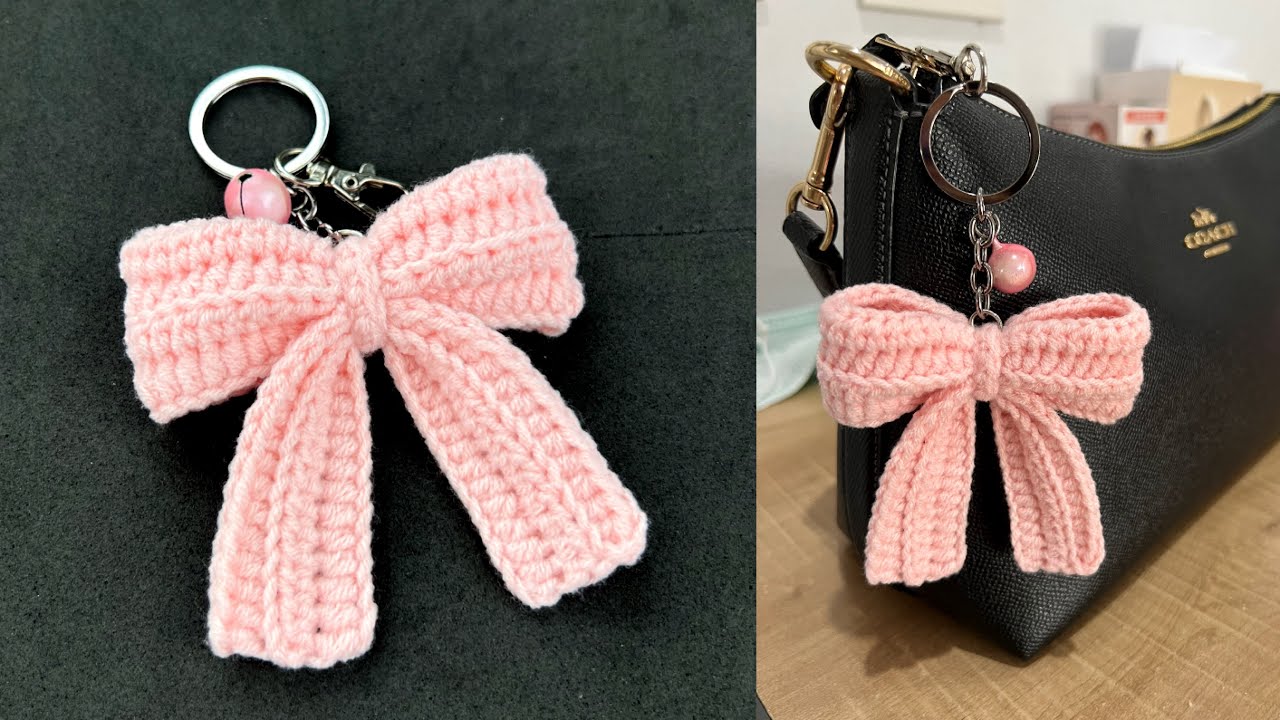
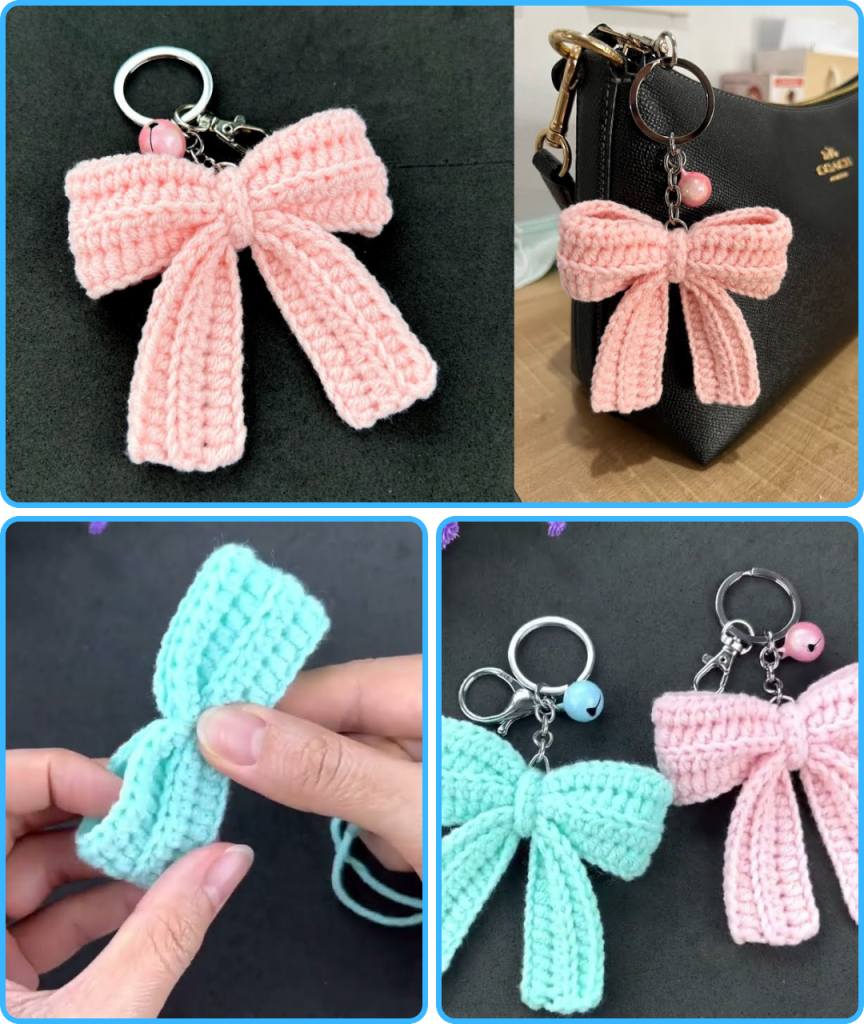
by Crocheting a bow keychain is a delightful and quick project that adds a touch of handmade charm to your keys, bag, or backpack. This little accessory is not only adorable but also a fantastic way to practice basic crochet stitches and use up small bits of leftover yarn. This tutorial is perfect for beginners and seasoned crocheters alike, offering a fast, satisfying craft that you can complete in just a few minutes.

Why Crochet a Bow Keychain?
- Quick & Easy: You can finish this project in under 15 minutes, making it a great last-minute gift or a fast way to get a crafting fix.
- Yarn Stash Buster: This pattern requires very little yarn, so it’s the perfect project for using up those small scraps from larger projects.
- Customizable: You can easily adjust the size and color to match your style or create a themed gift for a friend.
- Beginner-Friendly: It relies on just a few basic stitches, making it an excellent project for those new to crochet.
- Versatile Accessory: It’s not just for keys! Use it as a zipper pull on a pouch, a bag charm, or even as a simple embellishment for a wrapped gift.
What You’ll Need:
- Yarn: A small amount of worsted weight yarn is ideal for this project. Cotton or acrylic yarn works well for durability.
- Crochet Hook: An H (5.0 mm) hook is a good size for worsted weight yarn, but you can use a smaller or larger hook to adjust the size of your bow.
- Keychain Hardware: A simple split ring or a lobster clasp is perfect for attaching your bow.
- Tools:
- Scissors.
- Yarn needle (for weaving in ends).
Step-by-Step Tutorial: The Classic Bow Keychain
This pattern creates a simple, classic bow shape. The key is to create a flat rectangle and then cinch it tightly in the middle.
Common Abbreviations:
- ch: chain
- sl st: slip stitch
- sc: single crochet
- hdc: half double crochet
- dc: double crochet
- st(s): stitch(es)
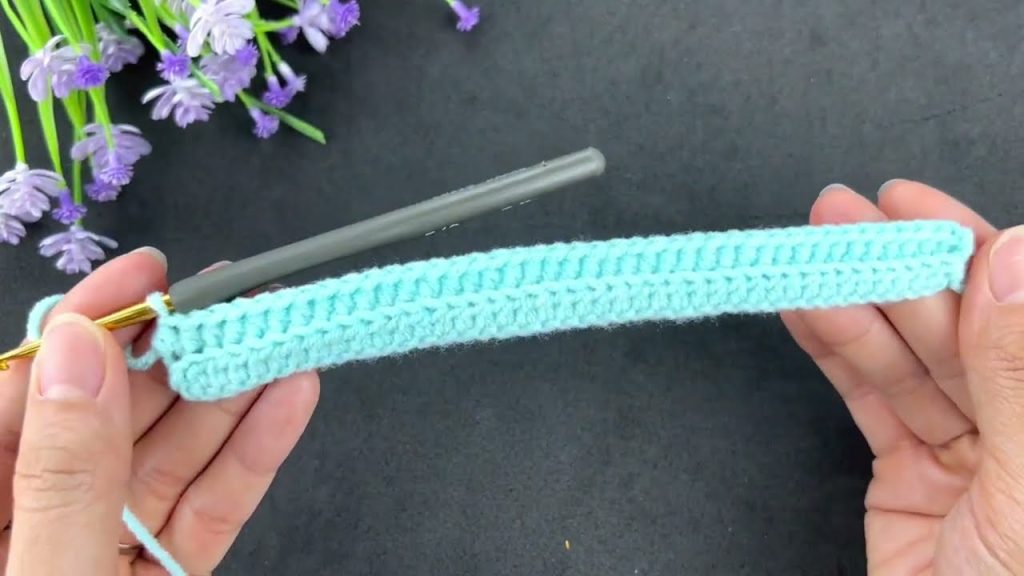
Part 1: Crocheting the Main Bow Shape (The Rectangle)
- Start with a slip knot.
- Chain 15. (This determines the width of your bow. For a wider bow, chain more; for a narrower bow, chain less).
- Row 1: Work a double crochet (dc) into the 3rd chain from your hook. Continue to dc in each chain across. (You should have 13 dc).
- You can also use half double crochet (hdc) for a slightly flatter bow, or single crochet (sc) for a very small, dense bow.
- Row 2: Chain 2 (counts as first dc). Turn your work. Work 1 dc into each stitch across. (13 dc).
- Row 3: Chain 2 (counts as first dc). Turn your work. Work 1 dc into each stitch across. (13 dc).
- Fasten off, leaving a long tail (at least 10-12 inches / 25-30 cm). This tail will be used to cinch the bow and attach the hardware.
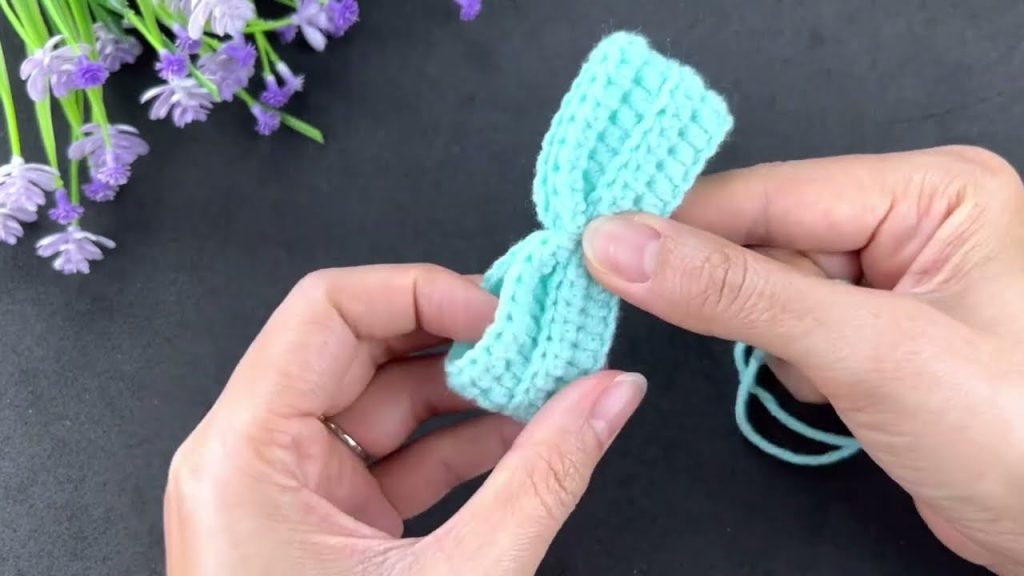
Part 2: Shaping and Finishing the Bow
- Cinch the Center: Lay your crocheted rectangle flat. Use the long yarn tail you left and your yarn needle to wrap the tail tightly around the center of the rectangle several times. Pull firmly to create a defined “waist” for your bow. Wrap until you’re happy with the shape.
- Attach the Keychain Hardware: With the yarn tail still on your needle, slide the keychain split ring or lobster clasp onto the yarn. Bring the yarn to the back of the bow, directly behind the cinched center. Wrap the yarn around the cinched area again to secure the hardware.
- Secure and Weave in Ends: Bring the yarn tail to the back of the bow. Make a secure knot and then use your yarn needle to carefully weave the remaining tail into the back of your bow to hide it completely. Trim any excess yarn.
Customization & Styling Ideas:
- Adjusting Size: To make a larger or smaller bow, simply adjust the number of stitches in your starting chain and the number of rows you crochet. A 20-chain start with 4 rows will make a much larger bow.
- Stitch Variation: Using a single crochet (sc) stitch will create a much smaller, denser bow. This is great for a more minimalist look.
- Color Blocking: Use a different color yarn to create the center wrap for a two-toned bow.
- Add Embellishments: Once finished, you can add a small button, a decorative bead, or a touch of glitter glue to the center of your bow for extra sparkle.
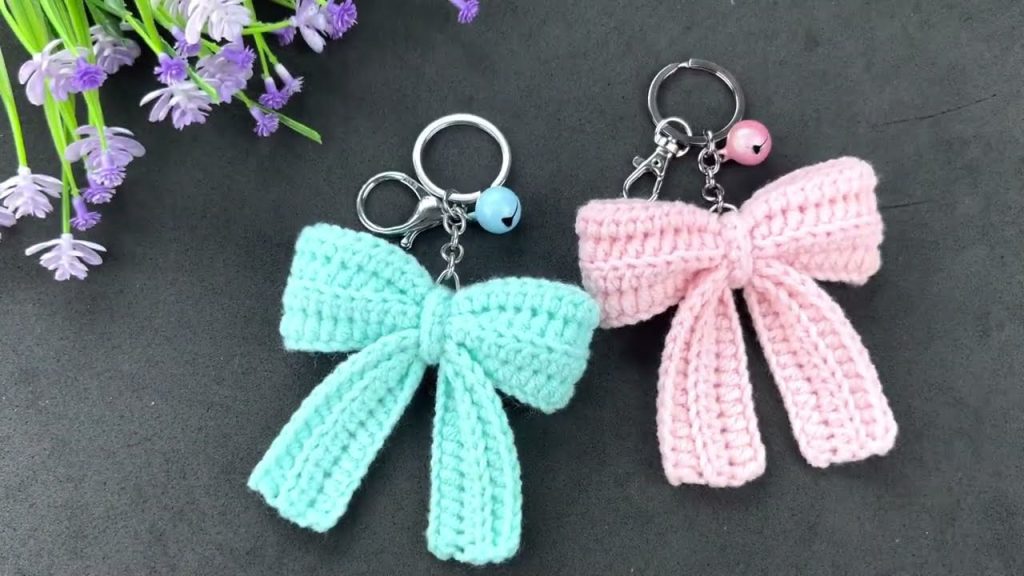
Your beautiful crochet bow keychain is now complete! It’s the perfect way to add a bit of handmade charm to your everyday items. Enjoy your new accessory!
Video tutorial: