by
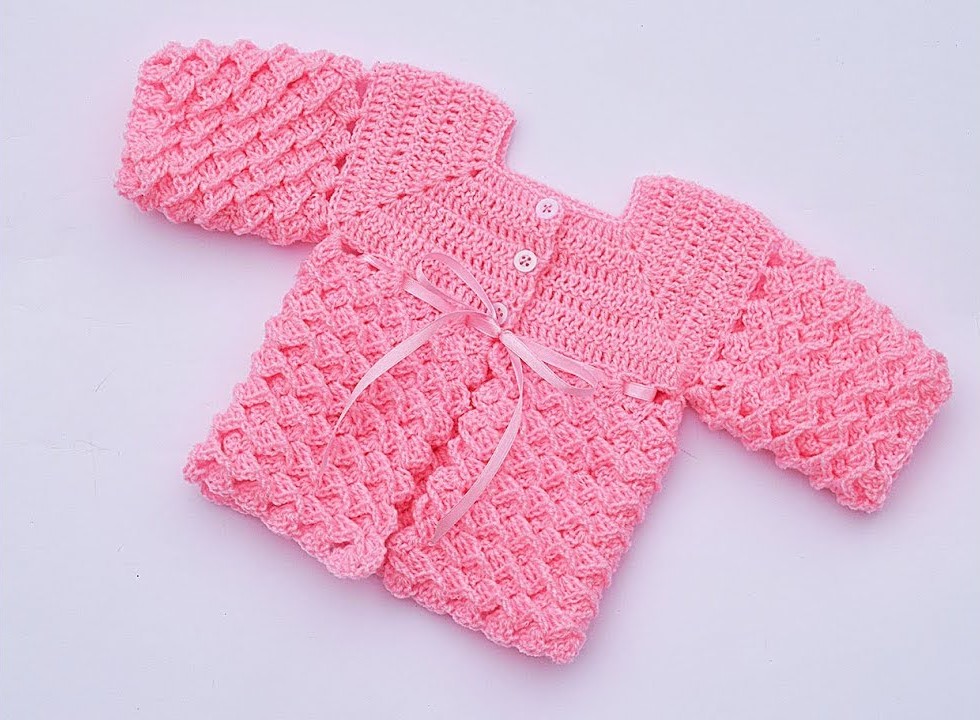
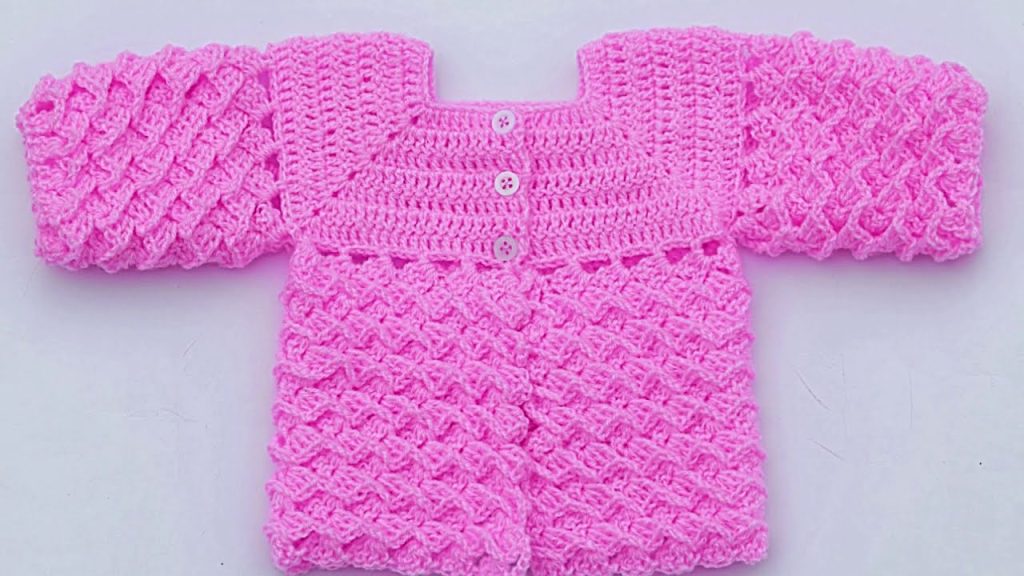
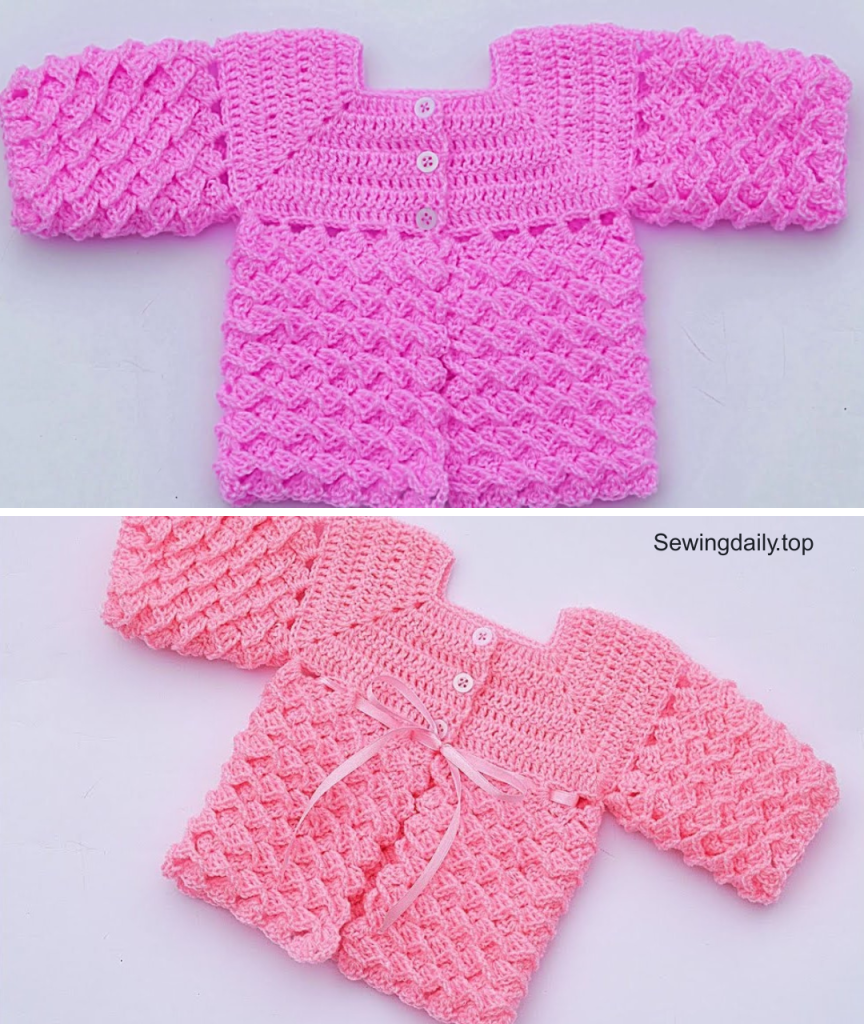
by A comfy, stylish cardigan with a wrap‑front / crossover opening, textured body, long sleeves, and optional belt or tie. Perfect for cooler days, transitional weather, or layering over dresses. Adjustable, charming, and fun to make!
Why This Style Works
- Wrap‑front gives a cozy fit without needing many buttons or complicated closures.
- Textured stitch adds visual interest and snuggle factor.
- Provides warmth with long sleeves and a slightly longer body.
- Customizable: you can make short sleeves, add a hood, belt, pockets, etc.
Sizes & Measurements
Here are approximate garment measurements. Always measure the child if possible; adjust your stitch gauge accordingly.
| Size | Chest Circumference | Garment Body Width (with ease) | Body Length (shoulder to hem) | Sleeve Length (shoulder to wrist) |
|---|---|---|---|---|
| 2 yrs | ~21 in (53 cm) | ~23 in (58 cm) | ~15 in (38 cm) | ~13 in (33 cm) |
| 4 yrs | ~23 in (58 cm) | ~25 in (63 cm) | ~16.5 in (42 cm) | ~14.5 in (37 cm) |
| 6 yrs | ~25 in (63 cm) | ~27 in (68 cm) | ~18 in (46 cm) | ~16 in (41 cm) |
| 8 yrs | ~27 in (68 cm) | ~29 in (73 cm) | ~19.5 in (50 cm) | ~17.5 in (44 cm) |
Ease: The garment is worked with ~2‑3 in (5‑7 cm) ease in chest so it’s comfortable to layer clothing underneath.
Materials / Tools
| Item | What to Use / Size |
|---|---|
| Yarn | DK or light worsted weight yarn; or worsted weight if you want warmer wrap. Soft, washable fiber (acrylic / cotton blend / wool blend). |
| Hook | Appropriate hook size per yarn—usually 4.0 mm to 5.5 mm depending on stitch and yarn. |
| Tapestry Needle | For weaving in ends. |
| Scissors | For cutting yarn. |
| Stitch Markers | Helpful for marking raglan or sleeve openings, or front crossover edges. |
| Optional | Belt or tie (crocheted or purchased); small buttons or decorative closure; pockets. |
Gauge
To get good fit and drape, check your gauge:
- In the Textured Stitch pattern (see below): ~16‑18 stitches × ~14‑15 rows = 4 in (10 cm), using the specified hook and yarn.
- If your gauge has more stitches per inch (denser), you may want larger hook; if fewer, smaller.
Stitch & Texture Pattern
One of the charming parts of this cardigan is the stitch texture. Here’s a suggested repeat:
- “V‑cluster stitch”:
A V‑cluster is: yo, insert hook into stitch, yo, pull up loop, yo, insert into same stitch, yo, pull up loop, yo, pull through all loops on hook — kind of like 2 double‑crochets with a chain between, worked into one stitch. - Another way: dc, ch1, dc in same st equals a V‑stitch.
- Between V’s, you’ll work rows of single crochet (or half double crochet) to give contrast.
This alternation (textured rows vs “V stitch” rows) gives a nice ribbed lace‑hinted look that’s warm but not bulky.
Pattern Structure & Construction
We will build this cardigan top‑down with wrap‑front panels, raglan shaping (or modified set‑in sleeves), long sleeves, then finishing edges and optional belt. Top‑down helps you try on as you go and adjust length.
Full Step‑by‑Step Pattern
Below are instructions tailored initially for size 4 yrs, with notes in parentheses for sizes 2, 6, 8 yrs. Adjust stitches / rows accordingly based on gauge.
1. Start Yoke & Neckband
- Foundation Chain: Chain X stitches, where X is enough to comfortably go around the back of the neck and front wrap overlap. For size 4, chain ~ 40. (For 2 yrs, ~36; 6 yrs ~44; 8 yrs ~48).
- Row 1 (Right Side):
- Row 1: sc in 2nd chain from hook, sc in each ch across. Turn.
- Row 2 & 3:
- Continue sc rows until neckband height ~1 in (2.5 cm). These rows form the neckline border.
2. Begin Body & Wrap Panels
- Divide for Wrap Panels & Back Panel:
- From bottom edge of neckband, create three sections: Left front wrap, Back, Right front wrap. For example, for size 4: Left front ~8 sts, Back ~24 sts, Right front ~8 sts. (Adjust proportionally for other sizes.)
- Place markers between these sections so you know where to increase or shape.
- Raglan / Shoulder Increases:
- Working in rows, increase at the edges of front wraps/back to shape shoulders/underarm. For example, at each end of the back section (i.e., between back & wrap), inc 1 stitch each row until sleeve opening width is reached.
- Continue until the body width (across chest) equals the measurement needed (from table above: ~25 in for size 4, etc.), minus wrap overlap. Also, stop increasing when yoke depth (shoulder to underarm) is reached: ~ 7 in (18 cm) for size 4. For size 2 yrs, ~6 in; size 6, ~8 in; size 8, ~9 in.
3. Split Body & Sleeves
- Separate Sleeves:
- When you reach yoke depth, the markers demarcate where sleeves will go. Transfer sleeve stitches (wrap each sleeve section on stitch holders or waste yarn).
- Between the wrap sections on front and back, leave underarm openings of several chains (say ch 4‑6 stitches depending on size) to provide ease.
- Work Body:
- Continue working the body across back + both front wrap panels, in the texture stitch pattern: e.g. alternate one row of V‑stitch row, then one row of sc (or hdc) across, etc., until the body length (shoulder to bottom hem) reaches desired length (~16.5 in for size 4; adjust smaller/larger).
4. Sleeves
- Pick up Sleeve Stitches:
- Return to held sleeve stitches; join yarn at underarm (use a new ball or strand).
- Work in Rounds or Rows:
- Many prefer rounds for sleeves (seamless). If working rounds, you may have to work around carefully if you want texture pattern to match body pattern. If easier, you can work in back‑and‑forth rows and seam later.
- Use same texture pattern: alternate V‑stitch row / plain row.
- Add decreases if you want tapered sleeves: for example, decrease 1 stitch on each side every few rounds (every 6‑8 rows) until sleeve width at wrist is smaller (e.g. for 4 yrs, ends ~6‑7 in width).
- Add cuff border: sc or ribbed stitch (back‑loop only) for 3‑4 rows to finish nicely.
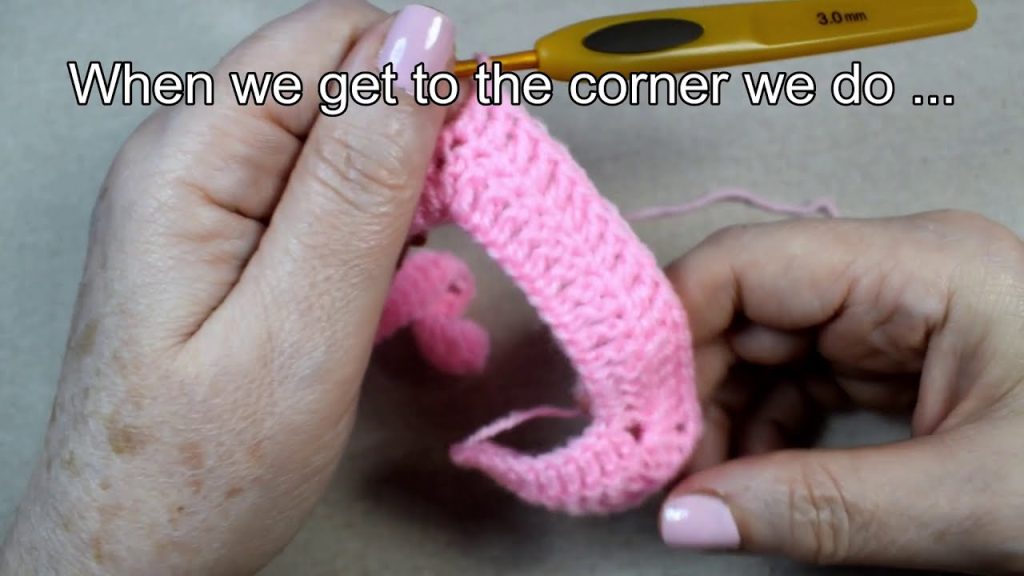
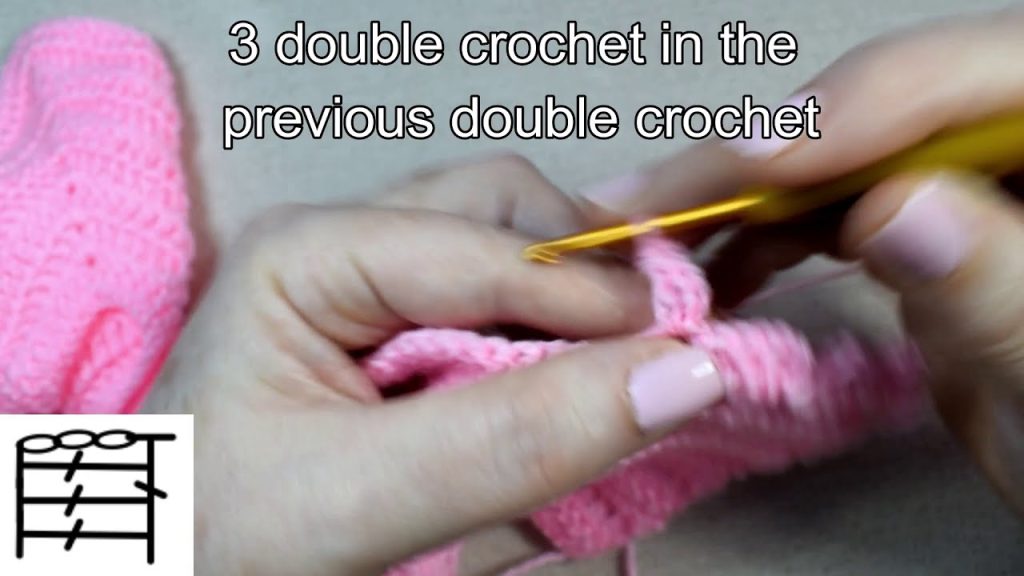
5. Finishing Edges & Wrap Overlap
- Front Wrap Edges & Neckband Finishing:
- Once body & sleeves are done, finish front wrap edges and neckband with a border. One good option: single crochet all along wrap front edges + neckline + hem, possibly adding one or two rows of sc or hdc to give stable edging.
- Hem / Bottom Border:
- At bottom of the body, add a border: sc or ribbed stitch for 2‑3 rows; ensure it aligns with front wrap, so wrap panels match bottom border.
- Optional Belt or Tie:
- You can crochet a belt or tie: chain long enough (for size 4, maybe ~60 chains) then work sc or hdc rows back. Or use a ribbon. Attach belt loops on sides (sc loops) or let belt be free wrap.
6. Optional Customizations
- Hood: If you’d like a hood, pick up stitches around neckline; work in half‑rounds increasing at sides; shape top of hood by decreasing centrally.
- Short Sleeves: Skip long sleeves; just continue body shorter, then finish with border.
- Pockets: Crochet two small patch pockets; attach to front body (on backs of front wrap panels or hip level).
- Color Stripes or Contrast: Use color changes in the borders, sleeves, etc. Contrasting color for cuffs or neckline gives nice detail.
Stitch‑by‑Stitch Sample (First Few Rows for Size 4)
Here’s how the beginning might go in more detail (you can mirror this for other sizes):
- Chain 42. Join? (if working back & forth)
- Row 1: sc in 2nd ch from hook and across (41 sc). Turn.
- Row 2‑3: sc across.
Row 4 (start texture): V‑stitch row: dc, ch1, dc in st, skip 1 st, (dc, ch1, dc in next st), skip 1, repeat to end.
Row 5 (plain row): sc across all sts.
Repeat Rows 4‑5 until you have 7 rows of texture, ending with a plain sc row. Then begin raglan increases etc.
Tips for Success
- Use stitch markers to mark boundaries between front wrap / back / front wrap, especially during increases.
- Check fit often: the wrap‑front style means overlap matters; try it on the child (or dress form) before proceeding to body length.
- Whenever changing yarn color, do so at edges or border rows for clean transitions.
- Keep tension moderate: texture stitches can pull fabric, but if stitches are too tight, cardigan may not flex well.
- Finish ends neatly and block if needed to even out stitches and relax fabric.
Care & Wearing Suggestions
- Use soft, washable yarn so children can wear it often.
- Wash gently (hand‑wash or gentle cycle, cold water), lay flat to dry to retain shape.
- Since front is wrap style, belt/tie needs to be secure or consider small buttons or snaps to prevent wrap from slipping.
- For cold weather, layer under with long‑sleeve top + scarf; cardigan works well with dresses or leggings.
Summary
This wrap‑front cardigan for girls aged about 2‑8 years gives you cozy coverage, lovely texture, and customization. Whether you go neutral or bright, simple or embellished, with long or short sleeves, pockets, hood, etc., you’ll have a heartfelt handmade garment perfect for gifting or everyday wear.
Video tutorial: