 by
by In the vast and ever-evolving world of fashion accessories, few items capture the perfect balance between functionality, creativity, and personal expression like the crochet crossbody mini bag. This charming accessory is more than just a storage solution; it’s a reflection of artisan skill, a nod to tradition, and a stylish addition to any wardrobe. Whether you’re a seasoned crocheter looking to try your hand at a new project, a fashion enthusiast searching for something unique, or a casual shopper who appreciates handmade items, the crochet crossbody mini bag ticks all the right boxes.

A Brief History of Crochet and Its Fashion Revival
Crochet, derived from the French word croche meaning “hook,” is a needlework technique that dates back to the early 19th century. Although the origins are debated, crochet gained popularity in Europe as a lace-making alternative and was later embraced globally for both utilitarian and decorative uses.
Over the years, crochet went through phases of popularity, with major revivals during the 1960s and 70s as part of the bohemian and hippie movements. Fast forward to today, crochet has once again found its spotlight, not only in garments but also in accessories like handbags. The crochet crossbody mini bag is a direct descendant of this enduring tradition, merging vintage charm with modern aesthetics.
What is a Crochet Crossbody Mini Bag?
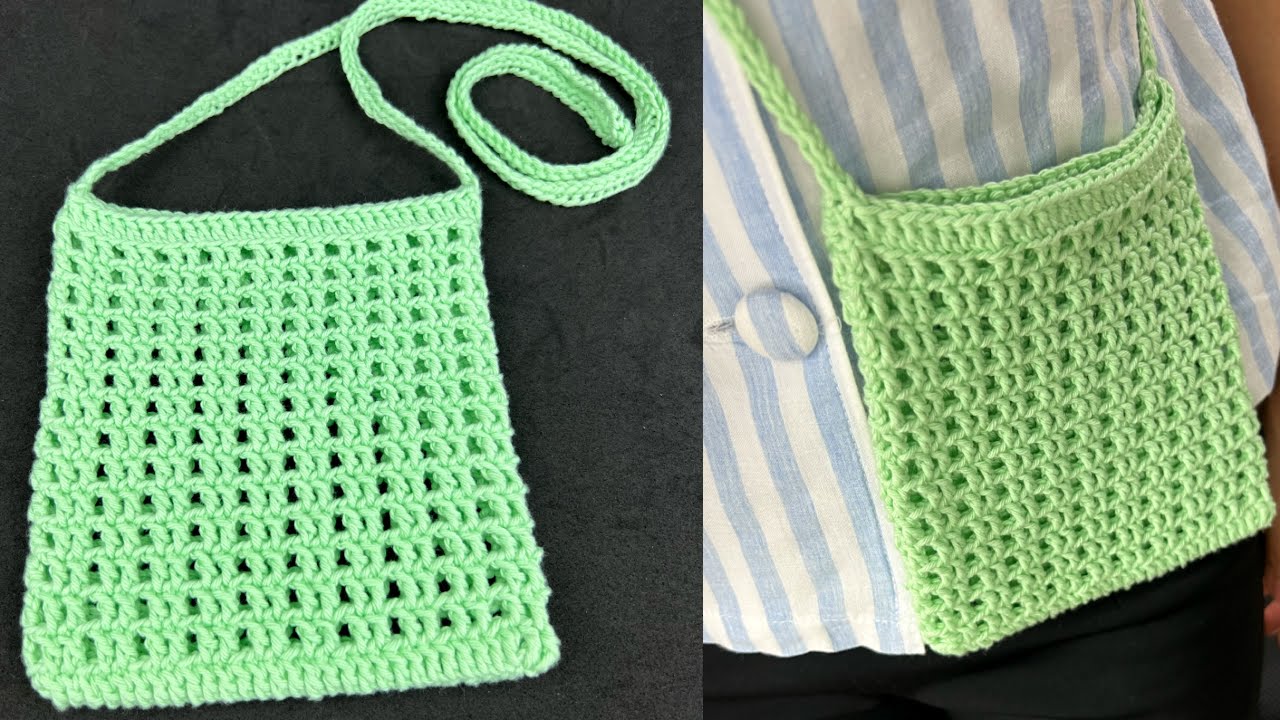
A crochet crossbody mini bag is a compact, hands-free bag typically worn across the body using a long strap. As the name suggests, the bag is crafted using crochet techniques, resulting in a fabric made from interlocking loops of yarn with a crochet hook. Its small size makes it ideal for carrying essentials like a phone, keys, and wallet, while its crossbody design ensures comfort and ease of use.
Key Features:
- Handmade construction: Often made by artisans or DIY enthusiasts.
- Compact size: Designed for minimal, everyday carry.
- Long strap: Typically worn diagonally across the chest for security and style.
- Textured aesthetic: The crochet stitches give the bag a rich, tactile surface.
Materials Used
One of the beauties of crocheting a mini bag is the variety of materials you can use to create it. These materials can significantly influence the bag’s look, feel, and durability.
1. Yarn
The most commonly used material for crocheting is yarn. For mini bags, the preferred yarns are:
- Cotton – Durable, lightweight, and holds shape well.
- Acrylic – Budget-friendly and available in a wide range of colors.
- T-shirt yarn – Upcycled from old tees, providing a chunky and sturdy texture.
- Jute or Hemp – Great for a rustic, natural look.
2. Hardware
To give the bag functionality and style, many makers incorporate:
- Metal clasps or buttons
- Magnetic snaps
- Zippers
- D-rings for adjustable straps
3. Straps
While some crochet the strap directly, others use:
- Leather straps for a premium finish
- Chain straps for a modern, elegant touch
- Woven or macramé straps for a boho vibe
🧶 How to Make a Crochet Crossbody Mini Bag (Beginner-Friendly Tutorial)
🧵 Materials You’ll Need:
| Item | Description |
|---|---|
| Yarn | Worsted weight cotton or acrylic yarn (approx. 100g) |
| Crochet Hook | Size 4.0mm (G-6) or as recommended for your yarn |
| Yarn Needle | For weaving in ends |
| Scissors | For trimming yarn |
| Stitch Markers | Optional, but helpful |
| Button / Magnetic Snap | For closure (optional) |
| Lining Fabric | Optional, for added structure |
| Strap hardware | D-rings and adjustable slider (optional) |
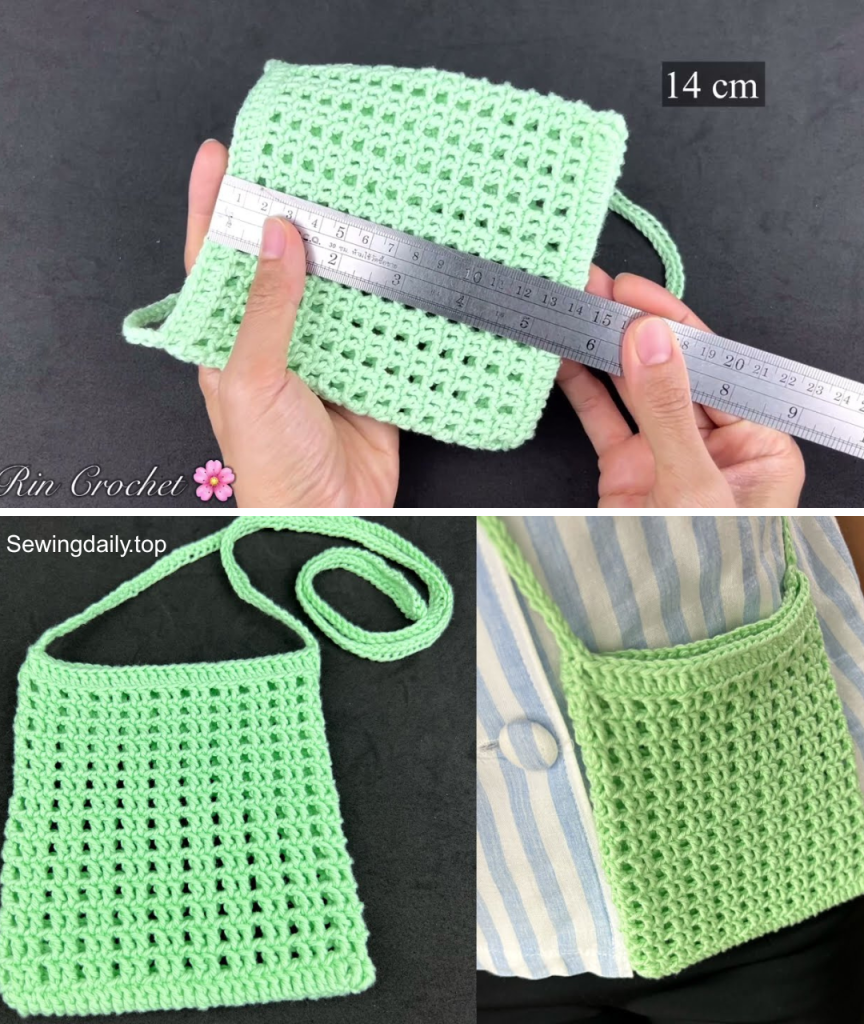
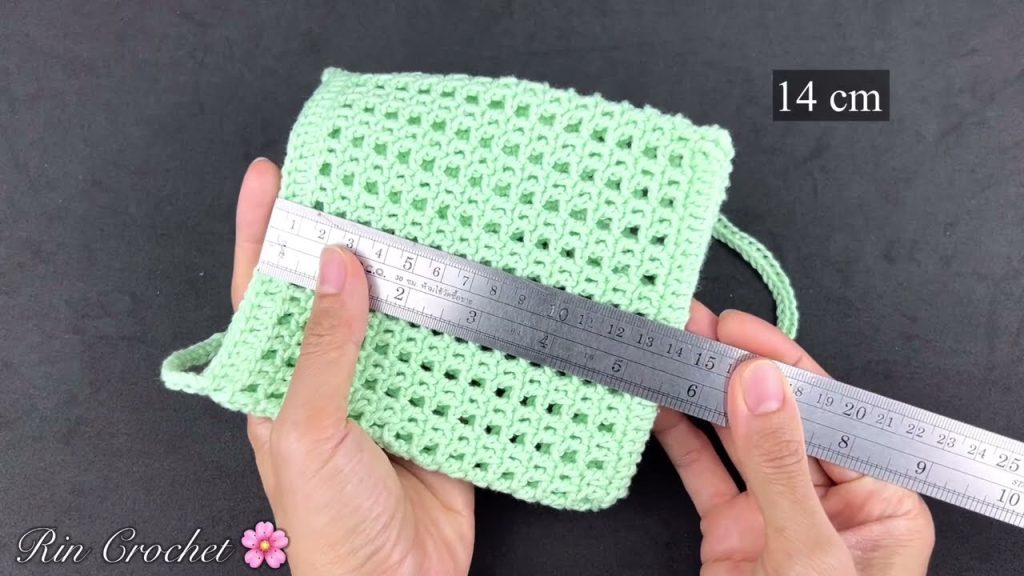
📏 Finished Size (Approx.)
- Width: 7 inches (18 cm)
- Height: 6 inches (15 cm)
- Strap: 40–50 inches (100–125 cm) or adjustable
🪡 Stitches & Abbreviations (U.S. Terms)
| Abbreviation | Stitch Name |
|---|---|
| ch | chain |
| sc | single crochet |
| hdc | half double crochet |
| sl st | slip stitch |
| st(s) | stitch(es) |
| rnd(s) | round(s) |
🧺 Step-by-Step Instructions
Step 1: Make the Base of the Bag (Oval Shape)
Round 1:
- Ch 21.
- In 2nd ch from hook, work 2 sc.
- Sc in next 18 ch.
- Work 4 sc in last ch (turning the work around).
- Sc in next 18 ch (on opposite side).
- 2 sc in last ch. Join with sl st to first sc. (44 sts)
Round 2:
- Ch 1.
- 2 sc in next st, sc in next 18 sts, 2 sc in next 4 sts, sc in next 18 sts, 2 sc in last 2 sts.
- Join with sl st. (52 sts)
Round 3 (Optional – for a wider base):
- Repeat the increase pattern on each corner to widen the oval.
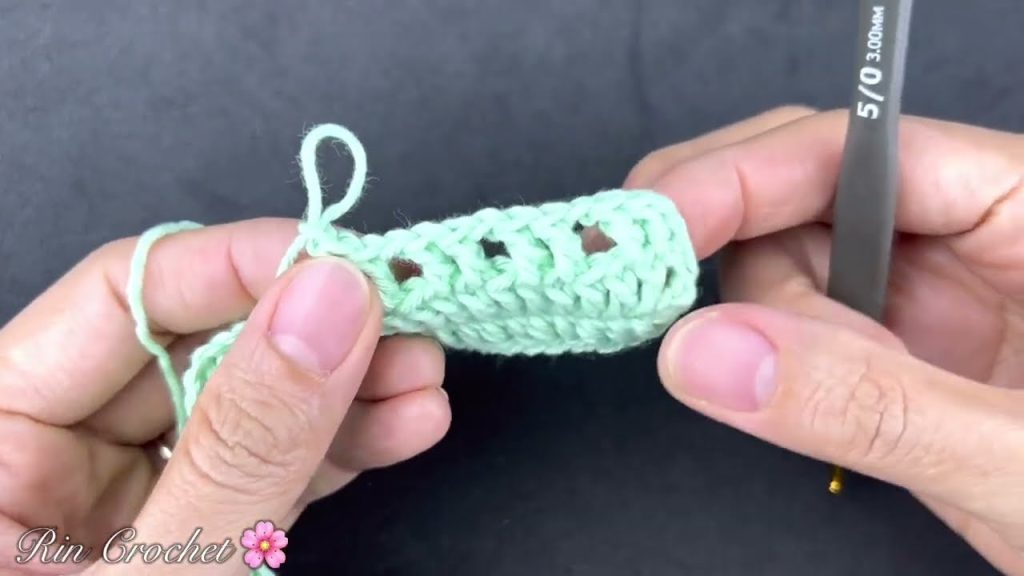
Step 2: Crochet the Body
From here, you’ll work in rounds without increasing.
Rounds 4–20:
- Ch 1.
- Sc in each st around.
- Join with sl st. (52 sts)
💡 Tip: You can switch to hdc for a taller, looser texture if you like.
Step 3: Create the Flap
You’ll now stop working in the round and work back and forth for the flap.
Row 1:
- From the joining point, count 26 sts across back side of the bag.
- Attach yarn and ch 1.
- Sc across 26 sts.
Rows 2–8:
- Ch 1, turn.
- Sc across.
Row 9 (Tapered edge for button flap):
- Ch 1, turn.
- Sc2tog, sc across to last 2 sts, sc2tog.
Repeat Row 9 until you have 4 sts left.
Last Row:
- Sc across. Fasten off.
(You can make a buttonhole in the center by doing: sc, ch 2, skip 2 sts, sc.)
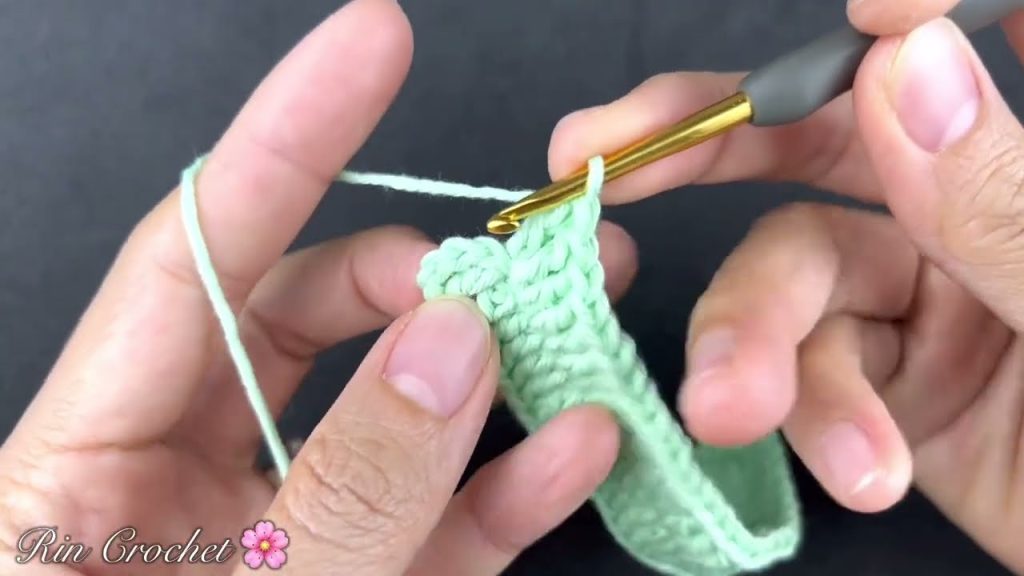
Step 4: Make the Strap
You have a few options:
Option 1: Crochet a Strap
- Ch 130 (or desired length).
- Turn, hdc in 2nd ch from hook and across.
- Fasten off.
💡 Optional: Crochet 2–3 rows for a thicker strap.
Option 2: Use a Leather or Macrame Strap
Attach it to the sides of the bag using D-rings or stitch it directly into the sides with yarn and a needle.
Step 5: Assemble and Finish
- Attach the Strap:
- Sew the strap ends to the inside of the bag on each side.
- Reinforce with several passes of yarn.
- Add a Closure:
- Sew a button or attach a magnetic snap under the flap.
- (Optional) Add a Fabric Lining:
- Cut fabric to match inside dimensions.
- Hem the top edge.
- Sew it to the inside with hand stitches or fabric glue.
- Weave in all ends with a yarn needle.
🌟 Optional Embellishments
- Tassels or fringe on the flap or bottom
- Granny square panels on the front
- Beads or embroidery on the body
- Color changes for stripes or color blocking
🧼 Care Instructions
- Spot clean with cold water and mild detergent.
- Air dry only.
- Store in a cool, dry place.
✅ Summary
| Step | Action |
|---|---|
| 1 | Crochet the base in an oval shape |
| 2 | Build the body in rounds |
| 3 | Add a flap with rows |
| 4 | Make and attach the strap |
| 5 | Add closures and optional lining |
Final Thoughts
The crochet crossbody mini bag represents a fusion of style, tradition, and practicality. Whether handmade or bought from a skilled artisan, it’s a statement piece that showcases craftsmanship and creativity. With the rise of slow fashion and eco-conscious consumerism, these bags are more than trendy accessories—they are symbols of sustainability and personal expression.
Whether you’re a maker or a buyer, embracing the crochet crossbody mini bag is a way to celebrate the beauty of handmade art in everyday life. It may be mini in size, but it’s mighty in impact.
Video tutorial: