 by
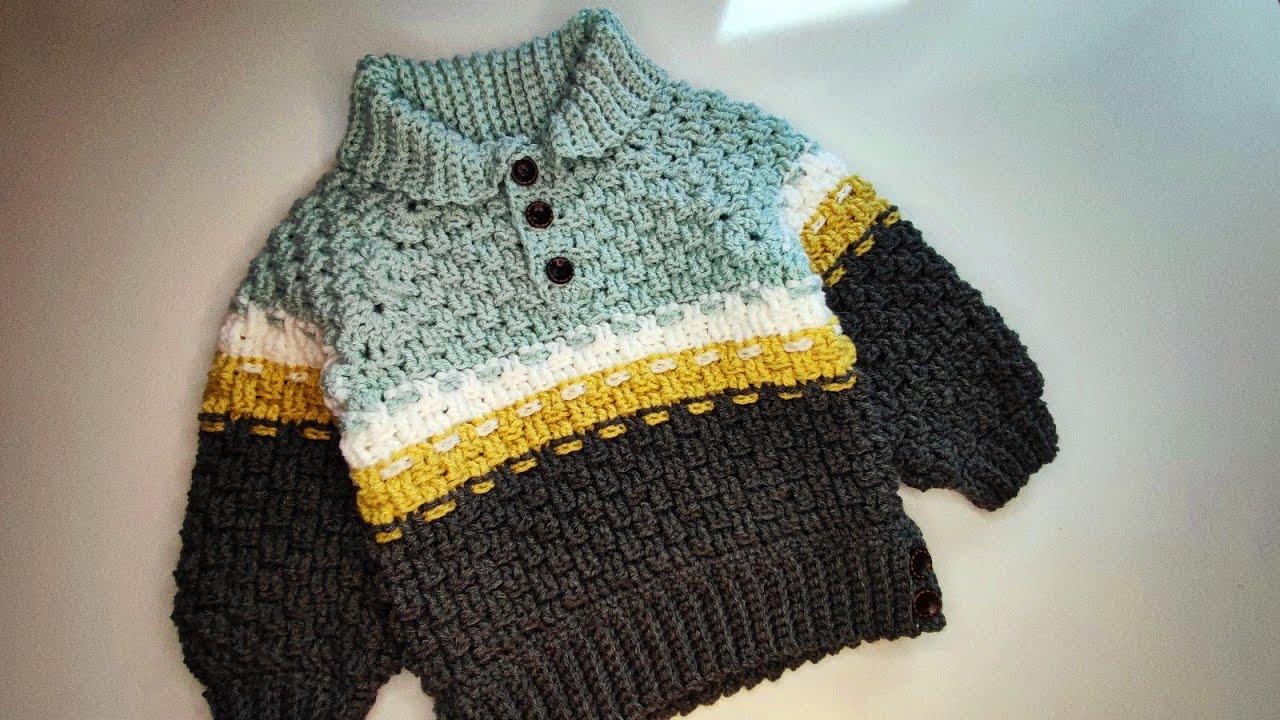
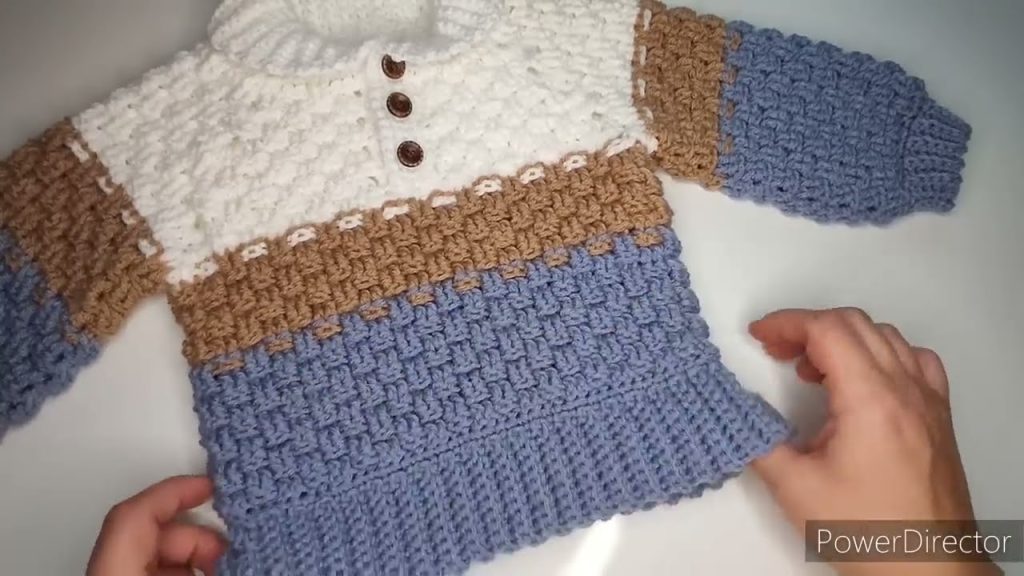
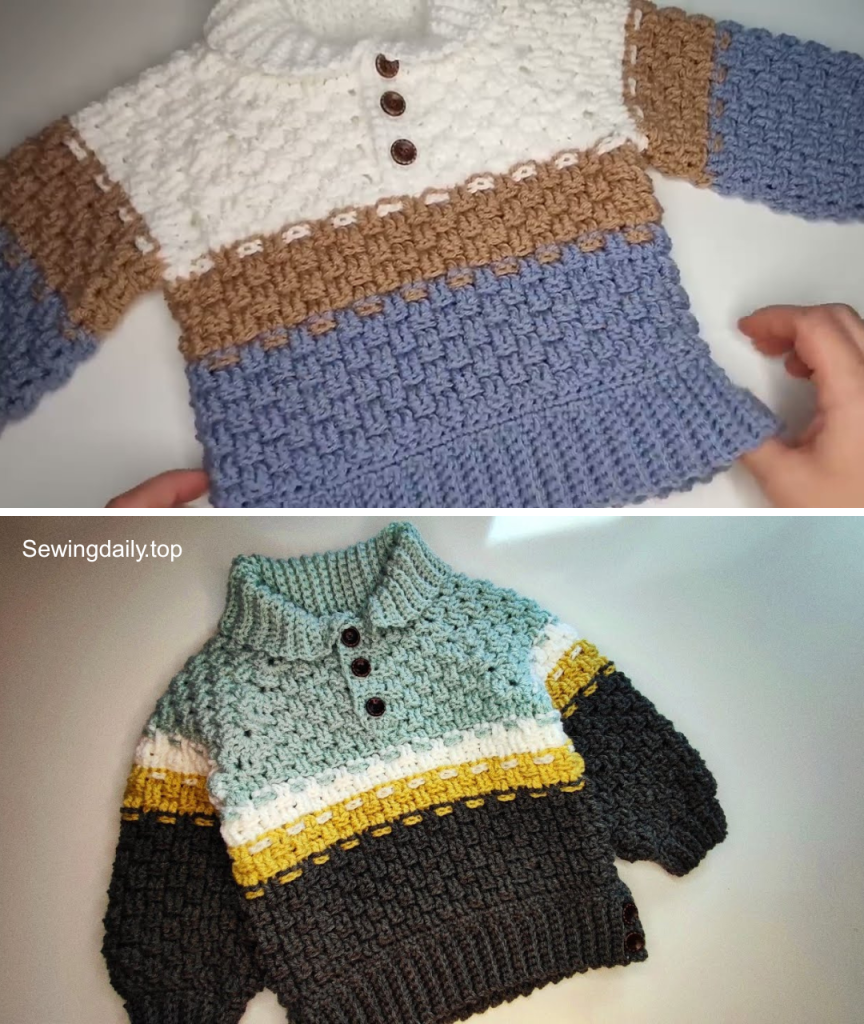
by A sweater crocheted for October feels just right: warm, cozy, and perfect layering over long‑sleeves or shirts. In this guide, you’ll learn how to make a stylish “October Sweater” for a boy, with instructions that allow adaptable sizing, varied yarn choices, and a rustic autumn vibe.

What Makes an “October Sweater”
Before you start, here are characteristics you might want to include to make it feel like an “October Sweater”:
- Slightly thick texture (for warmth, but not too bulky)
- Earthy or autumnal colors (mustard yellow, rust, brown, forest green, deep burgundy)
- Possibly ribbing or raised stitches for texture
- A comfortable neckline (crew, round, or a little wider)
- Sleeve length adapted to climate (full, 3/4, long)
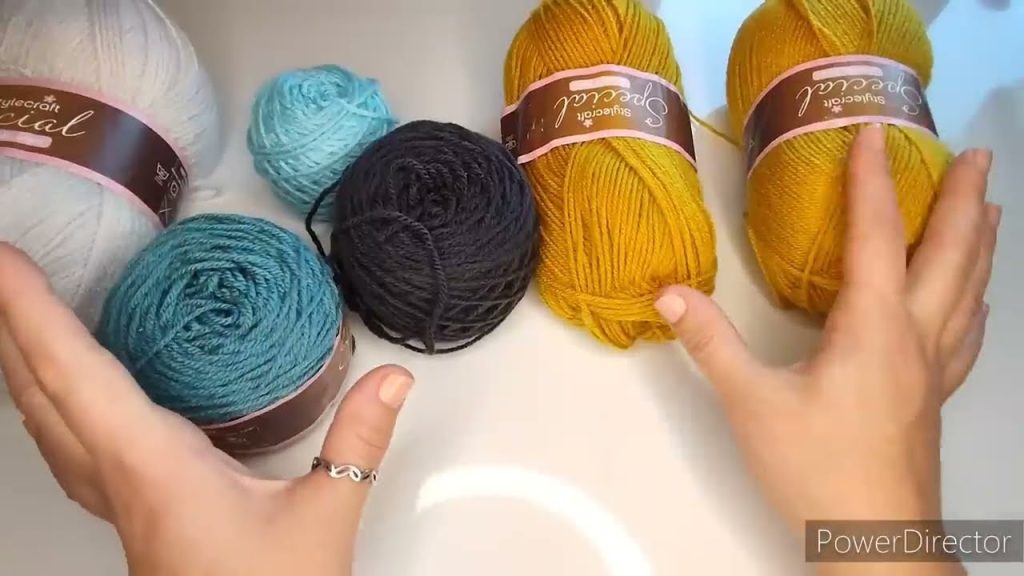
Materials & Tools
Here’s a suggested materials list. You’ll need to adapt quantities to the size you want.
| Item | Recommendation |
|---|---|
| Yarn | Worsted weight (Category 4) is good, or an aran weight for more warmth. Blends of wool, acrylic, or even mohair blends work. Use solid or semi‑solid colors to show texture. |
| Crochet Hook | Size appropriate for your yarn. Usually 5.0 mm to 6.5 mm, depending on how tight/loose you crochet. If you want a looser drape, use larger hook. |
| Notions | Stitch markers, tapestry needle, measuring tape, scissors. Possibly elastic or ribbed edging yarn if needed. |
| Gauge | Very important to get a sweater that fits. You’ll want to swatch. E.g., 14‑16 stitches x 20‑24 rows might give about 4″ x 4″ depending on stitch choice. Always block your swatch. |
Sizing & Measurements
To make this sweater fit well, take accurate measurements. For a boys’ sweater, typical measurements are:
- Chest circumference (plus ease)
- Waist circumference (if waist shaping)
- Shoulder‑to‑shoulder width
- Armhole depth
- Sleeve length (shoulder to wrist)
- Body length (neck down to desired hem)
Include some positive ease (sweater should be a bit larger than chest so it’s comfortable and easy to move). For boys, maybe 2‑3 inches of ease depending on yarn/bulk.
Basic Construction Plan
Here’s one way to build the sweater, step by step:
- Body / Back & Front Panels – You can either make them separately (back & front) or work sideways (one piece folded) depending on design.
- Sleeves – Work sleeves separately, then attach; or work in the round at the armhole if you prefer raglan or drop‑shoulder.
- Neckline – Depending on comfort, either a simple crew neck, ribbed neck, or a slightly wider opening.
- Edging & Ribbing – Hem, cuffs, and neckline can have ribbing (using back‑loop only stitches, front‑post / back‑post stitches, or half‑double crochet in BLO) to give a “pulled in” and cozy feel.
Stitch Choices & Texture Ideas
To give that autumn texture and a handmade look, here are stitch / pattern ideas:
- Half double crochet (hdc) in back loop only (BLO) for ribbing effect
- Raised stitches like front‑post / back‑post double crochet (FPDC / BPDC)
- Alpine stitch or waffle stitch for a thicker fabric
- Simple double crochet / single crochet combinations for easier knitting
- Stripes or panels of color change (e.g. one accent color on shoulders or sleeves)
Step‑by‑Step Instructions (Sample Pattern)
Below is a sample template you can follow. Adjust counts for size.
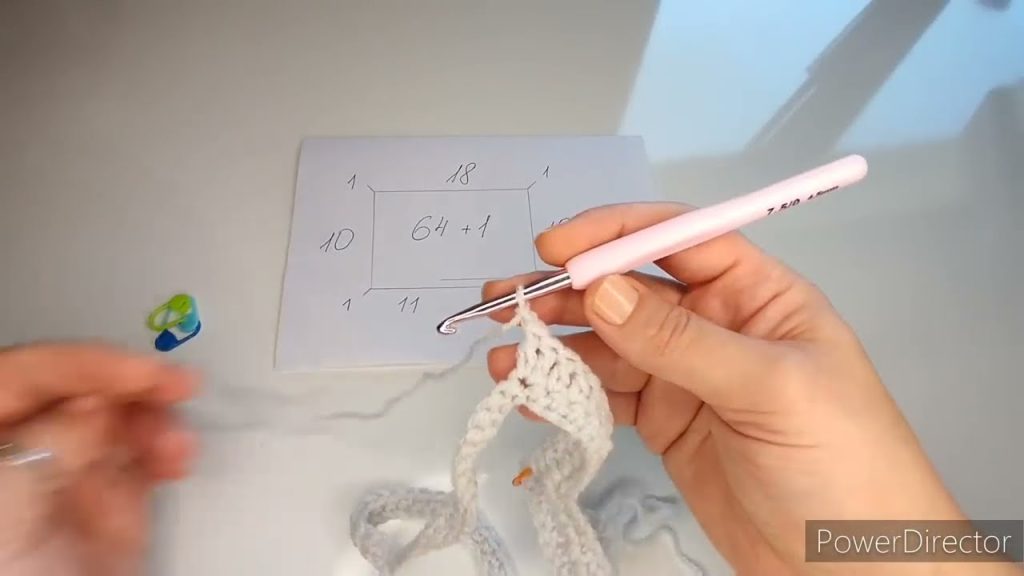
Step 1: Swatch & Gauge
Make a 4″ × 4″ (10 cm × 10 cm) swatch using your chosen stitch (for example, hdc in BLO, or alternate rows of dc / sc) to check gauge. Block it by washing lightly and laying flat to dry. Count stitches per inch (horizontal) and rows per inch (vertical).
From this, you’ll calculate how many stitches to chain for chest, etc.
Step 2: Back Panel
- Chain the number of stitches that correspond to the desired chest width (divided by two if you do separate front & back), plus any edge/selvage stitches.
- Work in your stitch of choice (e.g. hdc, or dc / sc combo) for rows until you reach the armhole depth. For example, if the armhole depth is 8 in (20 cm) from underarm.
- At that point, you can leave that panel finished.
Step 3: Front Panel
Repeat same number of stitches as back (for balanced sizing). Work same stitch pattern. For neckline shaping, begin to shape at the top few rows if desired (for example, leave middle stitches unworked or gradually reduce stitches at the center).
Step 4: Join Panels & Body
After you have front & back, stitch shoulder seams (if separate). Then for the body, you can join underarms and work down to the bottom hem, continuing the stitch pattern.
Alternatively, you can do the body sideways: one long rectangular panel that gets folded and seamed – depending on the design.
Step 5: Sleeves
- Option A: Sew sleeves on as separate rectangles or tubes. Work from cuff up, then attach to armholes.
- Option B: Crochet in the round for drop‑shoulder or raglan type design. For raglan, increase at armhole (if separate) and work increasing rows or rounds.
Length: check measurement shoulder to wrist. Also, consider cuff ribbing if desired (using BLO or post stitches).
Step 6: Neckline & Ribbing Edges
- Once body and sleeves are attached, crochet the neckline edge. For a classic crew neck, pick up stitches around neckline and work a few rounds of ribbing or simple sc / hdc rounds.
- Add ribbing to cuffs and bottom hem if desired – e.g. working sc in BLO or using FP/BP stitches to get stretchy ribs.
Step 7: Finishing
- Weave in all ends neatly.
- Block the finished sweater: gently wash, shape, pin to measured width & length, let dry. This softens stitches and evens tensions.
- Optional: add decorative touches – patches on elbows, color‑blocking, stripes.
Example Walk‑Through / Hypothetical Size
Here’s a hypothetical example: Boy age ~7, chest ~25 in, with 2 in ease = 27 in chest. Using a gauge of 14 stitches per 4 in, so ~3.5 sts/in.
- Front / Back width: ~27 in * (sts/in) = about 95 stitches for full chest. If doing separate back & front, each ~47‑48 stitches plus selvedge.
- Length: From shoulder to hem, maybe 18 in.
- Armhole depth: approx. 7‑8 in.
- Sleeve length: shoulder to wrist ~17 in.
You would chain for panel width accordingly, work stitch pattern for ~11‑12 in to armholes, shape front neckline if desired, then join and continue body. Sleeves either worked separately or joined.
Tips & Common Pitfalls
- Fit is everything: Always measure and make swatches—different crochets have different tensions.
- Ease matters: If yarn is fuzzy or thick, add more ease.
- Neck opening: Be careful not to make neckline too tight—try it on if possible.
- Yarn choice: A too‑stiff yarn will hurt comfort; too loose or drapey might lose shape unless ribbing is added.
- Seaming: If your panels are wide and large, seaming is easier if you use mattress stitch or whipstitch with same yarn. Use long tails.
- Sleeves length: Always test on child (or use measurement) rather than assuming standard.
Design Variations & Customization
- Color stripes or accents – maybe highlight neckline, cuffs, or bottom hem.
- Textured stitches – waffle stitch, alpine, bobble for autumn vibe.
- Hoodie version – add a hood.
- Pocket – patch pocket or kangaroo pocket.
- Buttons, zippers, or decorative closures.
Estimated Time & Yarn Usage
Depending on size and stitch complexity:
- Smaller size (age 4‑6): maybe 500‑800 yards of worsted weight yarn.
- Larger size: 1000 yards plus.
- Time: For an “easy” sweater, maybe 20‑30 hours of work (depending on speed) – spread over days or weekends.
Wrapping Up
Creating a boys’ “October Sweater” is a rewarding project. It’s not just about stitches, but about making something cozy, stylish, and personal. Whether you make it for a child, as a gift, or just for the fun of crafting, the steps above will guide you through.
Video tutorial: