 by
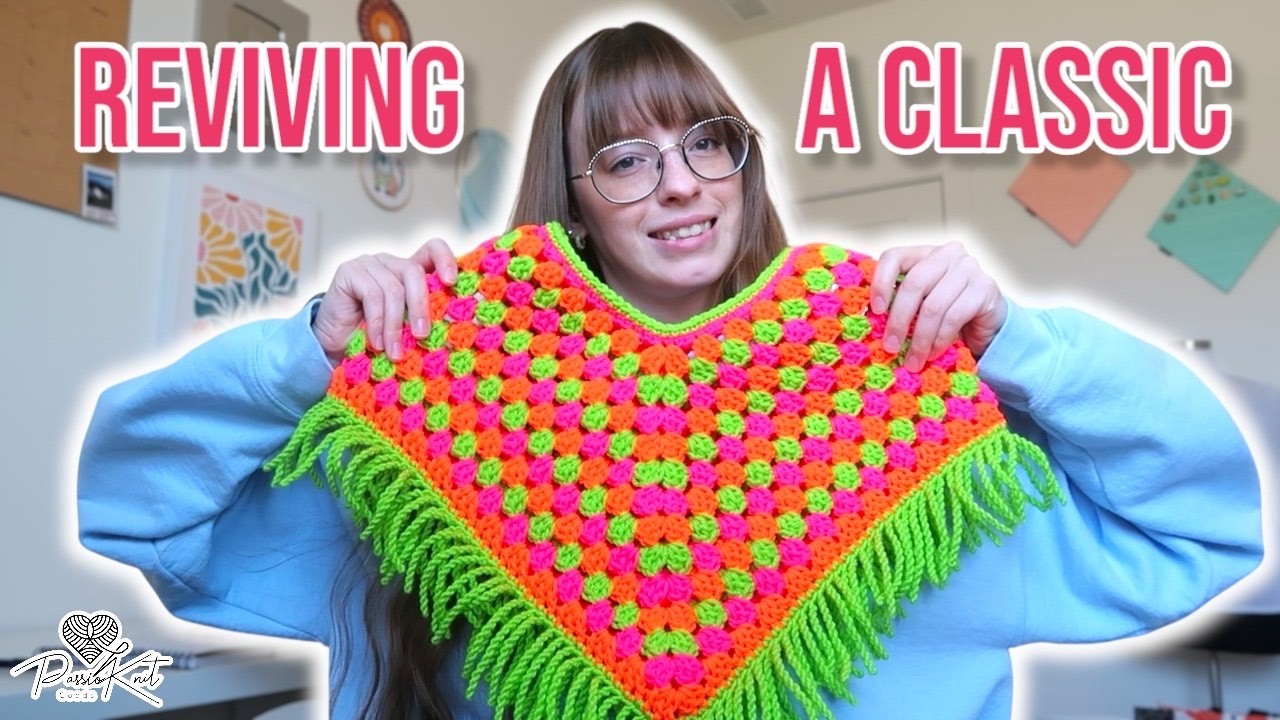
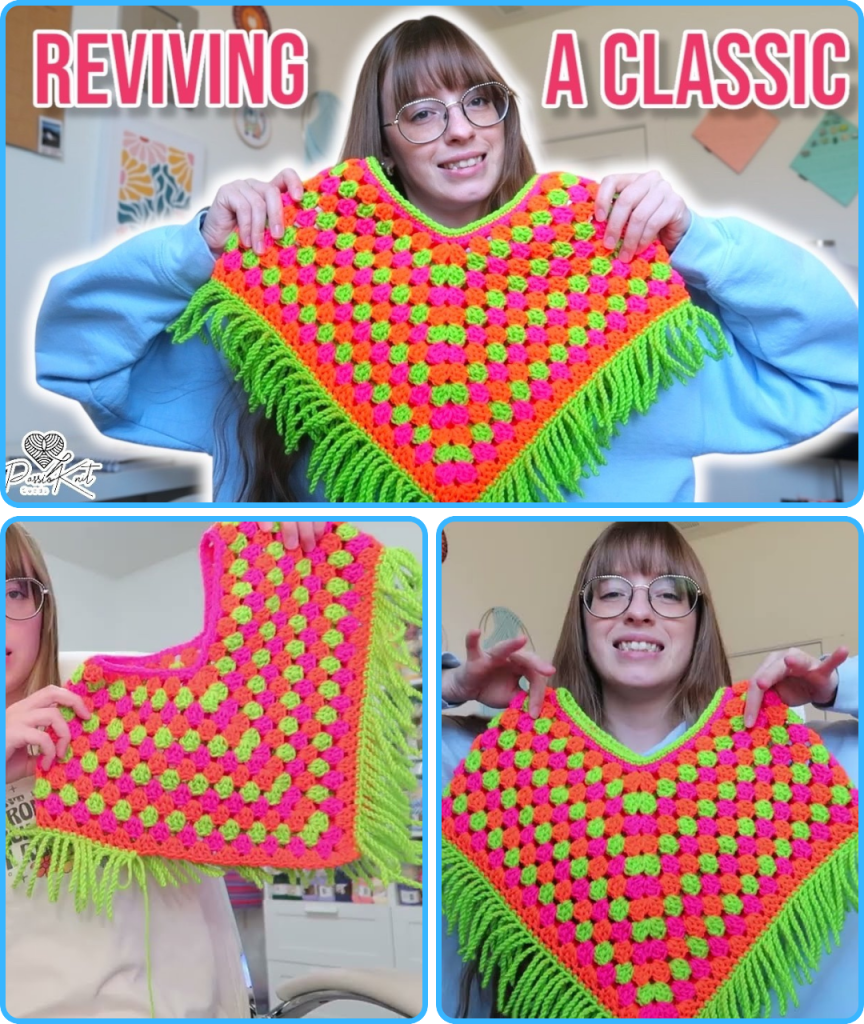
by Hello, fellow makers! Are you ready to create a fun, colorful, and unique garment for a special little one in your life? I’m excited to share this detailed pattern for the Sunset Poncho, a vibrant and stylish piece that’s perfect for a cool evening, a special event, or just for adding a pop of color to an outfit. This pattern is inspired by a design that uses a classic granny stitch, which is a fantastic project for a variety of skill levels.

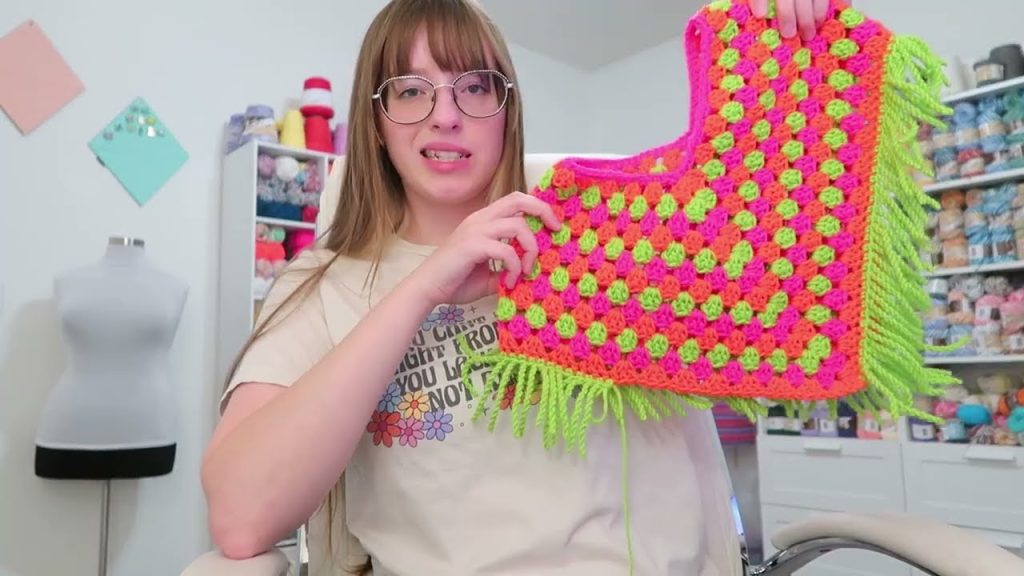
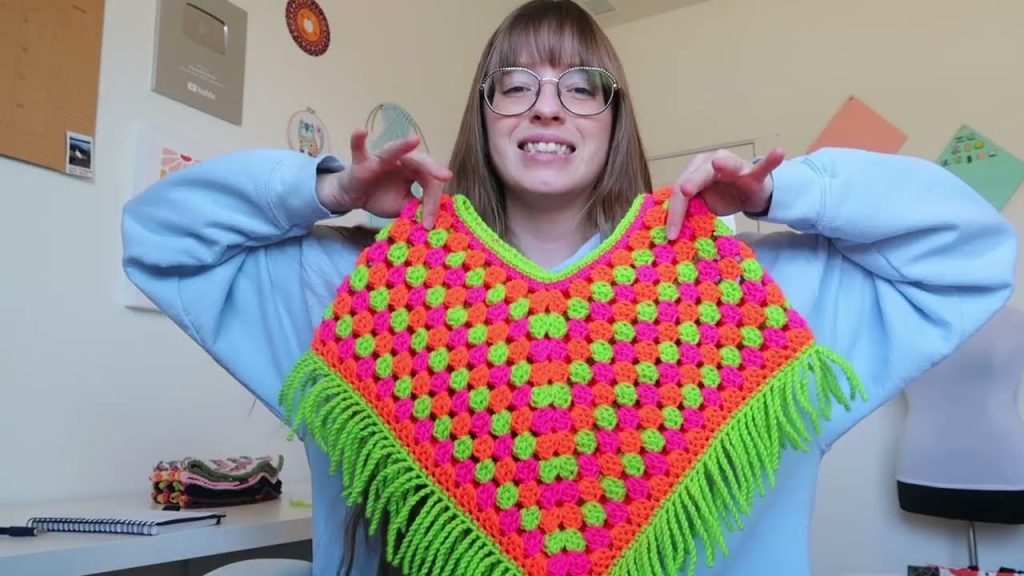
The beauty of this poncho lies in its simple construction. We’ll start at the neckline and work our way down in a continuous round, creating a “circle with two corners” shape that gives it a beautiful drape. The granny stitch is quick to work up, so you’ll have a finished garment in no time! We’ll also add a few finishing touches, including a ribbed neckline and some playful tassels, to give it a polished and professional look. Let’s grab our hooks and yarn and get ready to create something beautiful!
Why You’ll Love Crocheting This Poncho:
- Stunning Design: The classic granny stitch pattern and unique construction create a beautiful, elegant look.
- Colorful & Versatile: Easily customize the look by using a single color, or mix and match a variety of your favorite yarns.
- Skill-Building: You’ll practice working in the round and mastering the granny stitch.
- Perfect for Gifting: A handmade poncho is a thoughtful and cherished gift that will be treasured for years to come.
What You’ll Need:
- Yarn: Worsted-weight yarn in your favorite colors. The video uses bright, neon-colored yarns, but any colors will work!
- Crochet Hook: A 6mm crochet hook.
- Yarn Needle (Tapestry Needle): For weaving in all those ends.
- Scissors:
Essential Crochet Abbreviations:
- ch: chain
- sl st: slip stitch
- sc: single crochet
- dc: double crochet
- st(s): stitch(es)
- cl: cluster (
3 dcin the same space) - sp: space
- FO: fasten off
The Pattern: The Sunset Poncho
This poncho is worked from the top down, starting at the neckline. The pattern is designed for a child, but you can adjust the size by continuing to add more rounds.
Part 1: The Neckline
- Foundation Chain:
Ch 54. - Joining:
Sl stto the firstchto form a ring. Be careful not to twist your chain. - Round 1:
Ch 3(counts as firstdc).Dcin the nextch.Ch 1.Dcin the samechas the last stitch.Dcin the next 12ch.Ch 1.Dcin the samechas the last stitch.Dcin the next 15ch.Ch 1.Dcin the samechas the last stitch.Dcin the next 12ch.Ch 1.Dcin the samechas the last stitch.Dcin the last 7ch.Sl stto the top of the initialch 3to join the round.
Part 2: The Body
- Round 2:
Ch 3(counts as firstdc).Dcin the firstch 1sp.Ch 2for the corner.Dcin the samech 1sp.Dcin eachdcfrom the previous round until you reach the nextch 1sp. In each corner, make(dc, ch 2, dc).Sl stto the top of the initialch 3to join. - Round 3 (Granny Stitch):
Ch 3(counts as firstdc). Make aclin the firstch 2sp.Ch 2for the corner. Make aclin the samech 2sp.Ch 1.Skthe next 3 sts.Clin the nextspbetween the stitches. Repeat this pattern, making aclin thespbetween the stitches until you reach the next corner. In each of the fourch 2corner spaces, make(cl, ch 2, cl).Sl stto the top of the initialch 3to join. - Repeat Round 3 until the poncho reaches your desired length.
Part 3: Final Touches
- Neckline Border:
Ch 1. Workscaround the neckline to create a more polished, tighter edge.Sl stto the firstscto join. - Tassels: For a fun, unique tassel, cut a long length of yarn (about 9 inches). Pull the yarn into a loop, and twist it tightly. Then, fold the loop in half and let it snap together to form a twisted tassel. Attach these tassels to the bottom edge of the poncho.
- Weave in All Ends: Use your yarn needle to weave in all loose ends securely.
Congratulations, you’ve created a beautiful and unique Sunset Poncho! It’s now ready for a happy new owner. Happy hooking!
Bonus Pattern: The Sunset Mesh Market Bag
This is a fun and easy pattern that works up quickly, perfect for a reusable shopping bag.
What You’ll Need:
- Yarn: Medium-weight cotton yarn. The video uses a yarn called “Ahoy” and a separate orange yarn for the straps.
- Crochet Hook: A 6mm crochet hook.
- Yarn Needle (Tapestry Needle): For weaving in all those ends.
- Scissors:
The Pattern: The Sunset Mesh Market Bag
- Foundation:
Ch 50, or until the chain reaches your desired bag width. - Base: Work in
scfor a few rows to create a flat rectangular base for your bag. - Body (Mesh):
Ch 4,sk 1 st,dcin the nextst. Repeat this pattern around the entire bag, working in a continuous round. - Repeat the mesh pattern until the bag reaches your desired height.
- Handles: Create two long, flat strips of
scto use as the handles. - Finishing: Sew the handles to the top of the bag. Weave in all loose ends.
Congratulations, you’ve created a beautiful and unique Sunset Mesh Market Bag! Happy hooking!
Video tutorial: