by
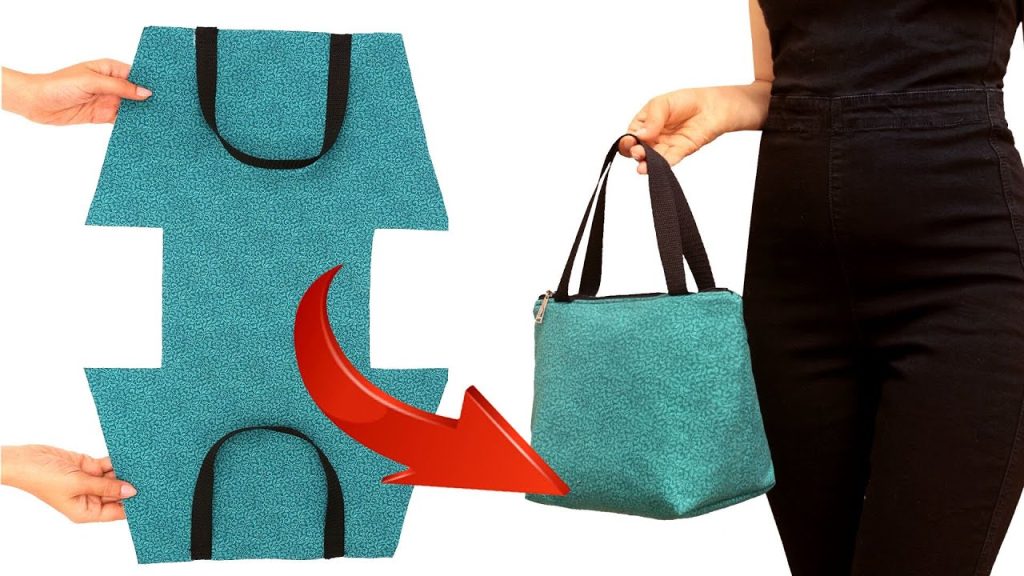
by Imagine creating a perfectly structured, boxy handbag with a wide, stable base and a secure zippered top—all constructed from a single, seamless piece of fabric! This detailed tutorial, inspired by the fantastic “How to sew a bag on a zip with a wide bottom out of one piece of fabric!” video from Miarti – Reuse, will guide you through creating this charming and functional zipper bag. The brilliance of this design lies in its ultra-efficient construction, which uses no side or base seams, resulting in maximum sturdiness and a professional finish.
Get ready to transform simple fabric and interfacing into a polished, high-capacity accessory that’s perfect for cosmetics, crafts, or simply organizing your tote bag!
Why This “Wide-Base Zip-Top” Bag Will Be Your New Favorite
This design is a masterclass in minimalist construction and maximum stability, offering several compelling reasons to make it your next sewing project:
- Seamless Stability: Constructed from one main piece, the bag has no seams on the sides or bottom, making it incredibly strong and stable.
- Easy Construction: The pattern relies solely on cutting two rectangular pieces (exterior/interfacing and lining), making assembly fast and beginner-friendly.
- Structured & Boxy: The thick interfacing is key to giving the bag a firm, boxy shape that holds its contents securely.
- High Capacity: The wide, flat base created by the clever folding technique allows for maximum storage.
- Professional Finish: The method for installing the zipper ensures a clean, recessed top and a durable closure.
- Fast & Rewarding: You can complete this entire project in a very short amount of time!
Materials You’ll Need:
Gathering your materials efficiently is the first step. The video uses a durable canvas-like fabric for the exterior and a light-colored lining.
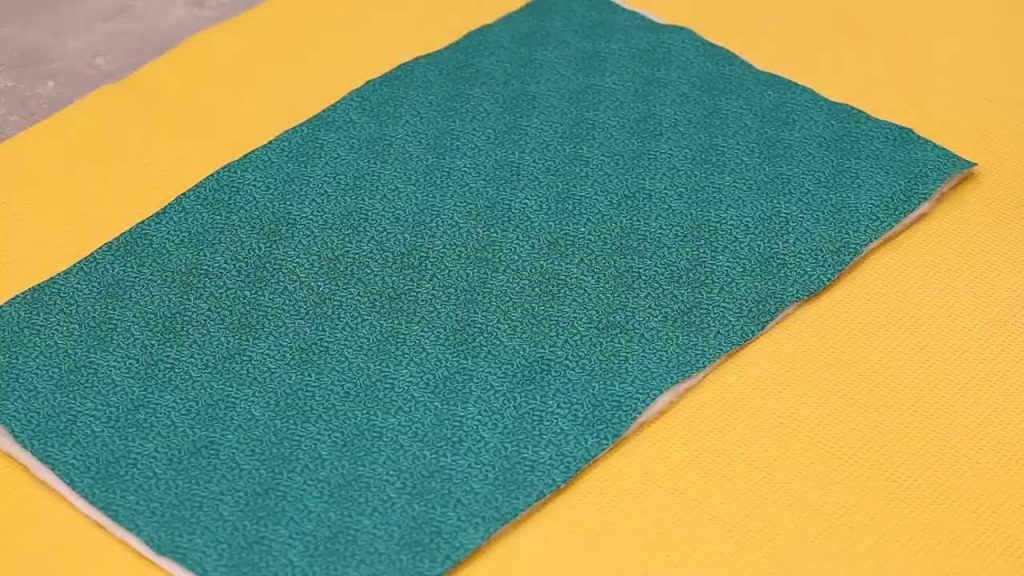
- Main Exterior Fabric (Sturdy Canvas/Cotton): 1 piece, 50 cm x 30 cm. (The entire bag body is cut from this single piece.)
- Lining Fabric (Cotton): 1 piece, 50 cm x 30 cm.
- Thick Fusible Interfacing/Felt Wadding: 1 piece, 50 cm x 30 cm. (Crucial for the bag’s structure; use heavy fusible fleece or dense interfacing.)
- Zipper: 1 piece, 40 cm long. (A sturdy zipper in a coordinating color.)
- Matching Thread: High-quality polyester thread.
- Basic Sewing Tools: Sewing machine, fabric scissors or rotary cutter, ruler, fabric marker, pins or clips, iron, and ironing board.

Step-by-Step Tutorial: Crafting Your “Wide-Base Zip-Top” Bag
This tutorial is broken down into four efficient phases: preparing the structured panels, installing the zipper, sewing the perimeter, and the final folding/shaping. All seam allowances are 1 cm unless otherwise stated.
Phase 1: Preparing the Structured Panels
The first phase involves creating a single, stabilized unit for the bag body.
- Layer and Fuse the Exterior: Take the 50 cm x 30 cm Exterior Fabric. Iron the Thick Fusible Interfacing/Felt onto the wrong side, following the manufacturer’s instructions. This creates one single, stiff, structured panel.
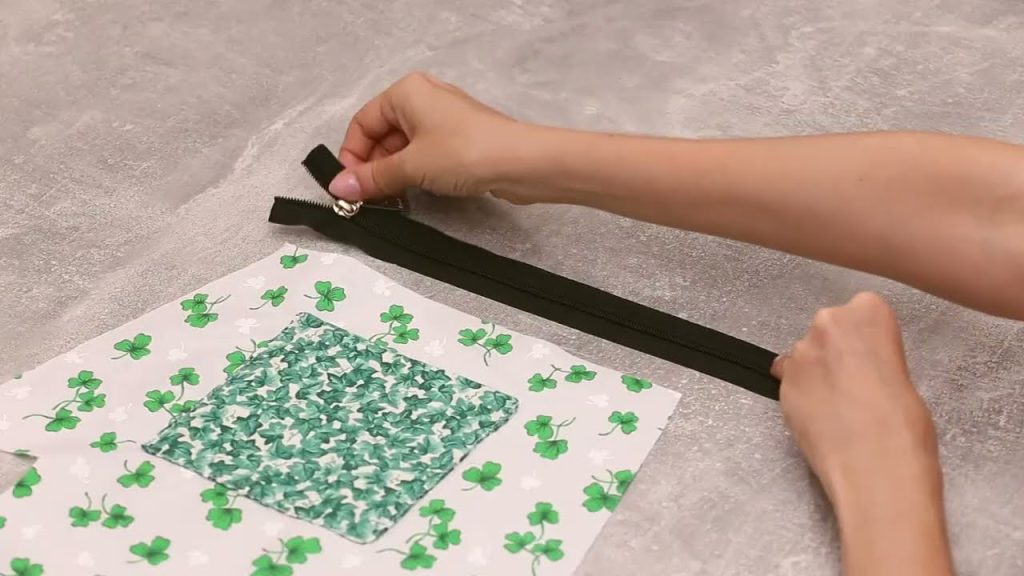
- Mark the Zipper Opening: Fold the fused panel in half along the 50 cm edge (creating a 25 cm x 30 cm panel). This fold will become the bottom of your bag. Now, fold the panel in half again along the 30 cm edge to find the center line where the zipper will be. Cut a straight line along this center, exactly the length of your zipper (40 cm). This creates a 40 cm opening for the zipper.
Phase 2: Installing the Zipper and Joining the Lining
The zipper is secured, and the lining is attached to the exterior.
- Attach Zipper to Exterior: Center and pin the 40 cm Zipper into the 40 cm opening on the exterior panel, right sides facing (zipper tape to exterior fabric). Stitch all around the zipper opening to secure the zipper in place.
- Pin Lining to Exterior: Place the 50 cm x 30 cm Lining Fabric on top of the Exterior Panel, right sides together (the zipper is now sandwiched inside). Pin all around the four 50 cm and 30 cm raw edges.
- Sew Perimeter: Stitch all around the entire perimeter of the square. Leave a 15 cm opening along one of the long 50 cm edges for turning.
- Clip Corners: Trim the seam allowances at all four corners to reduce bulk.
- Turn and Press: Unzip the zipper. Reach into the turning hole and pull the entire square right side out. Stitch the turning hole closed (by machine or hand). Press the entire square flat, ensuring the edges are crisp.
Phase 3: Creating the Base and Final Shape
This is the clever step where the seamless base and boxy sides are formed by internal stitching.
- Find the Bottom Fold: Fold the finished 50 cm x 30 cm rectangle in half along the 50 cm length (zippered edge to zippered edge) and press the fold sharply. This fold creates the clean, seamless base of the bag.
- Mark Side Box: Lay the folded bag flat. This bag now measures 25 cm (height) x 30 cm (width). The sides are the 25 cm edges.
- Create Boxed Corners: Measure and mark 4 cm up from the bottom fold on both 25 cm side edges. Then, mark 4 cm in from the side edge on the bottom fold. These points define the corner box.
- Stitch the Folds: Pinch the side of the bag at one of the corner marks, flattening the fabric so the side fold aligns with the bottom fold. Pin securely and stitch a straight line across this triangular fold. This stitch is placed 5 cm up from the fold (or whatever distance gives you a defined base width). Repeat this stitching on all four corners (two exterior, two lining). This creates the boxy shape and wide base.
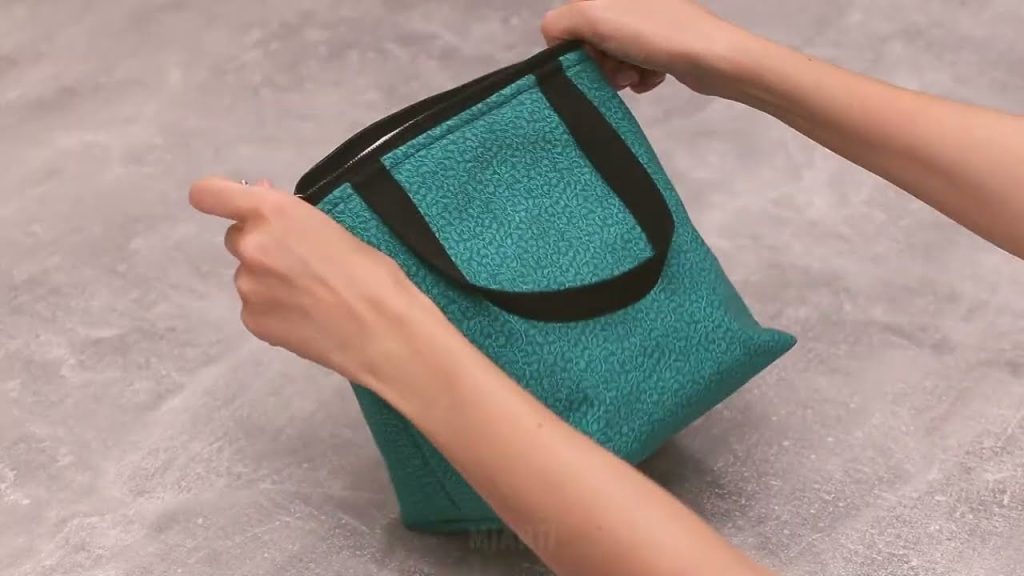
Phase 4: Finishing the Top
The final steps secure the side folds at the top for a boxy opening.
- Fold Top Corners: At the top opening (the zipper), fold the stitched corner triangles inward toward the lining. This creates the square top opening.
- Stitch Top Corners (Optional but Recommended): To hold the top box shape, carefully topstitch the fabric down near the zipper ends where the corner folds occur. Reinforce with a few backstitches.
- Add Wrist Strap (Optional): Attach a small loop or D-ring near one of the zipper ends for an optional wrist strap or tassel.

Your unique “Wide-Base Zip-Top” Handbag is complete! This structured, fast, and elegant accessory is ready to organize your life with style.
Video tutorial: