by
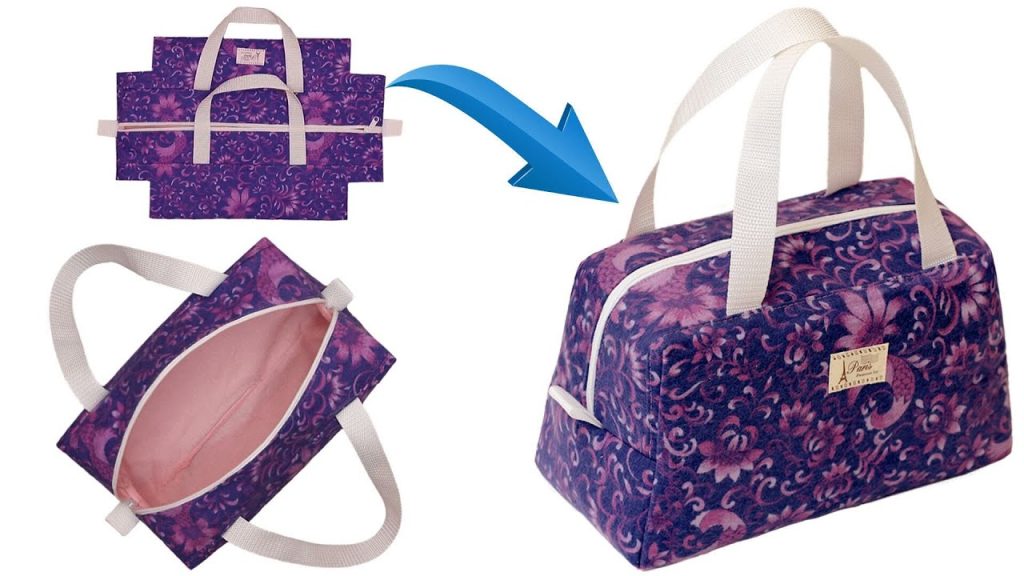
by Imagine a sleek, structured handbag with a secure zippered top and a surprisingly sophisticated shape—all made with minimal sewing steps! This detailed tutorial, inspired by the ingenious “The easiest way to sew a stylish bag simply and quickly!” video from Miarti – Reuse, will guide you through creating a charming and functional zippered pouch-style bag. The brilliance of this design lies in its ultra-simple construction: it uses a single exterior piece and a single lining piece, making it incredibly fast and perfect for beginners.
Get ready to transform two pieces of fabric into a stylish accessory that’s ideal for carrying essentials, or even as a chic organizer inside a larger tote.
Why This “Quick-Sew Chic” Bag Will Be Your New Favorite Project
This design is a masterclass in efficiency and style, offering several compelling reasons to make it your next sewing project:
- Lightning Fast: The minimal pattern pieces and straightforward assembly method mean you can finish this bag in under an hour.
- Structured Shape: The use of fusible interfacing gives the bag a lovely, firm shape that looks professionally made.
- Secure & Practical: A top-mounted zipper ensures your contents are always safe, making it perfect for phones, wallets, and keys.
- Beginner-Friendly: The steps are incredibly simple—it’s mostly straight stitching, ideal for those new to sewing bags.
- High Impact, Low Effort: Achieve a sophisticated, polished look without complex piecing or techniques.
- Customizable Style: Easily adapt the size and choose vibrant patterns or elegant solids to match any style.
Materials You’ll Need:
Gathering your materials efficiently is the first step to a successful and enjoyable sewing experience. The video uses a beautiful floral pattern for the exterior and a light solid color for the lining.
- Exterior Fabric (Sturdy Cotton/Canvas): 1 piece, 32 cm x 42 cm. (Choose a medium-weight cotton, canvas, or lightweight denim for durability.)
- Lining Fabric (Cotton): 1 piece, 32 cm x 42 cm. (A soft, lightweight cotton works well.)
- Fusible Interfacing: 1 piece, 32 cm x 42 cm. (Medium-weight fusible fleece or heavy-duty interfacing is crucial for the bag’s structure and body.)
- Zipper: 1 piece, 30 cm long. (A sturdy nylon coil zipper in a coordinating color.)
- Strap Webbing/Fabric: 1 piece, 30 cm long x 3 cm wide. (You can use pre-made webbing or create your own sturdy fabric strip.)
- Swivel Hook (or small D-Ring): 1 piece. (To attach the wrist strap.)
- Matching Thread: High-quality polyester thread.
- Basic Sewing Tools: Sewing machine, fabric scissors or rotary cutter, ruler, fabric marker, pins or clips, iron, and ironing board.
Step-by-Step Tutorial: Crafting Your “Zippered Pouch” Handbag
This tutorial is broken down into three phases: preparing the fabric, installing the zipper, and assembling the final bag shape. All seam allowances are 1 cm unless otherwise stated.
Phase 1: Preparing the Fabric & Strap
The entire bag body and lining are prepared before assembly, making the final steps very fast.
- Fuse Interfacing: Iron the 32 cm x 42 cm Fusible Interfacing onto the wrong side of the 32 cm x 42 cm Exterior Fabric, following the manufacturer’s instructions. This creates the stiff, structured exterior piece.
- Prepare the Strap:
- Take your 30 cm x 3 cm strap/webbing. If using fabric, fold the raw edges inward, press, and topstitch down both long edges to create a 30 cm strap.
- Thread one end of the strap through the swivel hook (or D-Ring). Fold the end over by about 2 cm and stitch it down firmly to secure the hook.
- Set the prepared strap aside.
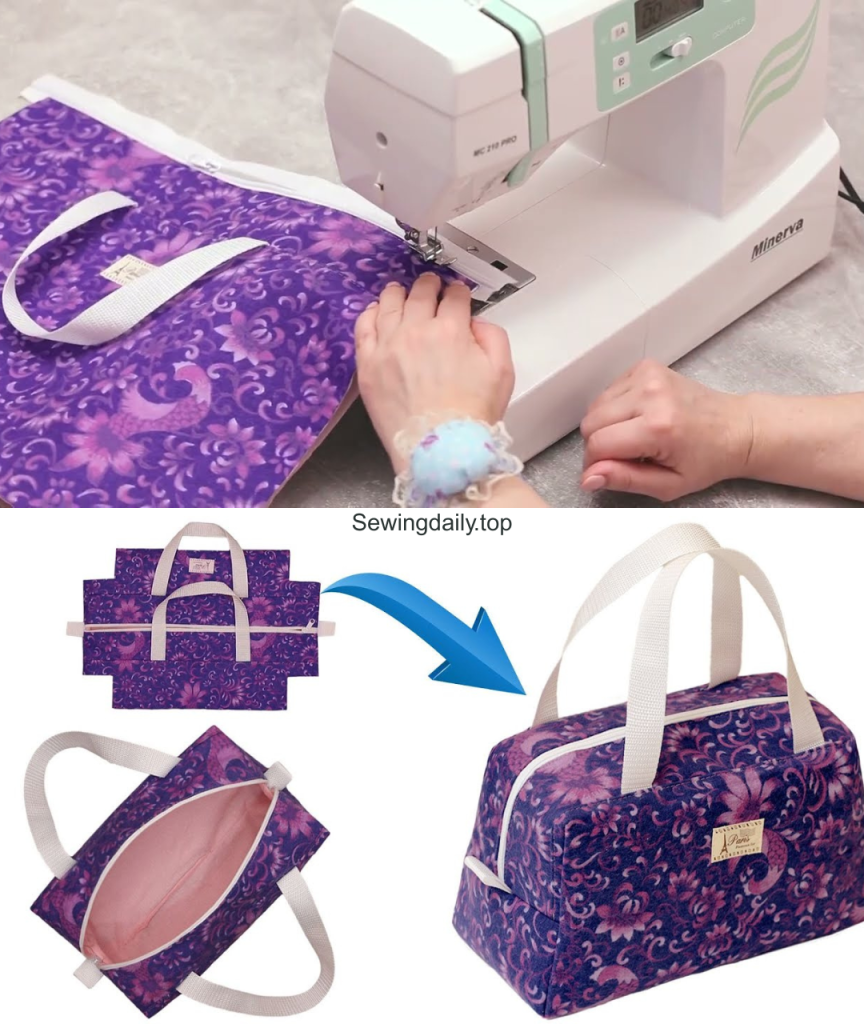
Phase 2: Installing the Zipper
The zipper is attached to the top edge of both the exterior and the lining pieces.
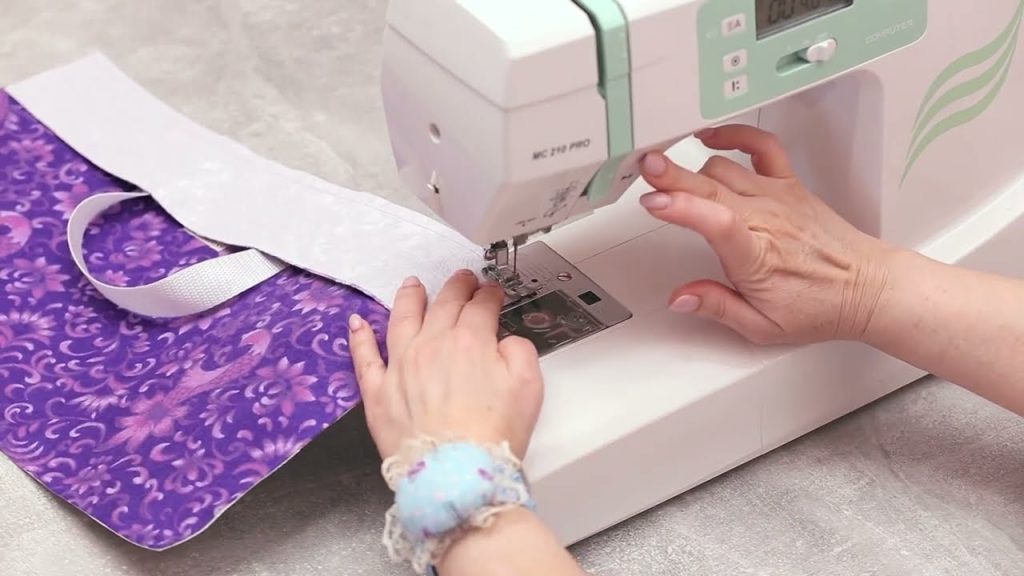
- Pin Zipper to Exterior: Place the Exterior Piece right side up. Lay the 30 cm Zipper along the 42 cm top edge, right side down (zipper teeth facing the fabric). The zipper should be centered along the edge with about 6 cm excess fabric on either side. Pin securely.
- Stitch Zipper: Using a zipper foot, stitch the zipper tape to the exterior fabric along the pinned edge.
- Pin Zipper to Lining: Take the Lining Piece. Lay it right side up. Place the Exterior/Zipper unit over the lining so the remaining free zipper tape edge aligns with the top 42 cm edge of the lining. Pin securely.
- Stitch and Topstitch: Stitch the zipper tape to the lining fabric. Flip the fabric so the zipper is visible, with the exterior fabric on one side and the lining on the other. Press the fabric away from the zipper teeth, then topstitch along both sides of the zipper to secure the fabric and give a professional finish.
Phase 3: Final Assembly and Shaping
This is where the pouch comes together, using the lining piece to create a clean finish and the base corners to define the structure.
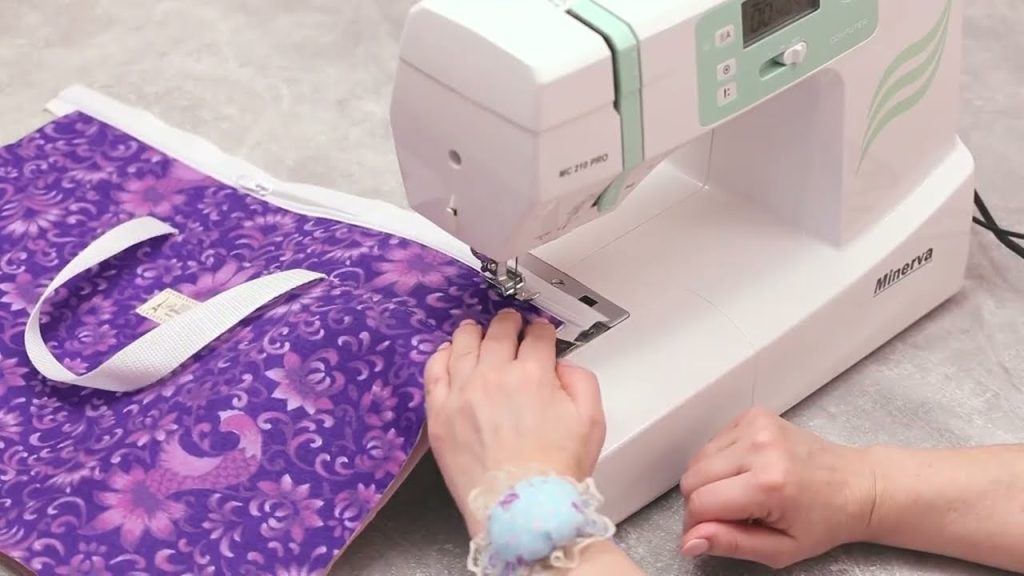
- Attach Strap Loop: Take the prepared strap with the swivel hook. Fold the bag in half (exterior to exterior, lining to lining). Place the raw, unsecured end of the strap between the layers of the exterior fabric, positioning the strap at the zipper, about 2 cm down from the edge. Pin and baste the strap in place.
- Sew Side and Bottom Seams:
- Exterior: Keeping the exterior layers right sides together, stitch along the side seam with the strap, then stitch the bottom seam. Do NOT sew the side of the exterior that has the zipper stop/start.
- Lining: Keeping the lining layers right sides together, stitch along both side seams and the bottom seam. Leave a 10 cm opening along the center of the bottom seam of the lining for turning.
- Box the Corners: With both the exterior and lining still wrong side out, measure and mark a 4 cm x 4 cm square from all four bottom corners (two exterior, two lining). Cut out these squares.
- Sew Boxed Corners: Pinch the cut-out corner edges together, matching the side seam line to the bottom seam line to form a straight line. Pin and stitch the corner closed on all four corners (exterior and lining).
- Turn and Finish:
- Unzip the zipper.
- Reach into the lining’s turning hole and pull the entire bag right side out.
- Push the lining back inside the exterior bag.
- Stitch the turning hole in the lining shut (by machine or hand).
- Tuck the lining neatly inside the exterior, shape the corners, and press the seams flat.
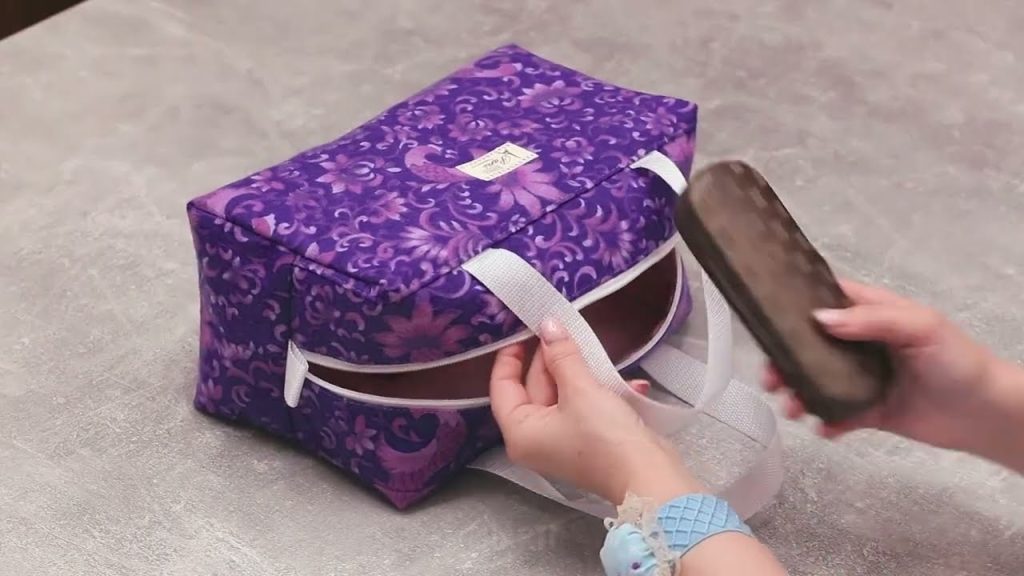
Your stylish “Zippered Pouch” Handbag is complete! Attach your wrist strap to the swivel hook, and enjoy your quick-sew, structured, and chic new accessory.
Video tutorial: