 by
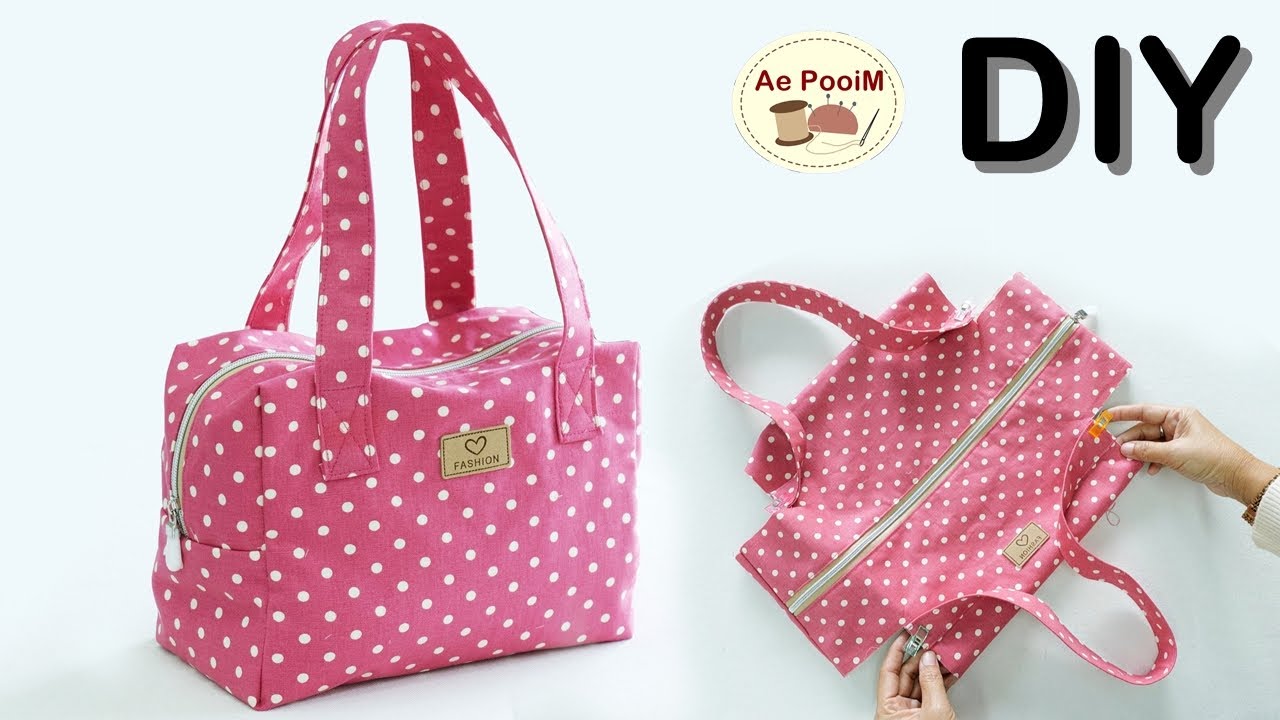
by A tote bag is a versatile everyday accessory, but a zipper tote bag is a true game-changer. The addition of a top zipper provides security, organization, and peace of mind, ensuring your essentials stay safe and sound whether you’re commuting, traveling, or just running errands. This detailed tutorial will walk you through the process of sewing a professional-looking tote, complete with a top zipper closure, making it a perfect project for any sewist ready to level up their bag-making skills.
Why Sew a Zipper Tote Bag?
- Enhanced Security: A zipper keeps your valuables safe from spills, dust, and potential theft.
- Professional Finish: Adding a zipper elevates your handmade bag, giving it a polished, store-bought look.
- Superior Organization: No more worrying about items falling out or getting lost at the bottom of your bag.
- Customization: Choose any fabric combination to create a bag that perfectly matches your style.
- Skill Building: This project is a great way to master zipper installation, a key skill for many garment and bag projects.
What You’ll Need:
- Exterior Fabric: 1 yard (0.9 meters) of a sturdy fabric like canvas, duck cloth, or home decor fabric.
- Lining Fabric: 1 yard (0.9 meters) of a coordinating quilting cotton or other durable, medium-weight fabric.
- Zipper: One 20-inch (50 cm) nylon coil zipper. Nylon zippers are easy to shorten and sew through.
- Interfacing: 1 yard (0.9 meters) of heavyweight fusible interfacing (like Pellon 70 Peltex II or Decovil Heavy) for a structured bag that holds its shape.
- Webbing for Straps: 2 yards (1.8 meters) of 1.5-inch (3.8 cm) wide cotton or polyester webbing.
- Thread: Strong, all-purpose polyester thread that matches or complements your fabrics.
- Sewing Machine: A machine with a zipper foot and a walking foot (highly recommended for thick layers).
- Tools:
- Rotary cutter, clear ruler, and cutting mat (or sharp fabric scissors).
- Fabric marker or tailor’s chalk.
- Plenty of strong pins or fabric clips.
- Iron and ironing board.
Step-by-Step Construction Guide:
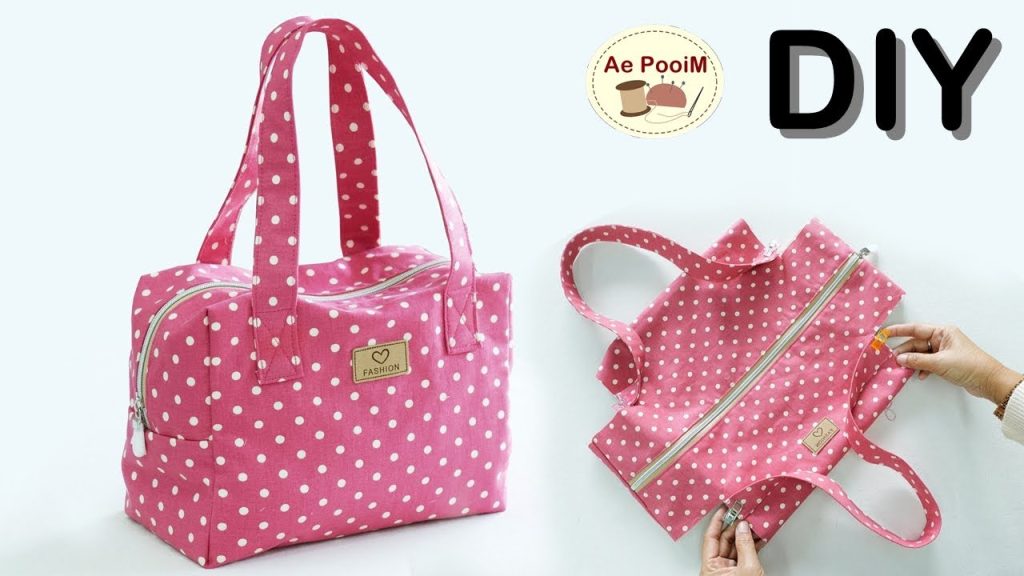
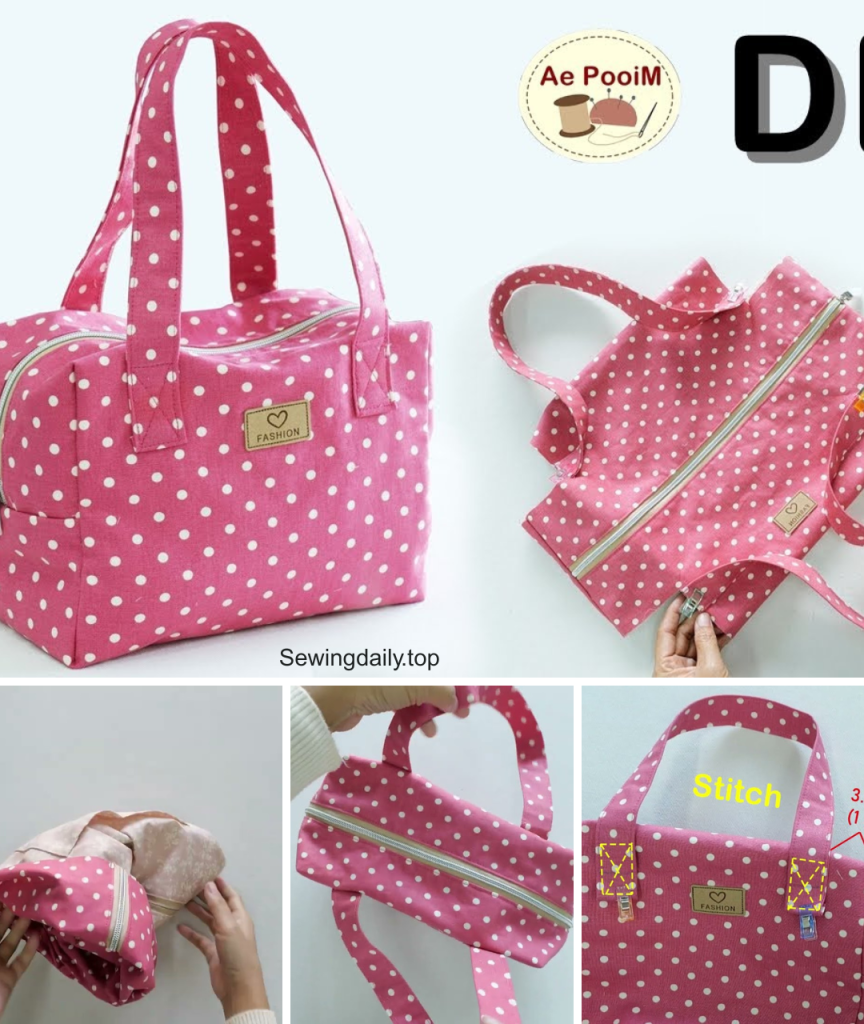
This tutorial creates a finished tote bag approximately 17 inches wide x 14 inches tall, with a 5-inch deep boxed bottom.
1. Cut & Prepare Your Fabric Pieces
- Main Exterior Panels (Cut 2): 18″ W x 15″ H (45.7 cm x 38.1 cm).
- Main Lining Panels (Cut 2): 18″ W x 15″ H (45.7 cm x 38.1 cm).
- Interfacing (Cut 2): 18″ W x 15″ H.
- Straps (Cut 2): 28″ L (71 cm) from your webbing.
Fuse the heavyweight fusible interfacing to the wrong side of your Main Exterior Panels. Press firmly to ensure good adhesion, which is key for a professional-looking bag.
2. Prepare & Attach the Straps
- To prevent fraying, carefully melt the cut ends of your webbing with a lighter (briefly!) or apply a dab of fray check.
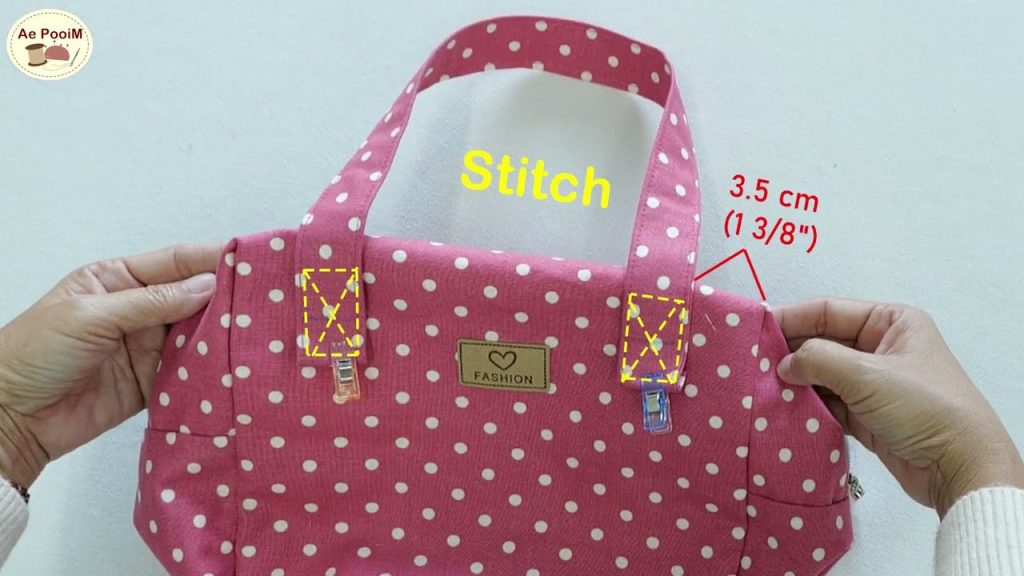
- On the right side of one Main Exterior Panel, mark the strap placement. Measure 5 inches (12.7 cm) in from each side edge along the top raw edge. These marks indicate where the outer edge of your straps will be placed. Repeat on the second exterior panel.
- Place one webbing strap on the right side of an exterior panel, aligning the raw ends of the strap with the top raw edge of the fabric. The strap should be pointing downwards onto the fabric. Pin in place. Repeat for the other strap on the second exterior panel.
- Stitch the straps to the panels with a 1/4-inch seam allowance. For extra strength, stitch a box with an “X” through it at each strap attachment point.
3. Assemble the Exterior & Lining Bags
- Sew Exterior Bag:
- Place the two Main Exterior Panels (with straps attached) right sides together. Pin and stitch along the two side seams and the bottom seam using a 1/2-inch seam allowance.
- Create a boxed bottom: Flatten each bottom corner so the side seam meets the bottom seam. Measure 2.5 inches (6.3 cm) from the tip of the triangle and draw a line perpendicular to the seam. Stitch along this line. Trim the corner, leaving a 1/2-inch seam allowance.
- Sew Lining Bag:
- Repeat the exact same steps for your two Main Lining Panels, including the boxed corners.
- Important: When sewing the bottom seam of the lining bag, leave a 6-inch (15 cm) opening in the middle. This is where you will turn the bag right side out.
4. Install the Top Zipper
- Turn the exterior bag right side out. Keep the lining bag wrong side out.
- Align the top raw edge of the exterior bag with the top raw edge of the lining bag. The straps should be tucked between the layers. Pin securely all around the top opening.
- Carefully insert the zipper between the exterior and lining layers, aligning the zipper tape’s top edge with the raw edges of the fabric. The zipper should be right side down, with the zipper pull facing into the bag. Center the zipper between the side seams.
- Using your zipper foot, stitch around the entire top opening, attaching the zipper to both the exterior and lining fabrics with a 1/2-inch seam allowance. Take your time and stitch close to the zipper teeth.
5. Finish the Zipper & The Bag
- To finish the zipper ends, carefully fold the excess zipper tape inward to create a small fold. Stitch this down by hand or machine to create a neat, finished edge.
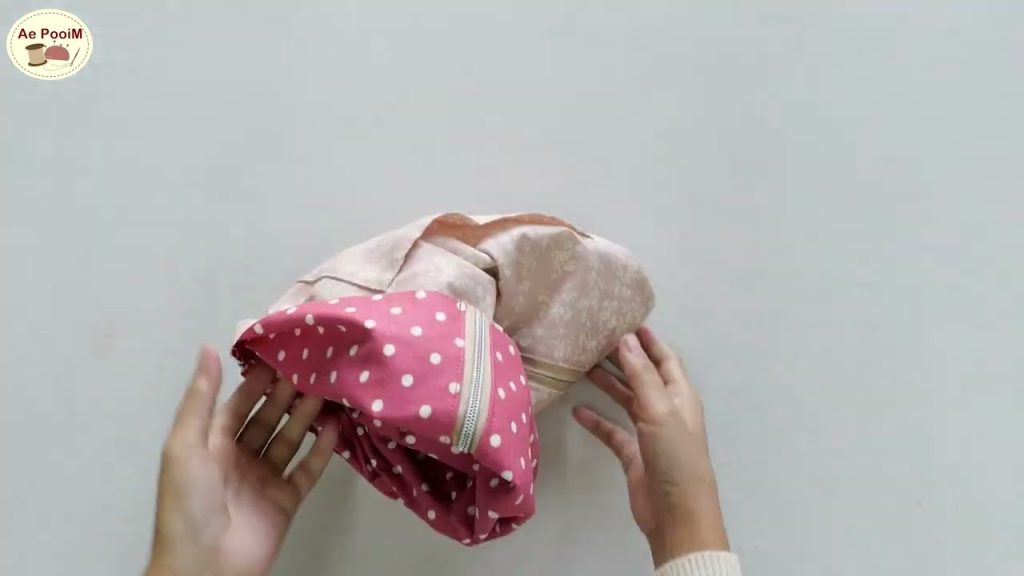
- Reach into the opening you left in the bottom of the lining. Carefully pull the entire bag through this opening until it’s right side out.
- Gently push out all corners and seams to create a neat, defined shape.
- Close the lining opening: Press the raw edges of the opening inwards and stitch it closed with a narrow seam allowance.
- Push the lining down into the bag. Give the bag one final, thorough press, paying special attention to the zipper and the top seam.
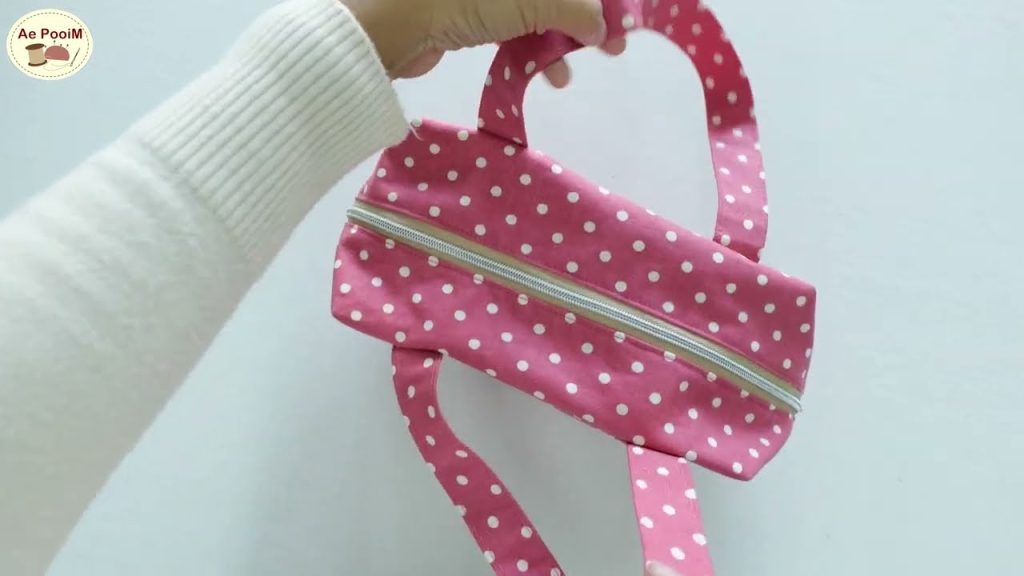
- Topstitch: For a professional finish, topstitch around the entire top opening of the bag, about 1/8 inch (0.3 cm) from the zipper. This will secure the lining and exterior and give your bag a crisp, polished look.
Your secure and stylish zipper tote bag is now complete! Enjoy the confidence of carrying a bag that’s not only beautiful but also built to keep your world organized and safe.
Video tutorial: