 by
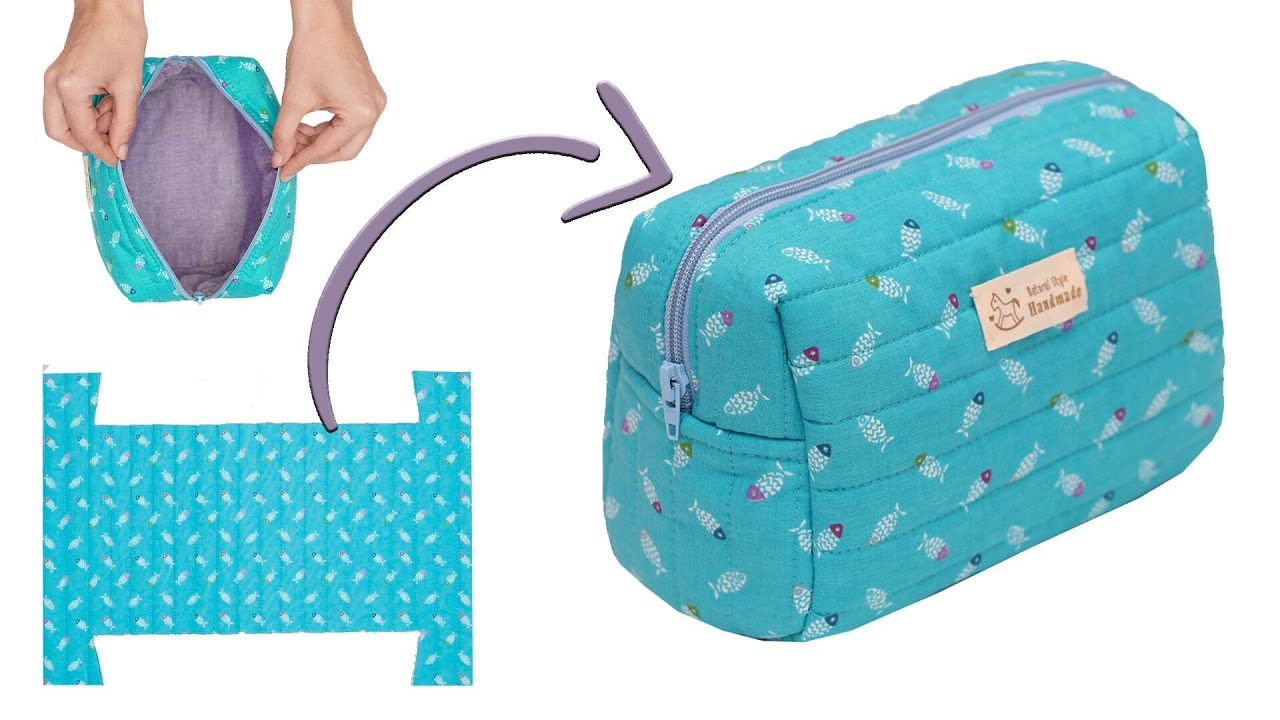
by Learning to sew your own accessories is a rewarding experience, and a makeup bag is the perfect place to start. It’s a small, practical project that helps you master fundamental skills like sewing straight lines, creating a boxy bottom, and, yes, even conquering the zipper! This guide is designed to make the process as simple as possible, so you can build confidence and create a beautiful, functional bag in just an afternoon.
Why Sew a Simple Makeup Bag?
- Beginner-Friendly: Uses straightforward techniques that are easy to learn.
- Quick Project: You can complete it in an hour or two, perfect for a fast, satisfying craft session.
- Ultimate Scrap Buster: A great way to use those leftover pieces of beautiful fabric you’ve been saving.
- Customizable: Choose any fabric combination to match your style or create a personalized gift.
- Practical & Portable: Keeps your cosmetics, toiletries, or art supplies organized in a custom bag.
What You’ll Need:
- Exterior Fabric: A fat quarter (18″ x 22″) of quilting cotton or a similar medium-weight fabric.
- Lining Fabric: A fat quarter of a coordinating quilting cotton.
- Zipper: One 9-inch nylon coil zipper. Nylon zippers are the easiest to sew over.
- Interfacing (Optional): A piece of medium-weight fusible interfacing to add structure.
- Thread: All-purpose polyester thread that matches or complements your fabrics.
- Sewing Machine: A machine with a zipper foot is highly recommended.
- Tools:
- Rotary cutter, clear ruler, and cutting mat (or sharp fabric scissors).
- Fabric marker or tailor’s chalk.
- Pins or fabric clips.
- Iron and ironing board.

Step-by-Step Instructions: Simplified Makeup Bag
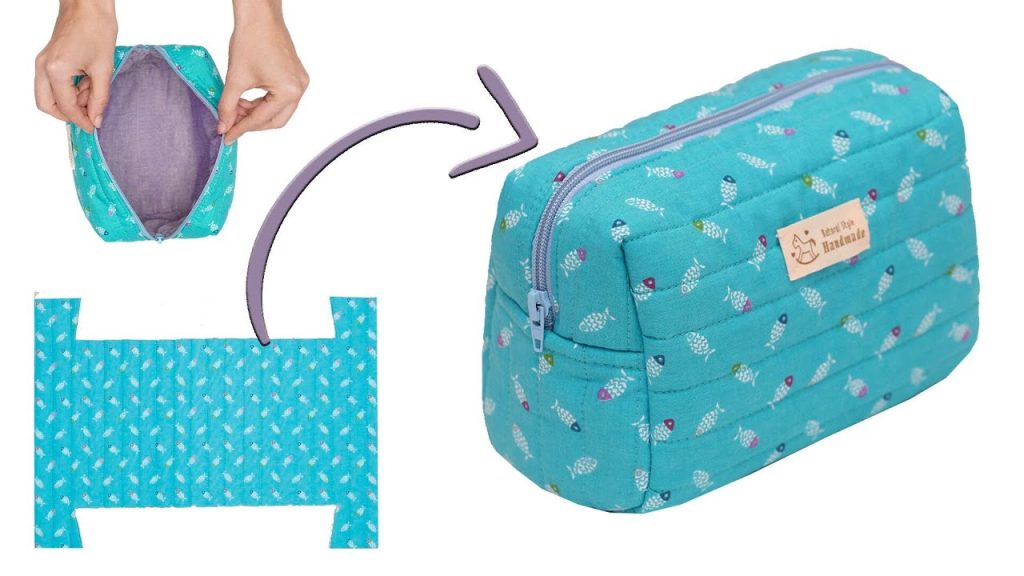
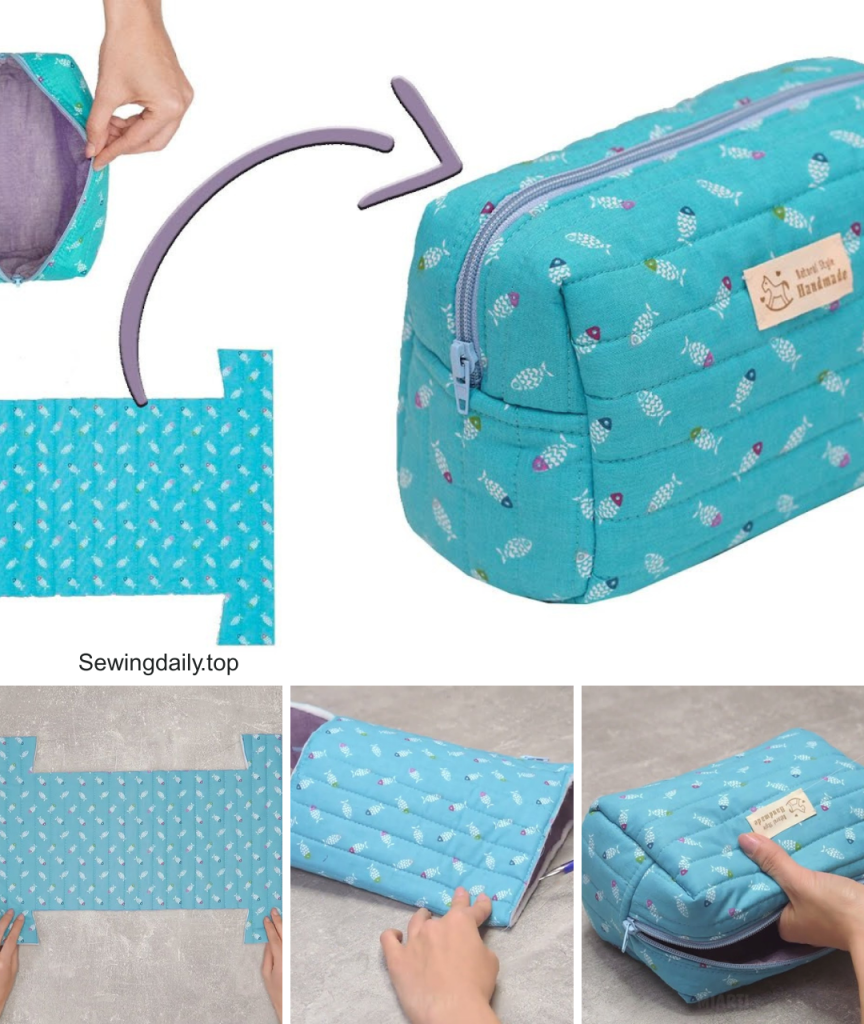
This tutorial creates a finished bag that is approximately 9 inches wide x 6 inches tall x 3 inches deep.
1. Cut & Prepare Your Fabric
- Exterior Fabric (Cut 2): 10″ W x 7.5″ H
- Lining Fabric (Cut 2): 10″ W x 7.5″ H
- Interfacing (Cut 2 – Optional): 10″ W x 7.5″ H
If using interfacing, fuse it to the wrong side of your exterior fabric pieces. Follow the manufacturer’s instructions for pressing time and heat. This step gives your bag body and makes it more durable.

2. Install the Zipper
This is the most intimidating step for many new sewists, but it’s easy with a zipper foot!
- Take one exterior panel and place it right side up on your work surface.
- Place your zipper on top, right side down, aligning the top edge of the zipper tape with the top raw edge of the fabric. The zipper pull should be facing down onto the fabric. Pin in place.
- Take one lining panel and place it on top of the zipper and the exterior fabric, right side down, aligning all three top raw edges. Pin.
- Using your zipper foot, stitch along this edge with a 1/4-inch seam allowance. Sew slowly. When you get to the zipper pull, stop, lift your presser foot, slide the pull past the needle, and continue stitching.
- Repeat steps 1-4 for the other side of the zipper, using the remaining exterior and lining panels. Make sure your exterior fabrics are aligned with each other, and the lining fabrics are aligned.
You should now have a long piece of fabric with the zipper in the middle, exterior fabric on one side, and lining fabric on the other.
3. Assemble the Bag Body
- Open the zipper about halfway. This is a crucial step! If you forget, you won’t be able to turn your bag right side out later.
- Fold the entire piece so the two exterior panels are right sides together, and the two lining panels are also right sides together. Align all raw edges and pin securely.
- Stitch around all three open sides (the two short sides and the bottom long side) with a 1/4-inch seam allowance.
- Important: When sewing the bottom seam of the lining fabric, leave a 4-inch opening in the middle. This is where you’ll turn the bag. Backstitch securely at the beginning and end of this opening.
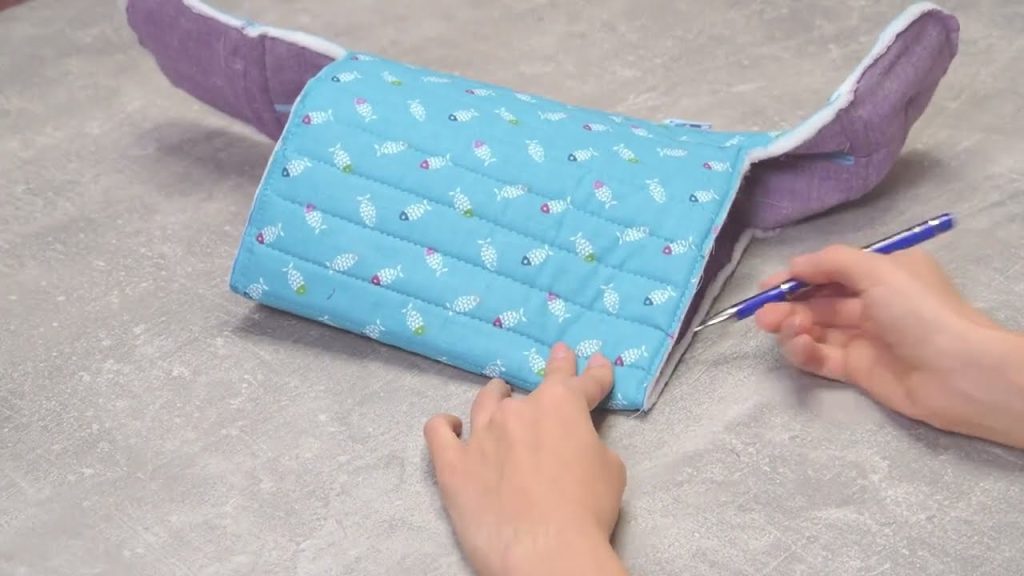
4. Create Boxed Corners
This step gives your bag a flat bottom, allowing it to stand up on its own.
- At each of the four corners (two on the exterior, two on the lining), pinch the corner so the side seam meets the bottom seam. This will form a triangle with the seam running down its center.
- Measure 1.5 inches from the tip of the triangle and draw a line perpendicular to the seam.
- Stitch directly along this marked line. Backstitch securely.
- Trim the excess fabric from the corner, leaving a 1/4-inch seam allowance.
- Repeat for all four corners.
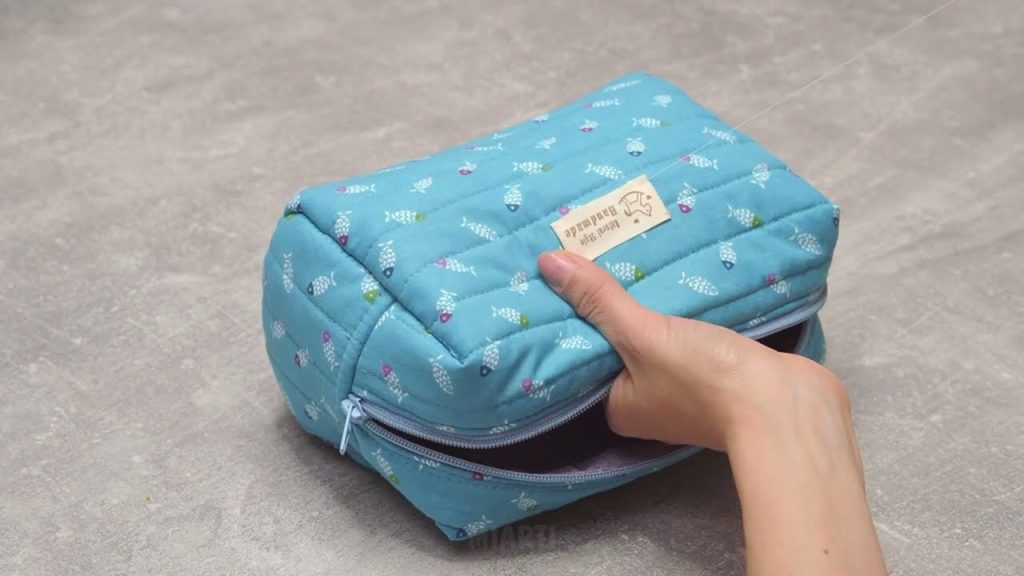
5. Finish the Bag
- Reach into the opening you left in the bottom of the lining. Carefully pull the entire bag through until it’s right side out.
- Gently push out all corners.
- Give the bag a good press with an iron, especially along the zipper.
- Close the lining opening: Press the raw edges of the opening inwards and stitch it closed with a very narrow seam allowance.
- Push the lining down into the bag. Give the bag one final press, making sure the top seam is crisp.
That’s it! You’ve just sewn a simple, classic makeup bag. Now you’ll have a stylish accessory for all your essentials.
Video tutorial: