 by
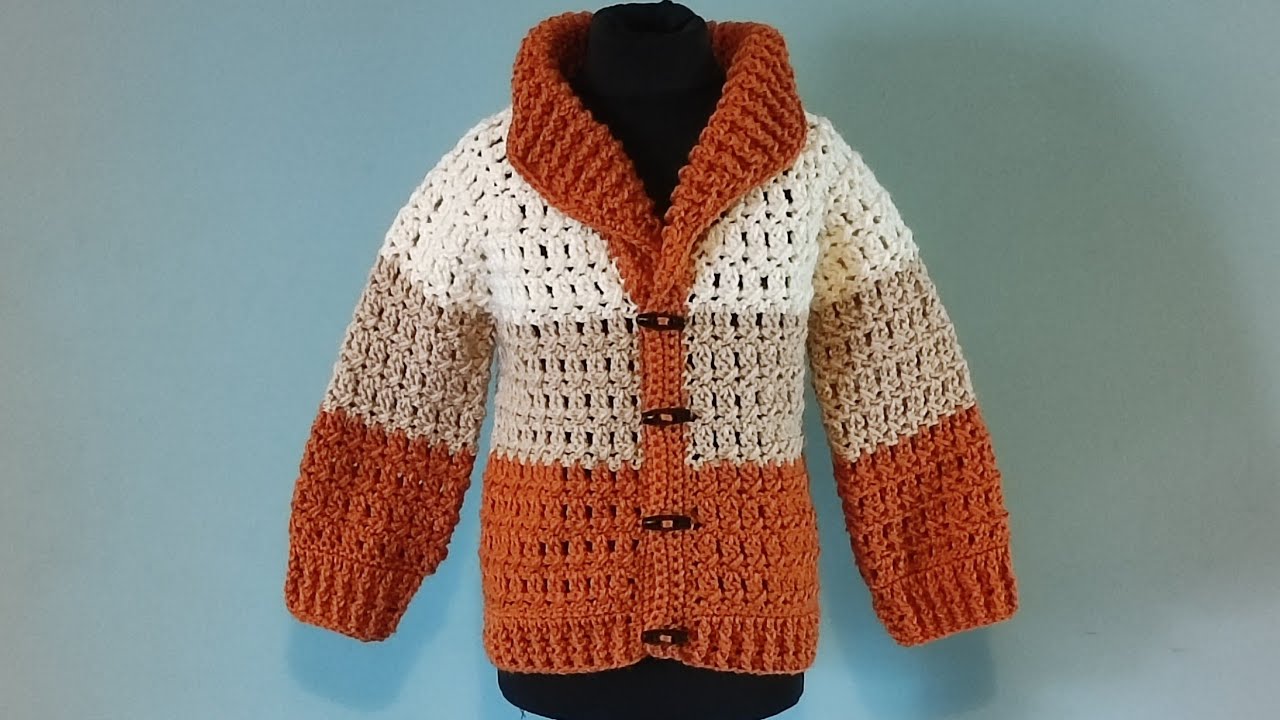
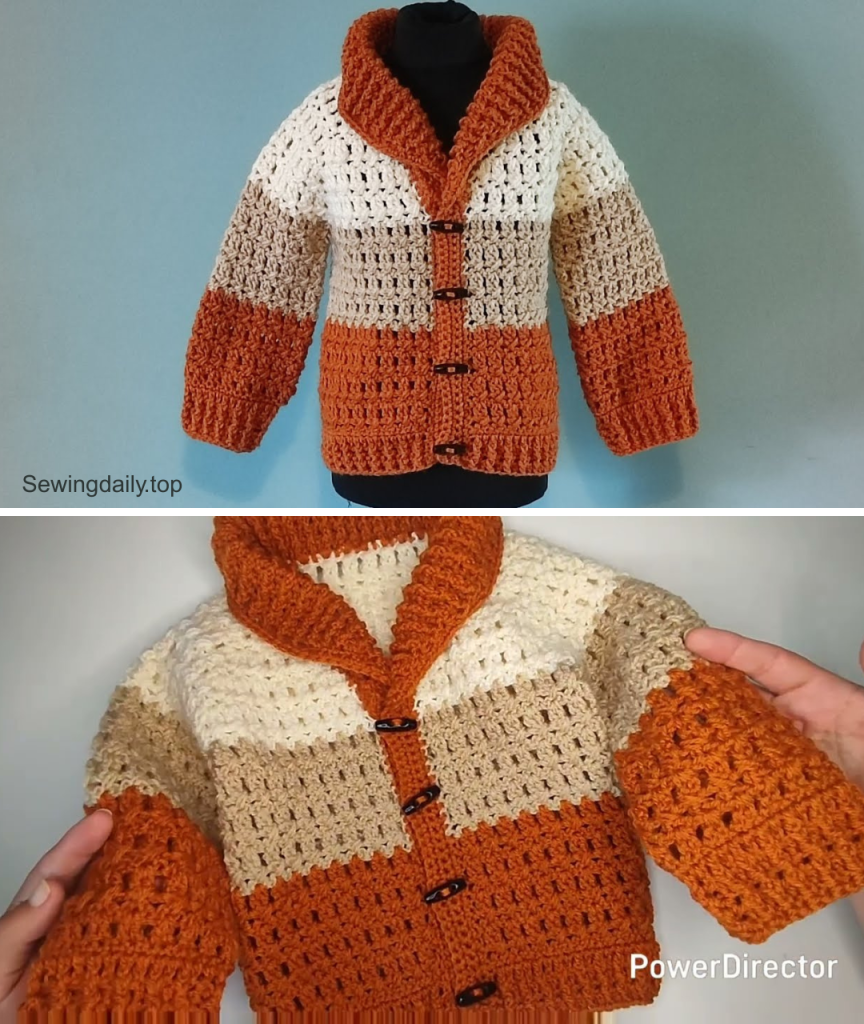
by Imagine dressing a little boy in a stylish, handmade V-neck cardigan that’s not only incredibly cozy but also uniquely crafted with love. This detailed tutorial, inspired by the excellent “Crochet #104 How to crochet boys V-neck cardigan / Part 1” video from Simona Crochet, will guide you through creating a charming and versatile V-neck cardigan for boys. This first part of the series will focus on building the foundational yoke and dividing for the body, featuring a clever two-row repeat pattern and designed with adaptability in mind for various sizes.
Whether you’re a seasoned crocheter or looking to expand your garment-making skills, this pattern offers clear, step-by-step instructions to create a cherished, custom-fit piece for a special child in your life.

Why This “Classic V-Neck” Cardigan Will Be a Wardrobe Staple
This cardigan is more than just a piece of clothing; it’s a labor of love with several irresistible qualities:
- Timeless V-Neck Design: A classic silhouette that’s always in style, perfect for layering over shirts or tees.
- Adaptable Sizing: The pattern is easily adjustable for boys aged 1-2 years, 2-3 years, 3-4 years, 4-5 years, and 5-6 years, ensuring a perfect fit as they grow.
- Engaging Two-Row Repeat: The pattern uses a two-row repeat that’s slightly different for the yoke (with increases) and the body (simpler), making it easy to memorize once you get the hang of it.
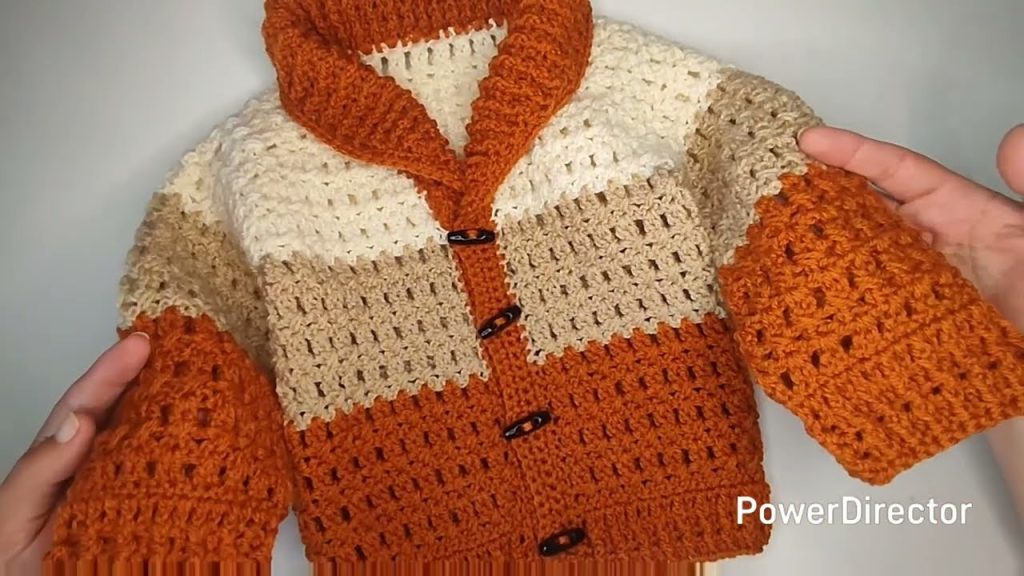
- Customizable Colors & Stripes: Experiment with a single solid color for a classic look, or explore various striping options to add a fun, personalized touch. The creator suggests one solid color if you’re not confident with stripes, but also demonstrates brighter, autumn-colored striped versions.
- Skill-Building Project: Master essential garment techniques like top-down construction, increasing for a V-neck, and dividing for armholes.
- Cozy & Thoughtful Gift: A handmade cardigan is a deeply personal and treasured gift for birthdays, holidays, or simply as a token of affection.
Materials You’ll Need:
Having your materials gathered and ready before you start will ensure a smooth and enjoyable crocheting journey.
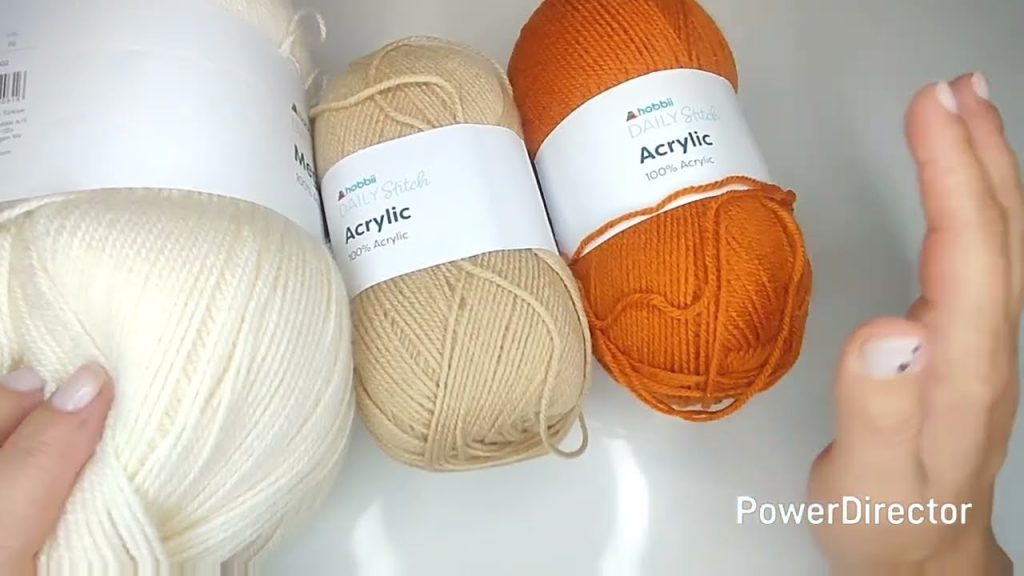
- Yarn: Approximately 200-250g of DK weight (Number 3 or lightweight) yarn. The creator notes that yarn on the thinner side (approx. 300-350m per 100g skein) works well with this pattern.
- Tip: Choose a soft, child-friendly fiber like acrylic, superwash merino, or a cotton blend for comfort and ease of care. You can use one color or several for stripes. The creator suggests approximately 200g for sizes 1-2 years and 250g for 3-5 years.
- Crochet Hook: 4 mm crochet hook.
- Buttons: 3-5 buttons (toggles are used in the video, but any style works).
- Stitch Markers: At least 7-8 stitch markers (essential for marking corner increases and side seams).
- Tapestry Needle: For weaving in ends and sewing on buttons.
- Scissors
- Measuring Tape: In centimeters, as the size chart is provided in cm (you can convert to inches if preferred).
The Heart of the Project: Sizing and Gauge
Achieving the correct size is crucial for a well-fitting garment. Don’t skip these steps!
- Refer to Sizing Chart: The creator provides a detailed size chart with measurements for Yoke, Half Chest, Cardigan Length, Sleeve Length, Sleeve Width, and Neckline. This chart is available on their Facebook page (or you can screenshot from the video). For this tutorial, we are following the instructions for size 3-4 years.
- Check Your Gauge: Crochet a swatch using the main stitch pattern (two double crochets with a chain 1). Work a square of at least 4×4 inches (10×10 cm). Measure your swatch to ensure your stitches per cm/inch match the pattern’s recommendations for your chosen size. Adjust your hook size (larger hook for looser gauge, smaller hook for tighter gauge) if necessary.
Stitch Guide (Common Abbreviations):
Familiarize yourself with these basic crochet terms before you start.
- ch: chain
- sl st: slip stitch
- dc: double crochet
- st(s): stitch(es)
- ch-sp: chain space
- cross stitch: (dc in space behind 2 dc from previous row, ch 1, dc in space before same 2 dc from previous row) – This creates a criss-cross texture.
Part 1: Crocheting the “Classic V-Neck” Cardigan – The Yoke and Body
This cardigan is worked from the top down, starting with the neckline loops and building the yoke, then dividing for the body.
Phase 1: Foundation – Neckline Loops & Marking Corners
The foundation is made of “loops” that form the initial neckline, then marked for future increases.
- Starting Loops (Main Color, e.g., Cream):
- For sizes 1-2 and 2-3 years, start with 16 loops. For 3-4, 4-5, and 5-6 years, start with 17 loops.
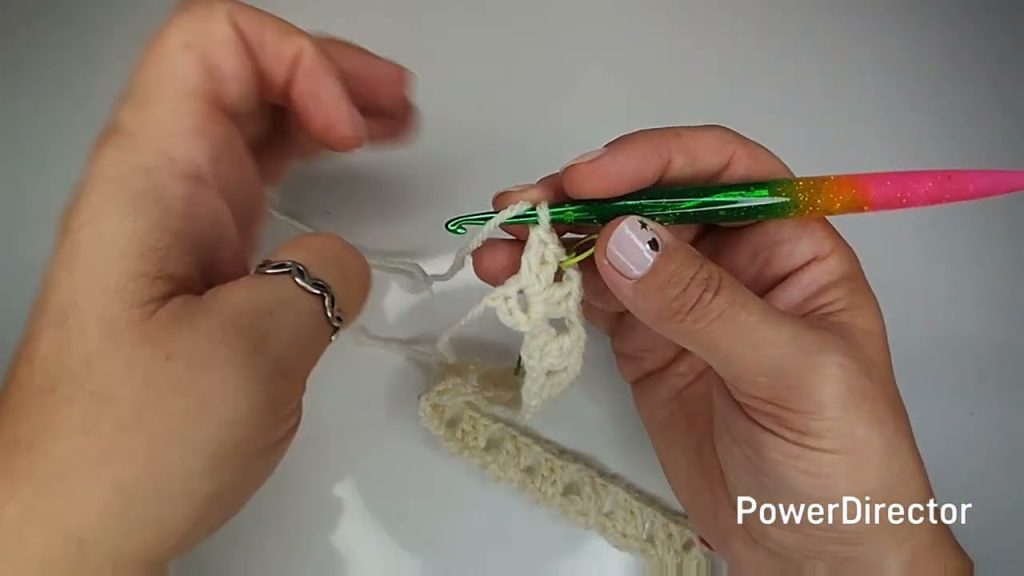
- Make a slip knot. Ch 3. Work 1 dc into the very first chain. This creates your first loop.
- Repeat: (Ch 3, dc into the bottom of the 3 chains just made) until you have the required number of loops (e.g., 17 loops for size 3-4 years).
- Marking Corner Stitches:
- Place your first stitch marker in the first loop on each side. These are for the V-neck front.
- Skip 3 loops. Place a stitch marker in the 4th loop. Repeat from the other side.
- If you started with 17 loops, you should have 7 loops between the two middle stitch markers (for the back panel). If 16 loops, you’ll have 6 loops.
- These marked loops are your “corners” where increases will occur.
Phase 2: Building the Yoke – The Two-Row Repeat Pattern
The yoke is worked in rows, increasing at the marked corners to create the top-down shape. The two repeat rows are a “two dc, ch 1” row and a “cross stitch” row.
- Row 1 (First Repeat Row – Two DC, Ch 2, Two DC at Corners):
- Ch 2, turn. In the first marked loop, work (2 dc, ch 2, 2 dc). Remove marker and place it in the ch-2 space.
- Ch 1. In the next loop, work (2 dc). Ch 1. Repeat (2 dc, ch 1) for each unmarked loop until the next marked loop.
- In each marked loop, work (2 dc, ch 2, 2 dc). Mark the ch-2 space.
- Continue this pattern around. The very last stitch of the row is 1 dc into the beginning of the last loop (no ch-2 increase at this final corner in Row 1).
- Row 2 (Second Repeat Row – Cross Stitch Row):
- Ch 2, turn.
- Increasing at Front (V-Neck): Work a cross stitch over the first 2 dc of the previous row (behind them, ch 1, before them).
- In the marked ch-2 space, work 1 dc. Mark this dc stitch.
- Continue working cross stitches over each pair of 2 dc (always behind, ch 1, before). Remember to ch 1 between the two double crochets of the cross stitch.
- In the marked ch-2 spaces, work 1 dc and mark that dc.
- Finish the row by working a cross stitch over the last 2 dc. The very last stitch is 1 dc into the top of the ch 2 from the start of the previous row.
- Rows 3-8 (Yoke – Continue Two-Row Repeat with V-Neck Increases):
- Crucial V-Neck Increase: For the next six rows (Rows 3-8), you will add extra stitches at the very beginning and end of every “two dc, ch 2, two dc” row.
- Start of Row: Ch 2, turn. Work (2 dc, ch 1, 2 dc) into the very first stitch (under the starting ch 2). Ch 1. Then continue with the regular (2 dc, ch 1) pattern into the top of each cross stitch.
- End of Row: Finish the row by working (2 dc, ch 1, 2 dc) into the very last stitch (the top of the starting ch 2 from the previous row).
- Continue alternating between the two dc/ch2/2dc row (with added front increases) and the cross stitch row (working over the new increases).
- After 8 rows total, you should have 7 cross stitches in each front panel. At this point, stop adding extra stitches at the front of the cardigan for the V-neck.
- Continuing Yoke (No Front Increases):
- Continue alternating the two-row repeat. For the “two dc, ch 2, two dc” row, you will not add extra stitches at the very first/last stitch. You will simply work the pattern across.
- Measure your yoke regularly: From the top back of the neckline to the stitch marker (where the shoulder increase began). Aim for your size chart’s yoke measurement (e.g., 16 cm for size 3-4 years).
- Your last row for the yoke must be a cross stitch row before connecting the body. The creator for this tutorial made 10 rows in total for the yoke, measuring 15 cm, noting that the connecting double crochet would bring it to 16 cm.
Phase 3: Connecting the Yoke and Dividing for Sleeves (Part 1 – Body)
This phase connects the yoke, creating the armholes and beginning the main body of the cardigan. This is also where you might introduce a color change.
- Preparation for Connection: Ensure your last yoke row is a cross stitch row. Measure the back width (from stitch marker to stitch marker). For size 3-4 years, aim for 31 cm (Half Chest measurement). If you need extra length under the armholes, you will add chains during the connection.
- If you need extra length: Each pair of “two double crochets” in the pattern covers approximately 2 cm, and corresponds to 3 chains. So, for 2 cm extra, chain 3. For 4 cm extra, chain 6. The creator only needed to chain 1 under each armhole.
- Connect Yoke (and Change Color, e.g., to Sand):
- Change color if desired by finishing the last stitch of the previous row with the new color. Ch 2, turn.
- Work the “two dc, ch 1” pattern across the first front panel until you reach the first stitch marker.
- Work 1 dc into the stitch with the stitch marker.
- Chain for Armhole: Chain the required number of stitches for under the arm (e.g., ch 1 for size 3-4 years).
- Skip Sleeve: Skip all the stitches for the first sleeve panel.
- Work 1 dc into the next stitch marker.
- Continue working the “two dc, ch 1” pattern across the back panel until the next stitch marker.
- Repeat the “Chain for Armhole” and “Skip Sleeve” for the second sleeve.
- Finish working the “two dc, ch 1” pattern across the second front panel.
- Working Over Chains (First Cross Stitch Row after Connection):
- Ch 2, turn.
- Continue working the cross stitch pattern over the two dc segments of the front panel.
- Working under Armhole Chains:
- If you chained 1 under the armhole: Work the first dc of a cross stitch into the dc of connection, ch 1, then the second dc of the cross stitch under that ch 1 space (effectively skipping the ch 1).
- If you chained 3 under the armhole: Make cross stitches over these chains. The creator shows working a cross stitch into the 1st and 3rd chain, skipping the middle chain.
- If you chained 6 under the armhole: You will create three cross stitches covering these 6 chains. This involves skipping chains and careful placement to create the cross stitch pattern.
- Continue working the cross stitch pattern across the back panel, then over the second armhole chains, and finally across the second front panel.
Phase 4: Continuing the Body – The Main Length
After connecting, the body is worked in straight rows using the two-row repeat.
- Body Length: Continue alternating the two-row repeat pattern (the “two dc, ch 1” row and the “cross stitch” row). The goal is to reach your desired cardigan length, measuring from the armhole down.
- For size 3-4 years, the minimum cardigan length is 25 cm.
- You will want to leave approximately 4-6 cm at the bottom for the ribbed edging. So, for a 25 cm total length, you would crochet about 20 cm in this main pattern.
- Important: Ensure your last row before starting the edging is a cross stitch row.
End of Part 1.
You have now completed the yoke and the main body of your “Classic V-Neck” Cardigan! You’ve learned how to build the foundation, incorporate increases for a V-neck, divide for armholes, and work the beautiful two-row repeat.
Be sure to look for Part 2 of this tutorial, where we will cover crocheting the sleeves, adding the collar and front edging, attaching buttons, and finishing all the details to bring your cardigan to life!
Video tutorial: