 by
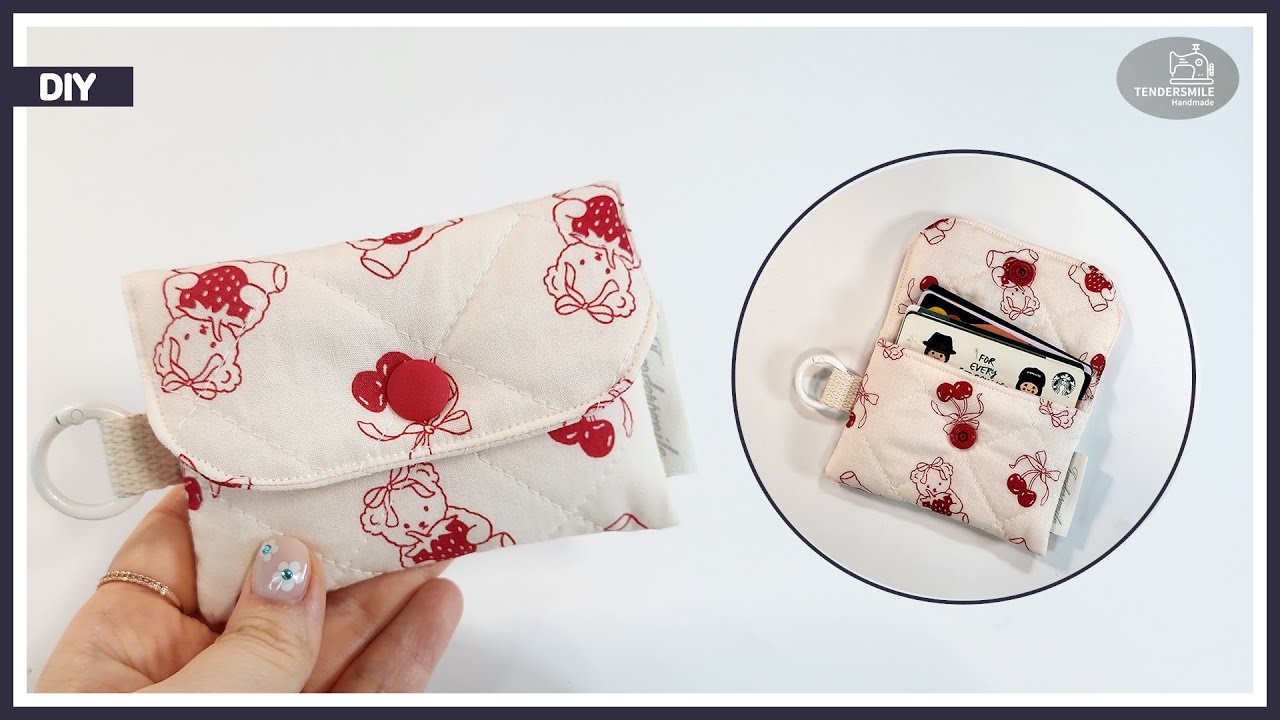
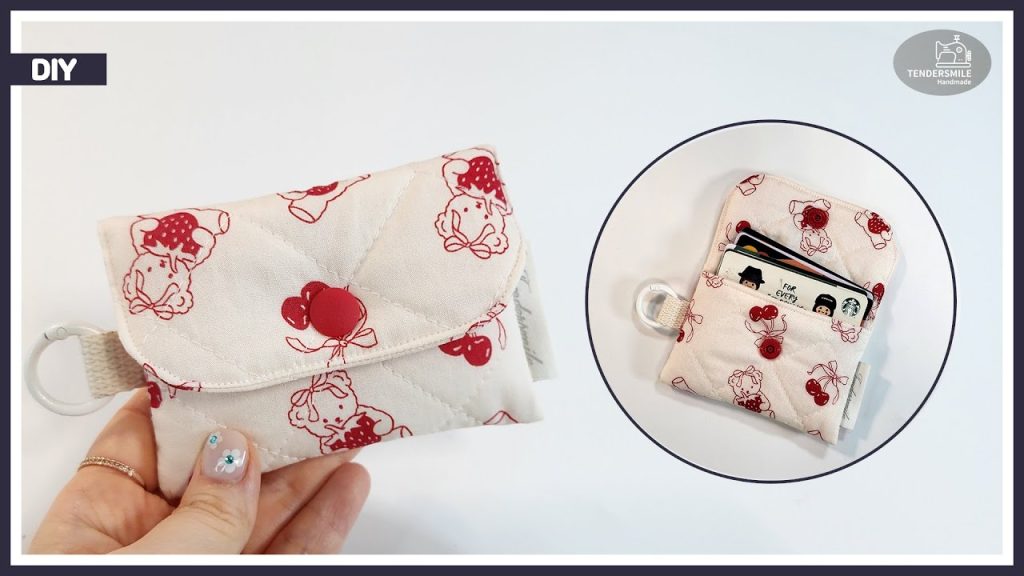
by You’re looking for a lightning-fast sewing project that’s both practical and stylish! Making a DIY card wallet in 10 minutes isn’t just possible, it’s incredibly satisfying. This is the perfect quick craft for beginners, a fantastic way to use up fabric scraps, or a last-minute handmade gift. Let’s get stitching!
Zip Through It: Your 10-Minute DIY Card Wallet
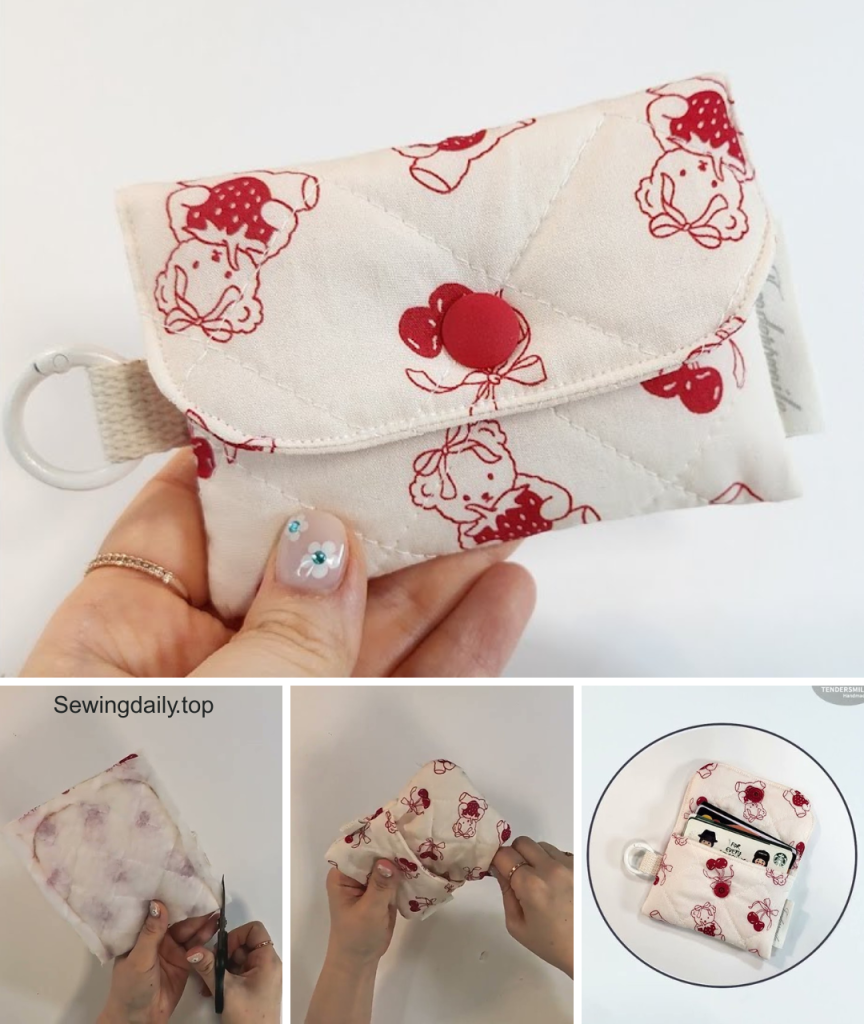
Need a new card holder for your essentials, or a quick gift that still feels thoughtful? Look no further! This 10-minute DIY card wallet is a super speedy sewing project that delivers big on utility and charm. It’s ideal for carrying a few cards (ID, credit card, bus pass) and some folded cash, making it perfect for minimalist everyday use or slipping into a smaller bag.
Why You’ll Love This 10-Minute Wallet:
- Blazing Fast: Seriously, you can whip this out in minutes once your fabric is cut.
- Ultimate Scrap Buster: Perfect for using up those tiny, beloved fabric remnants.
- Beginner-Friendly: Uses only straight stitches – no tricky techniques needed!
- Customizable: Endless possibilities for fabric choices and personalization.
- Super Practical: Keeps your cards organized and accessible.
What You’ll Need:
- Fabric: Two small pieces of cotton fabric (quilting cotton works great). One for the exterior and one for the interior/lining.
- Minimum size: 4.5 inches wide x 8.5 inches tall (11.4 cm x 21.6 cm) each.
- Pro Tip: Choose two fun, coordinating prints or a solid exterior with a pop of pattern inside!
- Thread: All-purpose polyester thread that matches or contrasts with your fabric.
- Tools:
- Sewing machine
- Fabric scissors or rotary cutter and mat
- Ruler
- Fabric marker or tailor’s chalk
- Pins or fabric clips
- Iron and ironing board (optional, but good for crispness)
Step-by-Step Instructions: Wallet in a Flash!
Let’s assume a finished wallet size of approximately 4 inches wide x 3 inches tall when folded. All seam allowances will be 1/4 inch (0.6 cm).
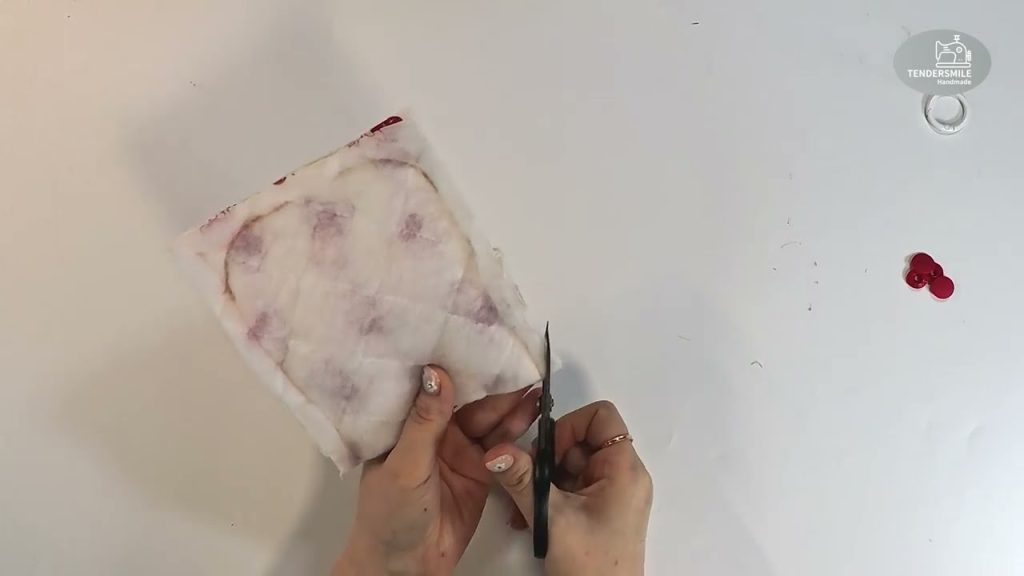
1. Cut Your Fabric (1 minute)
- Lay your two fabric pieces flat.
- Cut both the exterior and interior/lining fabric to 4.5 inches wide x 8.5 inches tall (11.4 cm x 21.6 cm).
- Accuracy is key, even for a quick project!
2. Hem the Top Edge (2 minutes)
- Take your exterior fabric piece. Fold one of the 4.5-inch raw edges down by 1/4 inch (0.6 cm) towards the wrong side and press (or finger-press firmly).
- Fold it down by another 1/4 inch (0.6 cm) and press again. This creates a double-fold hem.
- Stitch along this hem, close to the folded edge.
- Repeat steps 2.1-2.3 for your interior/lining fabric piece.
3. Stitch Side Seams (3 minutes)
- Place your exterior fabric piece and interior/lining fabric piece right sides together, aligning all edges perfectly.
- Pin along the two long 8.5-inch sides.
- Stitch down both of these long sides using a 1/4 inch (0.6 cm) seam allowance. Backstitch at the beginning and end of each seam to secure.
- Do NOT stitch the bottom short end yet!
4. Turn & Press (1 minute)
- Turn the tube of fabric right side out.
- Gently push out the corners.
- Press the entire piece flat, ensuring the side seams are crisp.
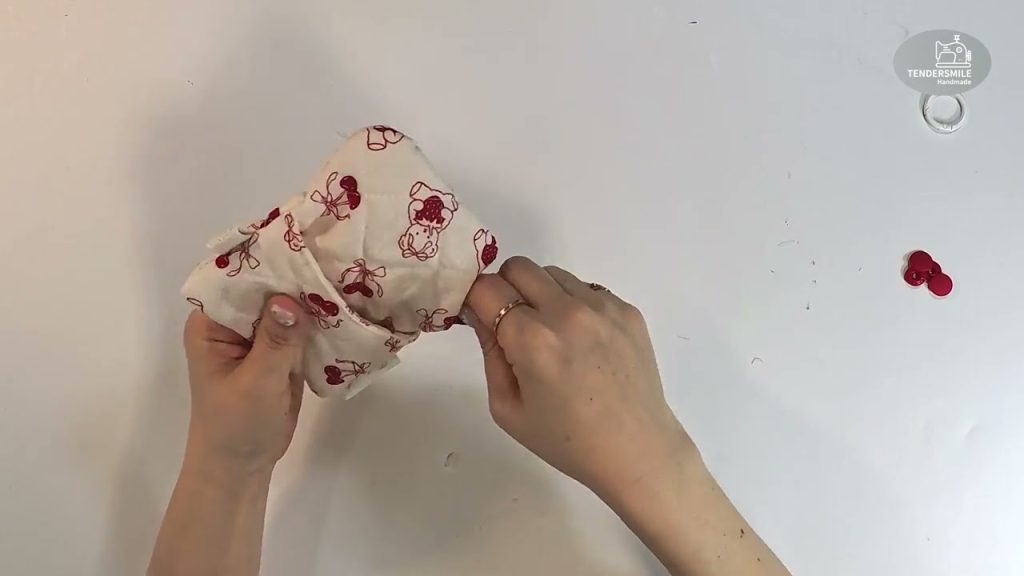
5. Fold & Finish the Bottom (3 minutes)
- With the fabric still right side out, lay it flat so the exterior fabric is facing up.
- Fold the bottom raw edge up towards the top, so that the raw edge aligns perfectly with the bottom edge of the hemmed top edge of the exterior fabric.
- This will create an opening inside the wallet where your cards will go.
- Pin this folded edge securely in place.
- Carefully fold the entire piece in half, bringing the bottom edge up to meet the top edge. The exterior fabric should be on the outside, and the interior/lining fabric should form the inner pockets.
- Pin the side seams together to hold the shape.
- Stitch the two short ends of the wallet (where the raw edges are) using a 1/4 inch (0.6 cm) seam allowance. Backstitch at the beginning and end of each seam.
- Trim off any excess thread.
Your 10-Minute Wallet is Done!
That’s it! You’ve just sewn a functional and adorable card wallet in a flash. Slip in your essential cards and a few folded bills, and you’re ready to go.
Quick Customization Ideas:
- Key Ring: Before stitching the final side seams (Step 5), tuck a small loop of ribbon or thin elastic (with a keyring attached) into one of the top corners of the wallet.
- Interfacing: For a slightly sturdier wallet, fuse a piece of lightweight fusible interfacing to the wrong side of your exterior fabric before cutting.
- Contrast Stitching: Use a contrasting thread color for a fun, visible detail.
Enjoy your speedy, handmade creation! What fabric scraps will you transform next?
Video tutorial: