 by
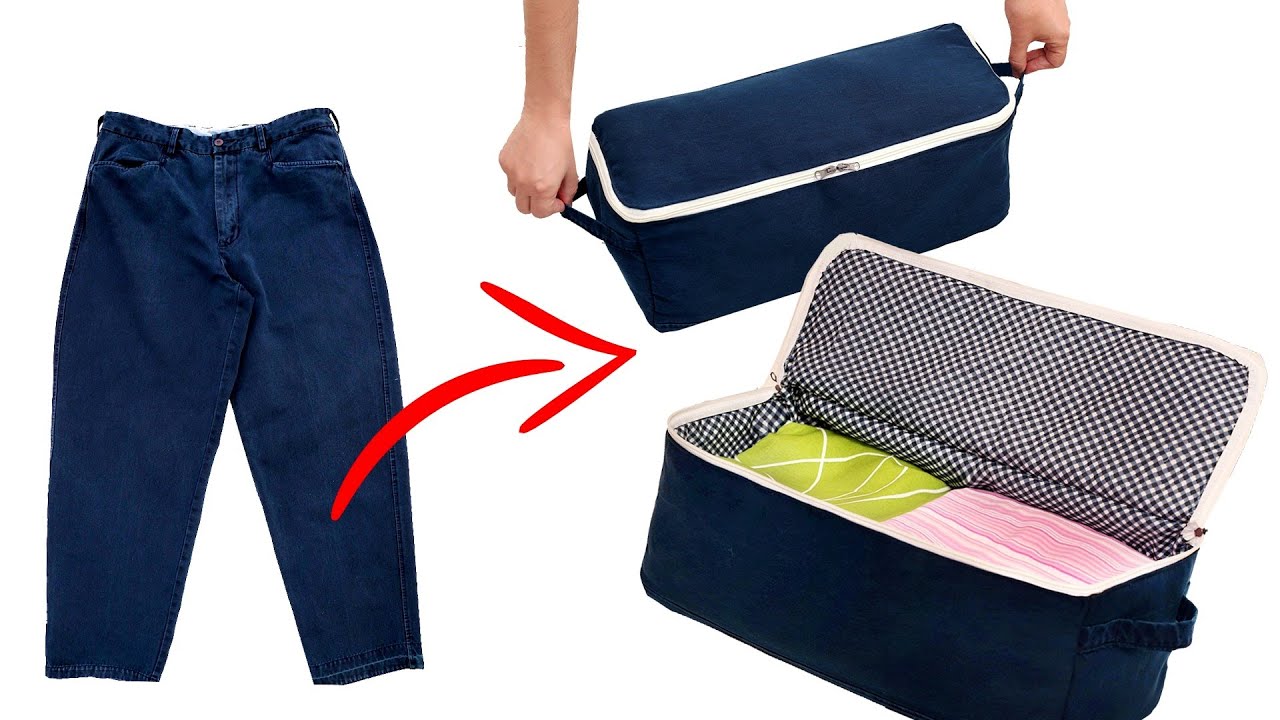
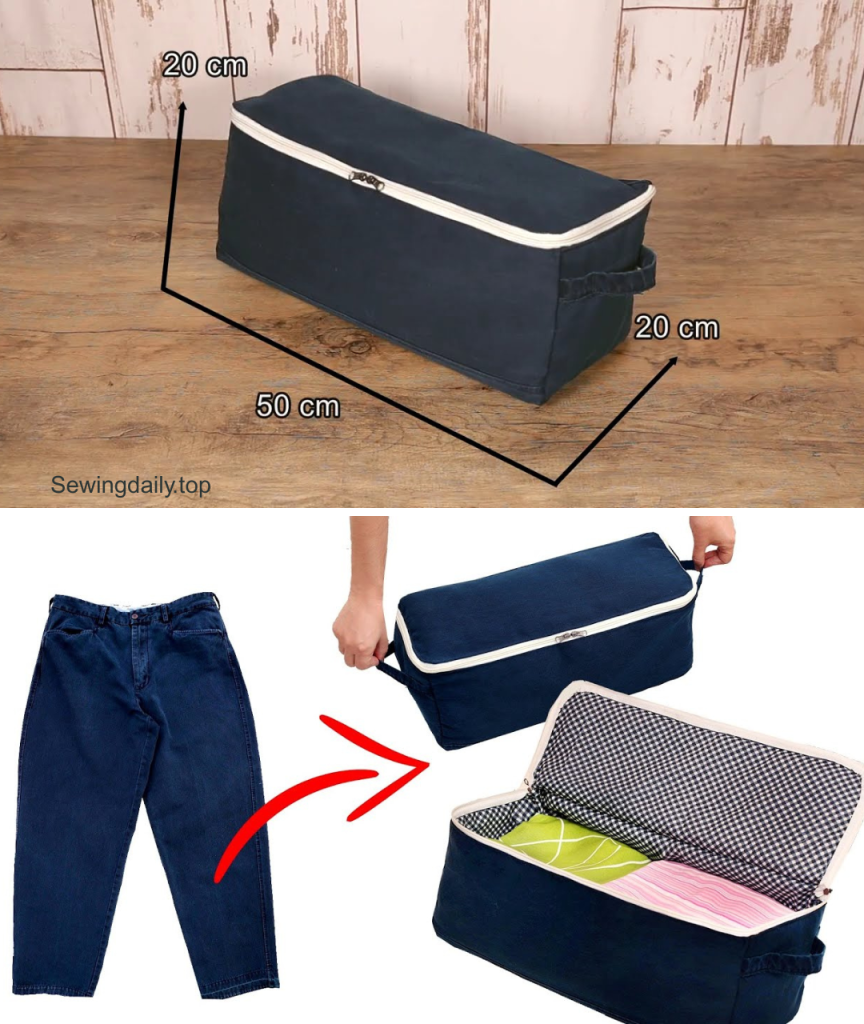
by In today’s world of sustainable fashion and upcycling, breathing new life into old clothes isn’t just a trend—it’s a practical and eco-friendly solution. If you have a stack of worn-out jeans sitting in your closet, don’t toss them just yet! Those sturdy denim fabrics are perfect for making durable, stylish, and personalized items—like a DIY travel bag.
Whether you’re a sewing enthusiast or a beginner looking for a creative project, this step-by-step guide will walk you through how to make a travel bag out of old jeans with your own hands.

✂️ Materials You’ll Need
Before starting, gather all your supplies. Here’s what you’ll need:
Fabric & Materials:
- Old jeans (2–3 pairs recommended depending on the bag size)
- Cotton fabric for lining (optional, but adds structure and cleanliness inside the bag)
- Sturdy zipper (14–20 inches, depending on the desired bag opening)
- Webbing or denim strips for handles/straps
- Thread (heavy-duty or polyester thread works best for denim)
- Interfacing (for added structure; optional)
Tools:
- Sewing machine (preferably one that handles thick fabrics)
- Fabric scissors
- Pins or clips
- Measuring tape or ruler
- Seam ripper
- Chalk or fabric marker
- Iron and ironing board
🧵 Step-by-Step Instructions
Step 1: Plan Your Bag Design
Before cutting, decide:
- The type of travel bag: duffel, tote, or backpack?
- The size: Carry-on size? Weekend bag?
- The features you want: pockets, compartments, handles, shoulder strap?
You can draw a simple sketch of your bag to use as a reference.
Step 2: Prepare the Jeans
- Cut the jeans along the seams to separate the front, back, and leg panels.
- Lay the fabric flat and iron it to remove wrinkles.
- Remove any embellishments or thick hardware (e.g., rivets) that may damage your sewing machine.
- Decide what denim panels to use for different parts:
- Use back pockets or thigh sections for exterior decoration or utility.
- Use legs for large continuous panels (front/back/sides).
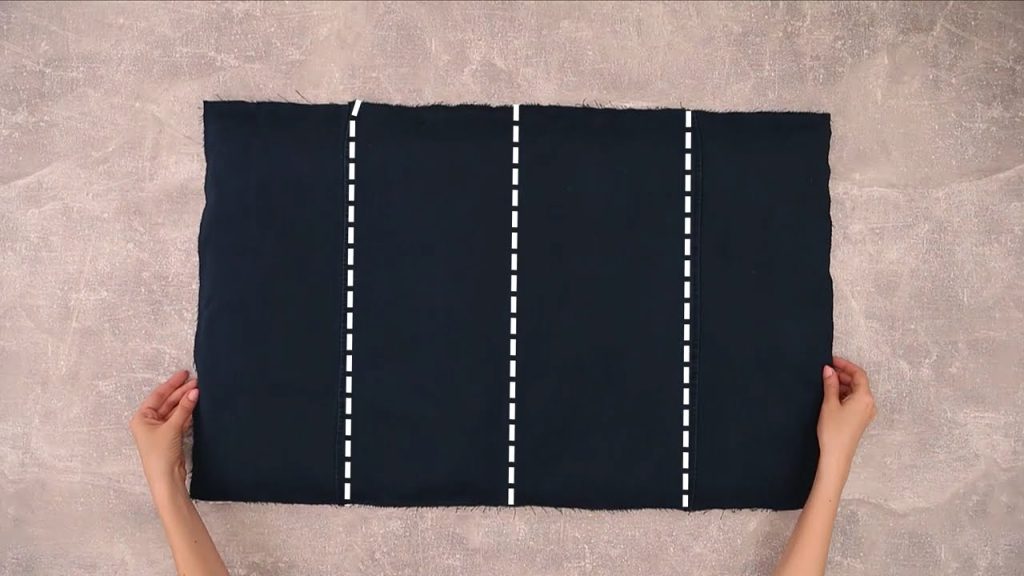
Step 3: Create a Pattern
You can create a basic pattern on paper or draw directly onto the fabric using chalk.
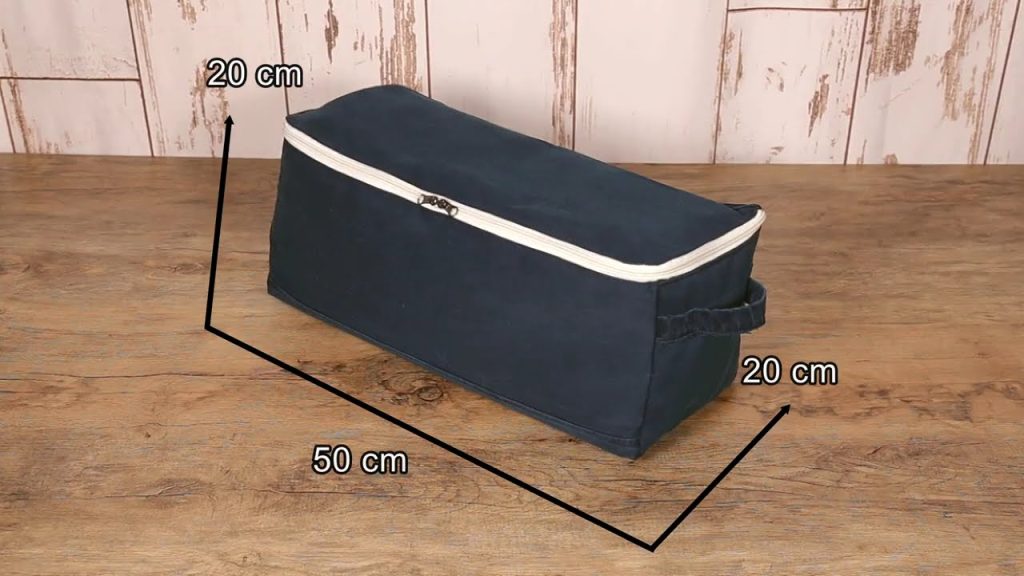
Here’s a simple travel tote style:
- Main body (x2): 18” wide x 14” tall
- Side panels (x2): 6” wide x 14” tall
- Bottom panel: 18” x 6”
- Handles: 20–24” long x 2” wide (or use webbing)
- Pockets: Optional (use jeans back pockets!)
Add ½-inch seam allowance around all pattern pieces.
Step 4: Cut the Denim and Lining Fabric
Using your pattern, cut:
- Denim pieces (for exterior)
- Cotton fabric or lining (cut to the same size)
- Interfacing (optional, to reinforce)
Tips:
- If you’re running short on large denim panels, patch together smaller pieces using a flat-felled or zigzag seam for durability and aesthetics.
Step 5: Sew Exterior Panels
- Assemble pockets:
- Reuse the jeans’ back pockets by sewing them onto your front or side panels.
- You can also create zipper pockets or flaps if desired.
- Join the panels:
- Start by sewing the side panels to the front and back panels, right sides together.
- Attach the bottom panel last to complete the outer shell.
- Topstitch the seams for strength and a finished look.
Step 6: Create and Attach Handles
There are two main options:
- Use denim strips: Fold long strips of denim lengthwise, press, and stitch to create sturdy handles.
- Use webbing or canvas straps: Easier and professional-looking.
Pin the handles to the bag’s exterior, spacing them evenly. Reinforce with a square and X-stitch pattern for added durability.
Step 7: Sew the Lining
- Repeat the steps you used for the denim exterior using the lining fabric.
- Optional: Add interior pockets for extra storage (great for passports, chargers, etc.).
- If you’re using interfacing, attach it to the lining or denim (according to the instructions) before assembly.
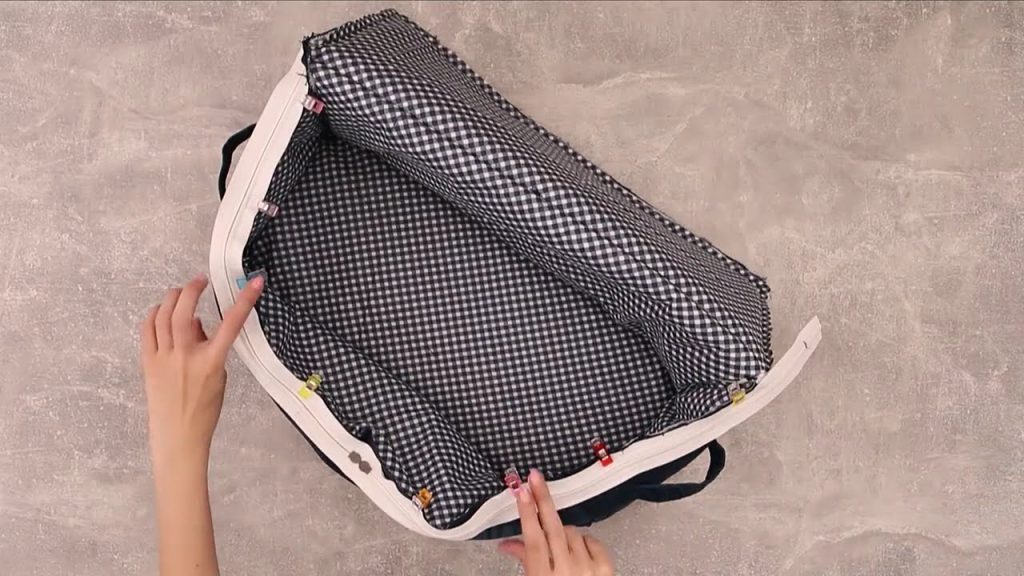
Step 8: Install the Zipper
- With the outer shell and lining prepared, pin the zipper between the top edges of the denim and lining (right sides facing).
- Use a zipper foot on your sewing machine.
- Sew along one side, then repeat for the other side of the zipper.
- Flip the fabrics and topstitch along the zipper edge to prevent fabric from catching in the teeth.
Step 9: Assemble the Bag
- Turn the lining inside out, but keep the denim right-side out.
- Place the denim shell inside the lining, right sides together.
- Align seams and zipper, then pin around the top edge.
- Sew all around the top, leaving a 5-inch gap to turn the bag right side out.
- Carefully turn the bag through the hole.
- Tuck the raw edges of the hole in and topstitch around the entire top edge to close it.
Step 10: Finishing Touches
- Add decorative elements: patches, embroidery, or studs.
- Check all seams for strength—this bag will carry weight!
- If you want a shoulder strap, attach D-rings to the side seams and make an adjustable strap from denim or webbing.
✈️ Tips for a Durable and Stylish DIY Travel Bag
- Double stitch or use reinforced seams for added strength.
- Use contrasting thread for a stylish denim look.
- Keep a uniform color palette by using jeans of similar washes, or create a patchwork style with varied shades.
- You can add feet (metal or fabric) to the bottom of the bag for protection.
🧳 Why Make a Travel Bag from Old Jeans?
- Sustainability: Upcycling reduces waste and gives materials new life.
- Durability: Denim is strong and can handle wear and tear.
- Cost-effective: Why buy a new bag when you can create one for free?
- Customization: Add exactly the features you need for your travel style.
🧵 Final Thoughts
Creating a travel bag from old jeans is more than just a sewing project—it’s a statement of creativity, sustainability, and self-expression. Each stitch carries your personal touch, and every upcycled piece adds character to your bag. Whether you’re heading out on a weekend getaway or flying overseas, you’ll carry a story on your shoulder.
So dust off those old jeans, grab your sewing kit, and give travel a new meaning—with a DIY denim bag that’s built to go places.
Video tutorial: