by
by Quilted tote bags bring together the best of both worlds: the practicality of a tote and the beauty of quilting. They’re not only stylish and functional but also an excellent way to show off your creativity, experiment with patchwork, or use up leftover fabric.
Whether you’re a seasoned quilter looking for a weekend project or a sewing enthusiast new to quilting, this detailed step-by-step guide will walk you through making your very own quilted tote bag—from fabric selection to final stitch.
Let’s get started!
✨ Why Make a Quilted Tote Bag?
Before jumping into the tutorial, here’s what makes quilted tote bags worth the effort:
- Extra Durability: The quilted layers add strength and cushion.
- Custom Style: Choose fabrics, colors, and patterns to make it truly unique.
- Skill Building: Combines patchwork, quilting, and bag construction techniques.
- Gift-Worthy: Handmade quilted totes make fantastic gifts for birthdays, holidays, or teacher appreciation.
📐 Overview of the Project
Difficulty Level:
Beginner to intermediate
Estimated Time:
4–6 hours (less if you’re experienced)
Finished Size:
Approximately 14″ wide x 15″ tall x 4″ deep
🧰 Materials & Tools
Fabric
- Outer fabric: Quilting cotton or fabric scraps (for patchwork front/back)
- Lining fabric: Quilting cotton
- Strap fabric: Same as outer or contrasting fabric (or pre-made cotton webbing)
- Batting: Low-loft cotton or polyester batting
- Optional: Fusible fleece for additional structure
Measurements
| Component | Size (each) | Quantity |
|---|---|---|
| Front & Back Panels | 16” x 17” | 2 |
| Batting | 16” x 17” | 2 |
| Lining Panels | 16” x 17” | 2 |
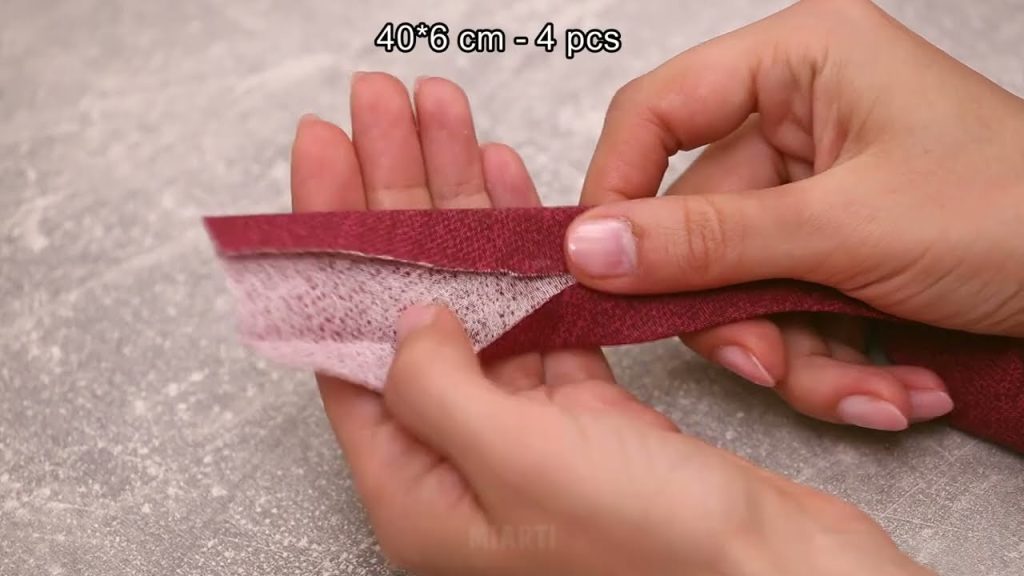
| Straps | 4” x 24” | 2 |
Optional: Patchwork blocks (4” x 4” squares, or use any block layout you like)
Tools
- Sewing machine
- Quilting ruler
- Rotary cutter & mat
- Iron & ironing board
- Fabric marking pen or chalk
- Pins or sewing clips
- Walking foot (helpful for quilting)
- Seam ripper (we all make mistakes!)
- Scissors
- Thread (cotton or polyester)
🪡 Step-by-Step Guide
Let’s walk through the process step-by-step. Feel free to adapt the design, sizes, or quilting style to your own preference.
Step 1: Choose Your Design
Option A: Solid Panels
Use one continuous piece of fabric for the outer panels. Choose a print or textured cotton.
Option B: Patchwork Panels
Sew together 4″ x 4″ squares or other quilting blocks (like log cabin, HSTs, or flying geese) into a panel that measures 16″ x 17″ including seam allowances.
Pro Tip: Use a ¼” seam allowance for piecing your patchwork panel.
Once you’ve completed your patchwork top, press all seams flat.
Step 2: Create the Quilted Panels
- Layer your sandwich for both front and back panels:
- Backing (outer fabric or patchwork) right side down
- Batting
- Top layer (right side up)
- Pin or baste layers together to prevent shifting.
- Quilt as desired:
- Straight-line quilting (diagonal or grid)
- Free-motion quilting (if you’re adventurous)
- Echo quilting around patchwork shapes
- Trim both quilted panels to 16” x 17” for a neat edge.
Step 3: Prepare Your Straps
If making fabric straps:
- Fold the strap fabric in half lengthwise, press.
- Open and fold raw edges to the center line, press again.
- Fold in half again and topstitch both long edges.
You’ll end up with a strong strap that’s ~1” wide and 24” long.
Alternatively, use pre-made cotton webbing to save time.
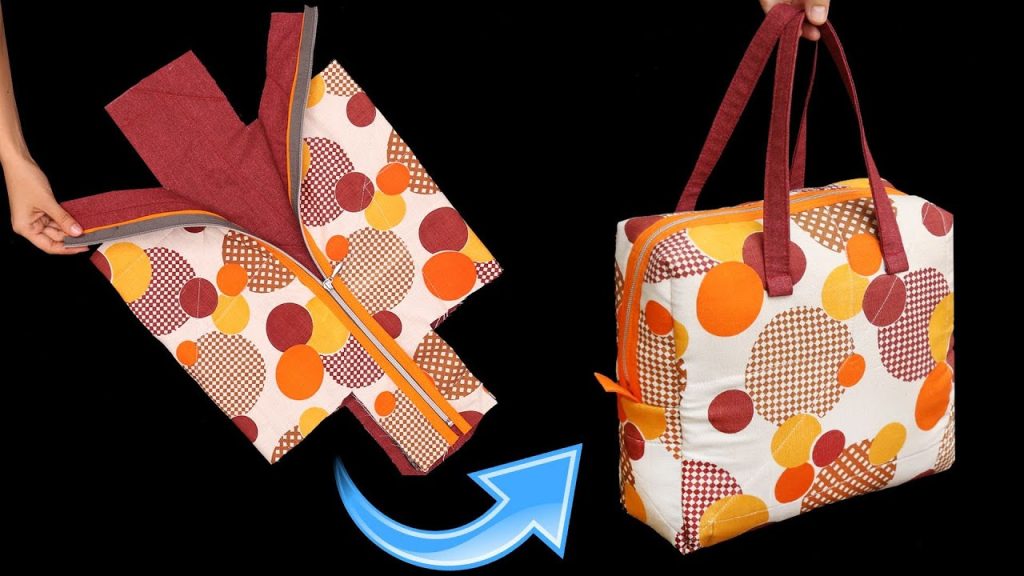
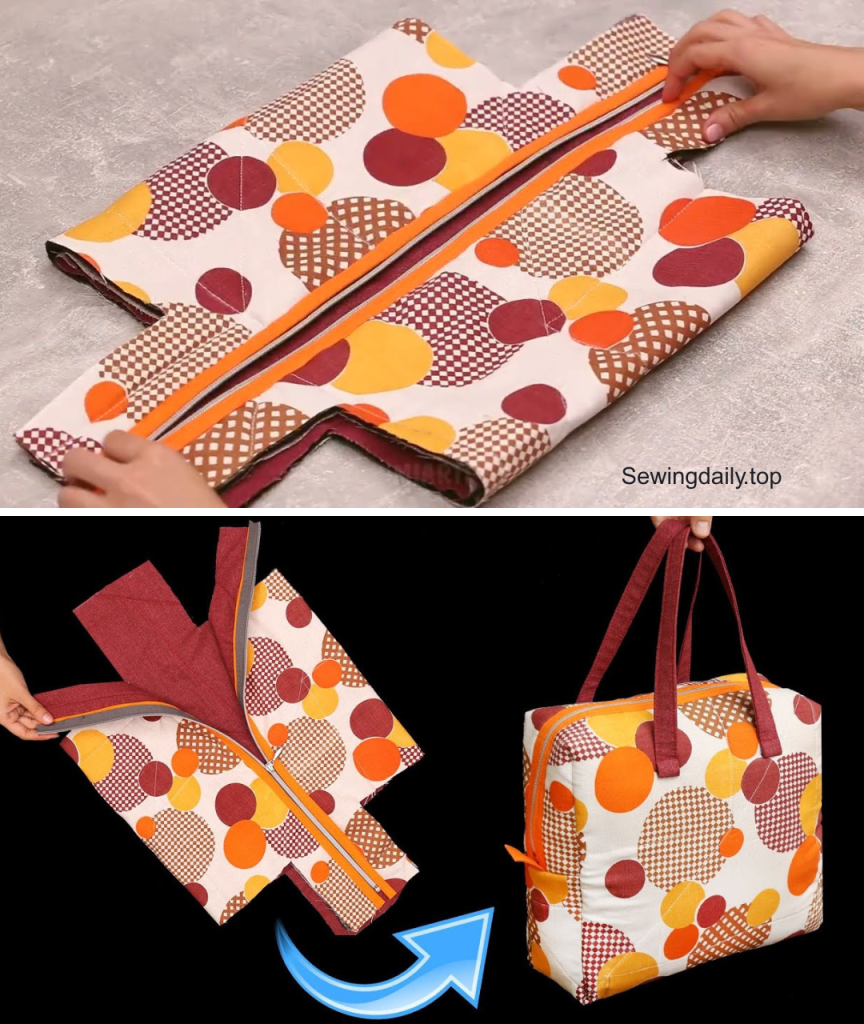
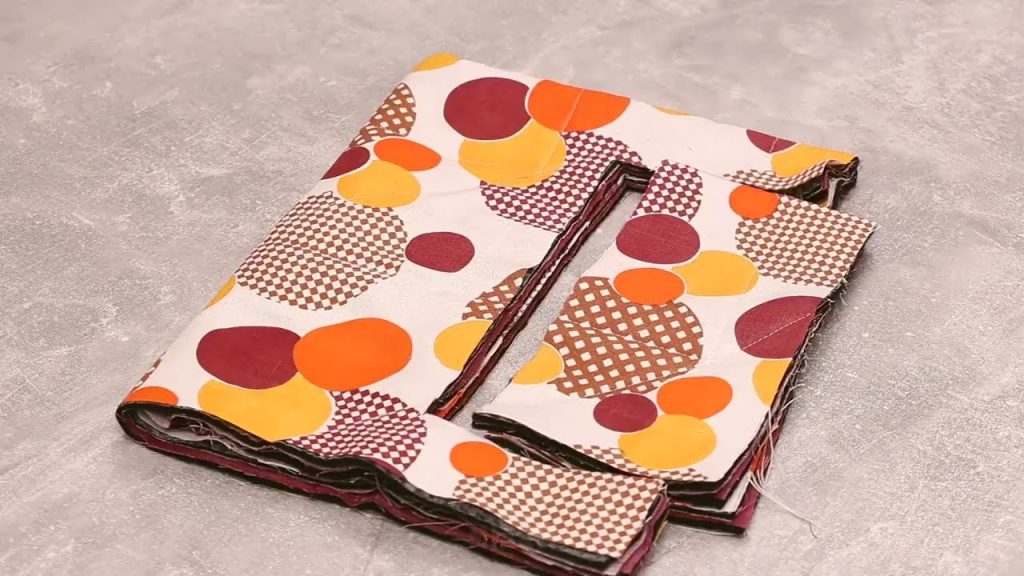
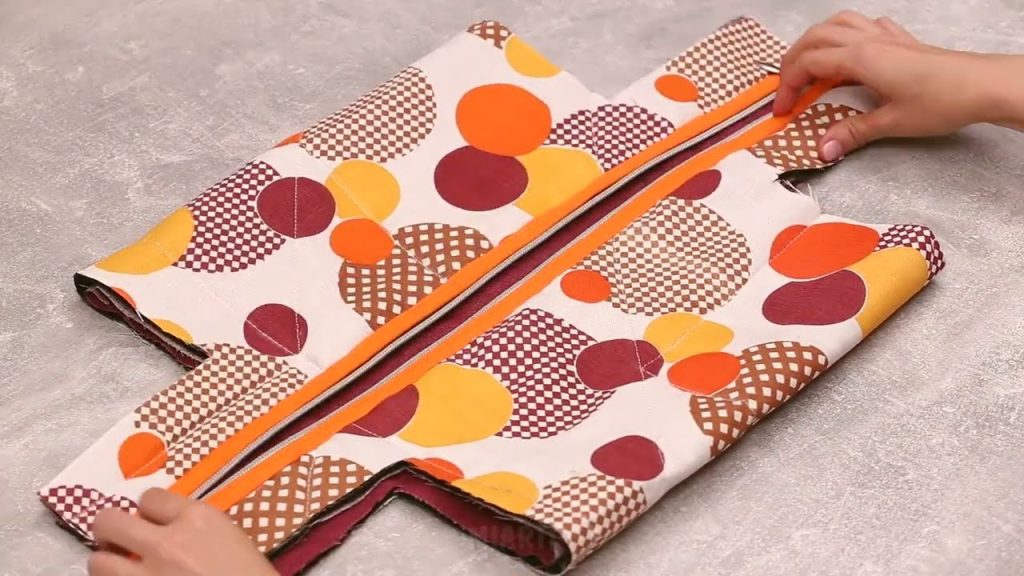
Step 4: Assemble the Outer Bag
- Place quilted panels right sides together, pin along the sides and bottom.
- Sew using a ½” seam allowance.
- Box the corners:
- At the bottom corners, pinch the fabric so the side and bottom seams align.
- Measure 2” from the corner point and draw a line across.
- Sew along the line and cut off excess fabric, leaving ¼” seam allowance.
Repeat for the other corner.
Step 5: Assemble the Lining
- Repeat the above steps with the lining fabric, but leave a 4” opening in the bottom seam (this will be used to turn the bag right side out).
- Box the corners in the same way.
Step 6: Attach the Straps
- Turn the outer bag right-side out.
- Pin straps to the top edge of the bag, 4” from each side seam.
- Ensure they are not twisted and hang evenly.
- Baste the strap ends to the top edge to keep them in place.
Step 7: Join Outer Bag and Lining
- With the outer bag right-side out and lining wrong-side out, place the outer bag inside the lining so that right sides are facing and straps are sandwiched between the layers.
- Align the top edges and side seams, pin all the way around.
- Sew around the top edge using a ½” seam allowance.
Step 8: Finish the Bag
- Pull the bag through the opening in the lining.
- Press the bag and lining flat.
- Sew the opening in the lining closed by hand or with a narrow topstitch.
- Tuck the lining into the bag and smooth out.
- Topstitch around the top edge (optional but recommended for a professional finish).

🪄 Customization Ideas
Once you’ve got the basic bag down, try these upgrades:
- Add an interior or exterior pocket (patch or zippered).
- Include magnetic snaps or buttons.
- Sashiko or hand embroidery quilting.
- Contrast panels or color blocking.
- Use leather, cork, or vinyl for straps.
💬 Pro Tips & Troubleshooting
| Problem | Solution |
|---|---|
| Bag feels too floppy | Use fusible fleece or heavier batting |
| Fabric layers shifting | Baste or pin thoroughly, use walking foot |
| Strap not even | Measure from side seams, use ruler |
| Uneven quilting lines | Mark before sewing with chalk or pen |
| Lining peeks out at top | Topstitch to secure it inside |
🧵 Beginner’s Glossary
- Basting: Temporarily stitching or pinning layers together.
- Boxing Corners: Technique to add depth to a bag.
- Topstitching: Stitching on the outside for a finished look.
- Interfacing: Material used to reinforce fabric.
🧶 Real-Life Story: My First Quilted Tote
The first time I made a quilted tote, I used leftover charm squares from a baby quilt. The result wasn’t perfect—my seams didn’t line up and I forgot to sew the straps before attaching the lining—but it was mine. I still get compliments on it, and every little imperfection reminds me how far I’ve come.
📚 Further Resources
- YouTube Channels:
- Jordan Fabrics – clear quilting + tote tutorials
- Sewing Times – stylish bag projects
- Books:
- Quilted Bags and Gifts by Akemi Shibata
- ByAnnie’s Soft & Stable Projects
- Patterns:
- Etsy or Pinterest for free & premium quilted tote bag patterns
✅ Final Thoughts: Make It Yours
A quilted tote bag is more than just a sewing project—it’s a fusion of craftsmanship, creativity, and personal expression. With a little patience and a lot of fun, you can transform scraps of fabric into something both beautiful and useful.
Don’t worry about making it perfect. Just make it yours.
Video tutorial: