by
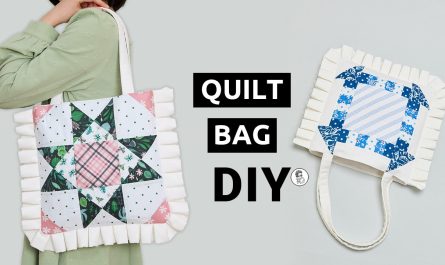
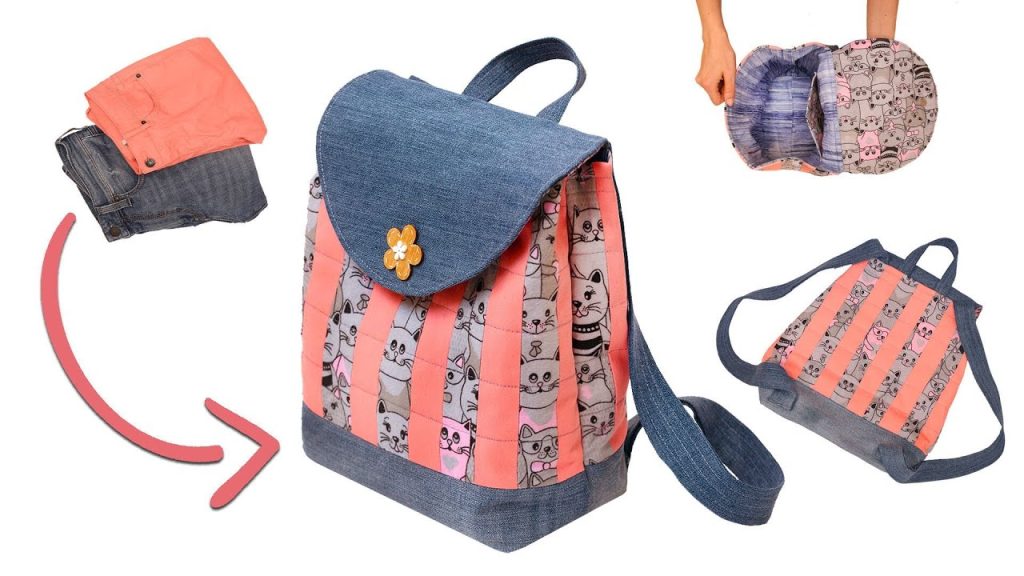
by Ready to breathe new life into those trusty old jeans? Forget donating them – let’s turn them into a ruggedly stylish and incredibly practical backpack that’s truly one-of-a-kind! This DIY project is a fantastic blend of sustainable fashion, personal creativity, and smart resourcefulness, perfect for anyone looking to make a statement with their accessories. Get ready to transform your denim into your next favorite carry-all!
What You’ll Need for Your Denim Transformation:
- Your Beloved Old Jeans: These are the star of your show! Pick a pair with good fabric integrity; any existing fades or subtle wear will only add to the backpack’s unique character.
- Contrasting Cotton Fabric: Select a vibrant pattern or a bold solid color. This will be used for the backpack’s lining, interior pockets, and eye-catching exterior striped details. The video’s playful cat-themed fabric is a perfect example of how a pop of print can elevate your design.
- Thermal Adhesive Polyester Wadding: This essential material provides structure, body, and a comfortable, padded feel to your finished backpack.
- Sewing Machine & Thread: A reliable sewing machine is your best friend for this project. Choose a strong thread that either blends seamlessly with your denim or creates a striking contrast for decorative stitching.
- Precision Tools: You’ll need sharp fabric scissors, a ruler or measuring tape for accurate dimensions, and fabric chalk or a washable marker for clear markings.
- Holding Power: Fabric clips or pins are indispensable for keeping your fabric pieces perfectly aligned before stitching.
- Secure Closure: A magnetic clasp offers a practical and stylish way to keep your backpack’s top flap securely closed.
- Optional Personal Touches: Consider adding a custom woven label, an embroidered patch, or unique buttons to infuse even more of your personality into the backpack!
Your DIY Journey: From Denim to Distinctive Backpack – Step-by-Step:
- Fabric Preparation & Striking Accents:
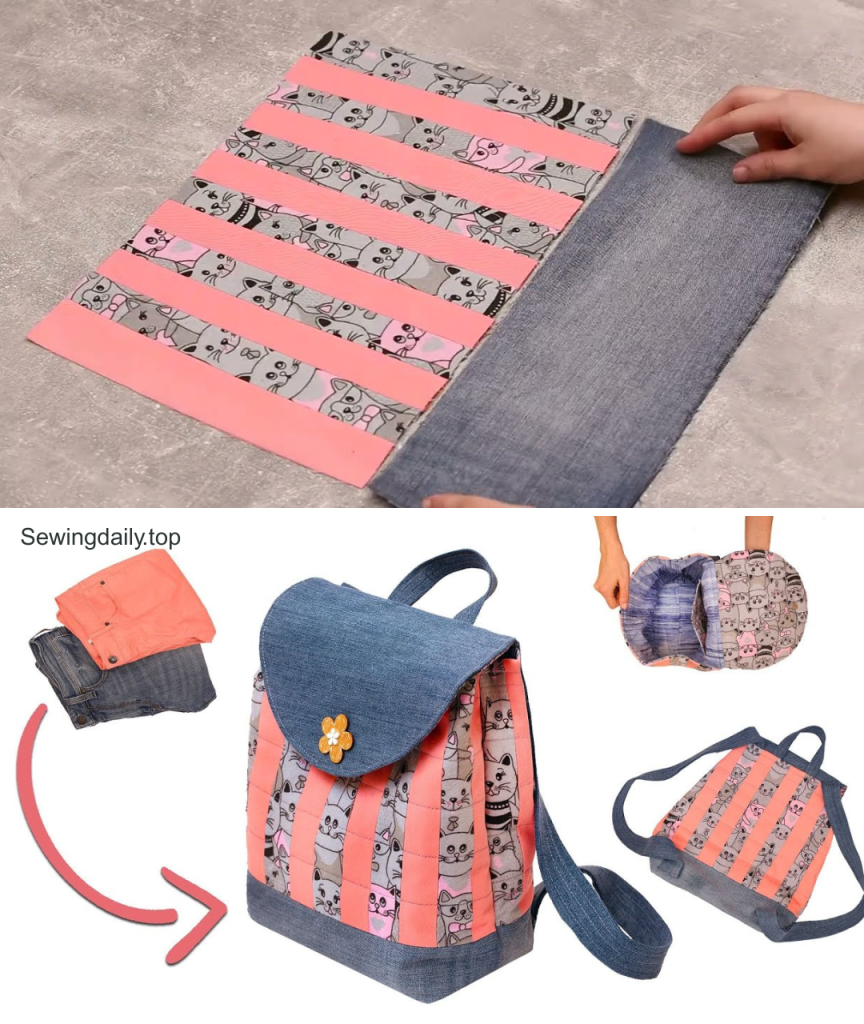
- Creating Your Striped Panel: Start by cutting several strips from your chosen contrasting cotton fabric. In the video, these strips are approximately 5×27 cm. Arrange these strips with your patterned accent fabric (like the charming cat print) in the middle, then carefully sew them together to form a visually engaging, larger striped panel. This panel will be a vibrant focal point on your backpack’s exterior.
- Cutting Denim Base Pieces: From your old jeans, cut two sturdy rectangular pieces. Each should measure roughly 41×15 cm. These pieces will form the durable lower section of your backpack’s main body and the foundation for its top flap.
- Constructing the Main Backpack Body:
- Uniting the Outer Fabrics: Take one of your 41×15 cm denim base pieces and sew it securely to the bottom edge of the striped cotton panel you just created. This forms a single, cohesive outer fabric piece for your backpack’s body.
- Adding Structure with Wadding: Cut a piece of thermal adhesive polyester wadding, approximately 41×40 cm. Carefully iron this wadding onto the back (wrong side) of your combined fabric panel. This step is vital for giving your backpack its defined shape, body, and a subtle cushioned feel. After adhering, trim any excess wadding and fabric around the edges for a clean finish.
- Defining the Base Corners: To achieve the classic, roomy box-bottom of a backpack, measure and cut out two 7×7 cm squares from the bottom corners of the denim section of your main panel. These cuts will create the “darts” that form the boxy corners.
- Crafting Durable Straps and a Convenient Top Handle:
- Robust Shoulder Straps: From your remaining old jeans, cut long, even strips of denim for your shoulder straps. The video illustrates a method of folding these strips lengthwise, pressing them flat, and then topstitching along both long edges. This technique results in robust, comfortable, and professional-looking straps that will withstand daily wear.
- Top Handle and Attachment Loops: Using the same folding and topstitching method, create smaller denim loops, approximately 22×7 cm. One of these will serve as a convenient top carrying handle, while the others will be used to securely attach the bottom of your shoulder straps to the backpack.
- Securing to the Backpack Body: Carefully position and securely sew the top handle and the upper ends of your shoulder straps to the top edge of your main backpack panel. Reinforce these attachment points with multiple rows of stitching for maximum durability.
- Designing the Flap and Reinforcing Side Accents:
- The Backpack Flap: Cut two identical semi-circular pieces from your denim, each with a diameter of about 26 cm. This forms the backpack’s main closure flap. Apply thermal wadding to the wrong side of one of these denim pieces to give the flap a firm, structured feel.
- Flap Lining & Closure Integration: Cut a piece of your contrasting fabric (approx. 23×30 cm) for the flap’s inner lining. Sew this lining piece to the denim flap (right sides together), then turn it right side out and topstitch neatly along the curved edge for a polished finish. Mark and install your magnetic clasp on the inside (lining side) of the flap. If you have a custom label, now is an excellent time to sew it onto the front of the flap for a truly personalized touch.
- Side Base Panels: Cut small denim squares, roughly 8×8 cm, which will form the lower side panels of your main backpack body. These are strategically sewn into the base to add reinforcement and help maintain the backpack’s structured shape.
- The Grand Finale: Bringing All the Elements Together!
- Sewing the Outer Bag: Fold your main outer body panel (with the denim base, striped accents, wadding, and straps already attached) in half lengthwise, right sides together, and sew the side seams to create a cylindrical shape. Then, stitch across the cut-out corner squares at the bottom to form the sturdy, boxy base of your backpack.
- Creating the Lining: From your contrasting fabric, cut corresponding pieces for the inner lining. Don’t forget pockets! The video illustrates adding a larger pocket (32×20 cm) and a smaller 7×7 cm pocket to the lining pieces. Sew these pockets onto your lining fabric. Assemble the lining just as you did the outer bag, including creating the box corners.
- Joining Outer Bag & Lining: Place the outer bag inside the lining, with right sides facing each other. Carefully align the top raw edges of both pieces. Stitch them together, leaving a small opening (about 4-5 inches) along one side. This unstitched section is crucial for turning your backpack right side out.
- Finishing Touches: Carefully turn the entire backpack right side out through the opening. Gently push out all corners and smooth the seams. Finally, close the remaining opening with a neat topstitch, either by hand or machine. Your backpack is almost complete!
- Attach the Flap: Position your expertly crafted flap at the top back of the backpack, ensuring it aligns perfectly with your magnetic clasp. Securely stitch it in place.
Congratulations! You’ve successfully upcycled your old jeans into a fantastic, functional, and undeniably stylish backpack. This project is a testament to the power of imagination and the rewarding experience of creating something new and useful from repurposed materials.
Video tutorial: