by
by Tired of digging endlessly through a bottomless pit of a handbag just to find your keys, wallet, or phone? The solution isn’t a bigger bag—it’s a smarter bag.
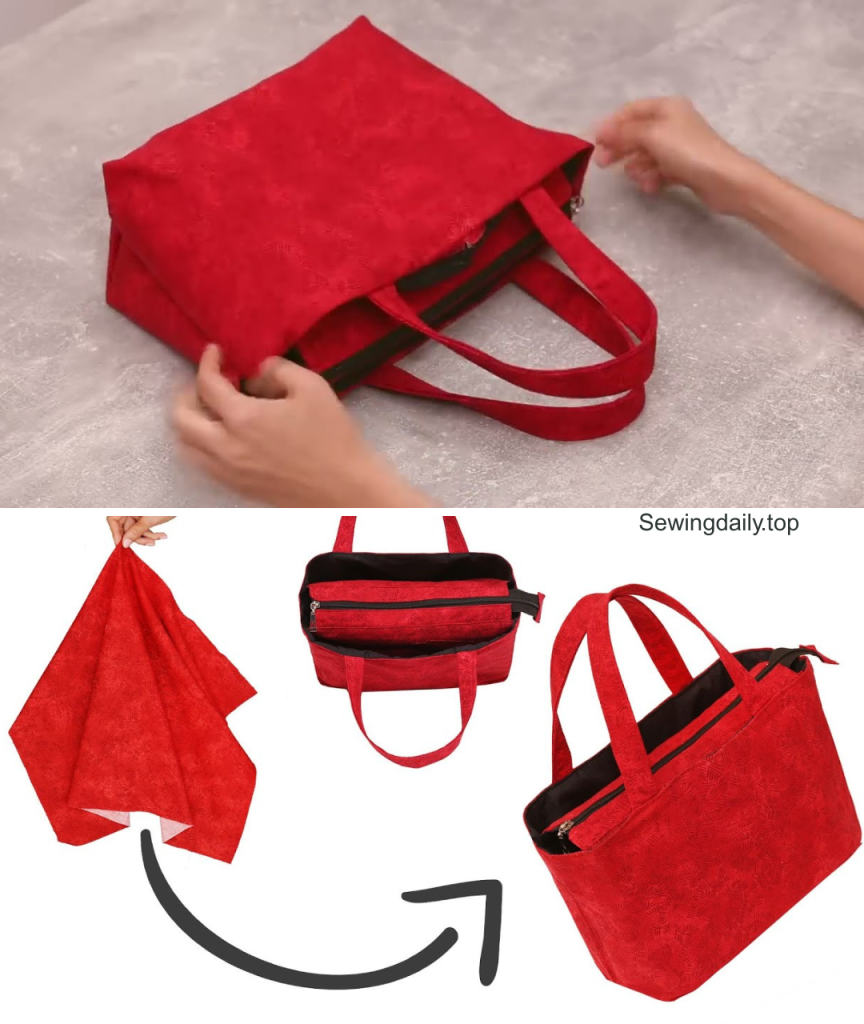
The triple-compartment design is the gold standard for effortless organization. It allows you to designate a home for everything: a secure zippered section for valuables, an open slip pocket for quick-access items, and a dedicated middle section for your phone or a small tablet. It transforms your daily carry from chaotic to controlled.
Inspired by the brilliant simplicity and professional finish demonstrated by creators like Miarti – Reuse in their tutorials, we’ve developed a detailed, step-by-step pattern for constructing this essential accessory. This project is challenging enough to be satisfying for intermediate sewers, yet straightforward enough for ambitious beginners ready to level up their bag-making skills!
Our Inspiration: Watch the source of this organizational genius, the “How to sew a handbag with 3 sections – DIY a bag!” video by Miarti – Reuse.
✂️ Structure is Everything: Tools & Materials Checklist
For a structured handbag, the materials you use for support are just as important as your chosen fabric.
Primary Materials (A 1-Yard Project):
- Exterior Fabric: 1 yard of sturdy fabric (canvas, denim, upholstery fabric, or faux leather are excellent choices).
- Lining Fabric: 1 yard of lightweight cotton or polyester for the interior.
- Heavy-Weight Fusible Interfacing: 1 yard (essential for giving the bag its shape and structure).
- Coordinating Thread: High-quality polyester thread.
- Zipper (10-12 inches): For the central security compartment.
- Bag Feet (Optional): For protecting the bottom of the bag.
- D-Rings or Rectangular Rings (2x): For attaching the shoulder strap.
Tools of the Trade:
- Sewing Machine: Equipped with a walking foot (highly recommended for thick layers and structured materials).
- Sharp Fabric Scissors or Rotary Cutter and Mat
- Measuring Tools: Ruler and clear sewing gauge.
- Pins and Fabric Clips: Clips are often better than pins for faux leather or thick layers.
- Iron and Pressing Cloth: Critical for interfacing application.

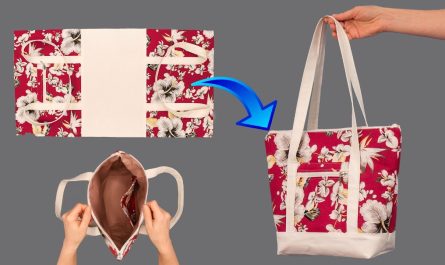
📐 The Detailed DIY Pattern: Creating the 3-Section Interior
The magic of this bag lies entirely in its internal construction. This guide is broken down into the key structural components.
Step 1: The Foundation – Cutting and Interfacing
Before any sewing, you must apply the interfacing to create the bag’s crisp shape.
- Cut Pattern Pieces: Cut all exterior and lining pieces according to your desired size (e.g., two large main body pieces, two side/bottom gusset pieces, and identical pieces for the lining).
- The Interfacing Rule: Apply the heavy-weight fusible interfacing to all exterior fabric pieces, following the manufacturer’s instructions. This step is non-negotiable for a professional-looking bag.
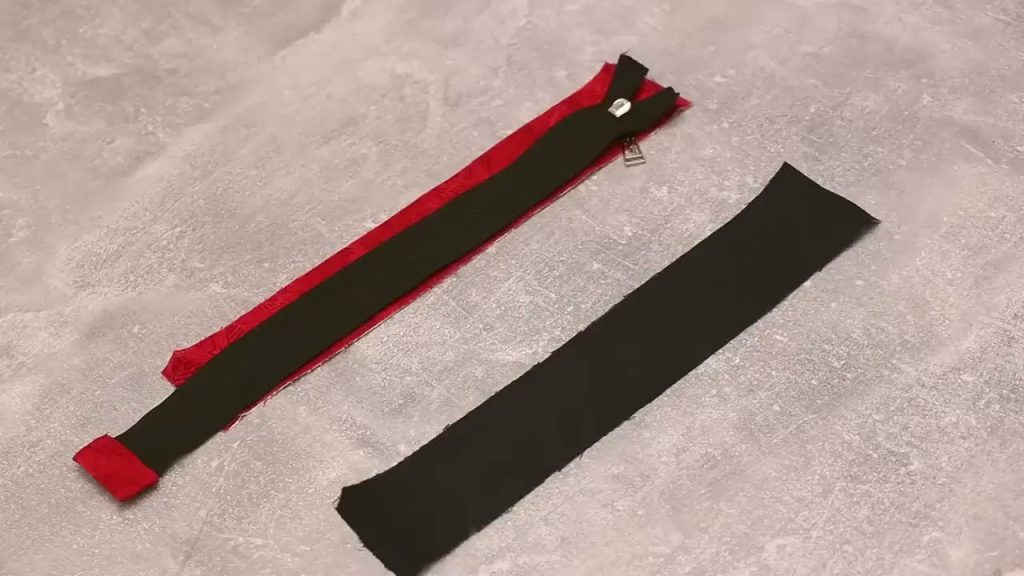
- Center Divider Pieces: Cut two pieces of lining fabric (plus two identical pieces of interfacing) that will form the central zippered pocket.
Step 2: Building the Central Zippered Divider
This divider acts as the core of the bag, separating the other two main compartments.
- Prepare the Zipper: Sandwich the zipper between the two center divider pieces, ensuring the fabric edges line up perfectly with the zipper tape. Stitch close to the zipper teeth.
- Create the Pocket: Once the zipper is installed, lay the two divider pieces right sides together (the zipper will be along the top) and sew around the remaining three edges to close the pocket. This forms your secure, third compartment.
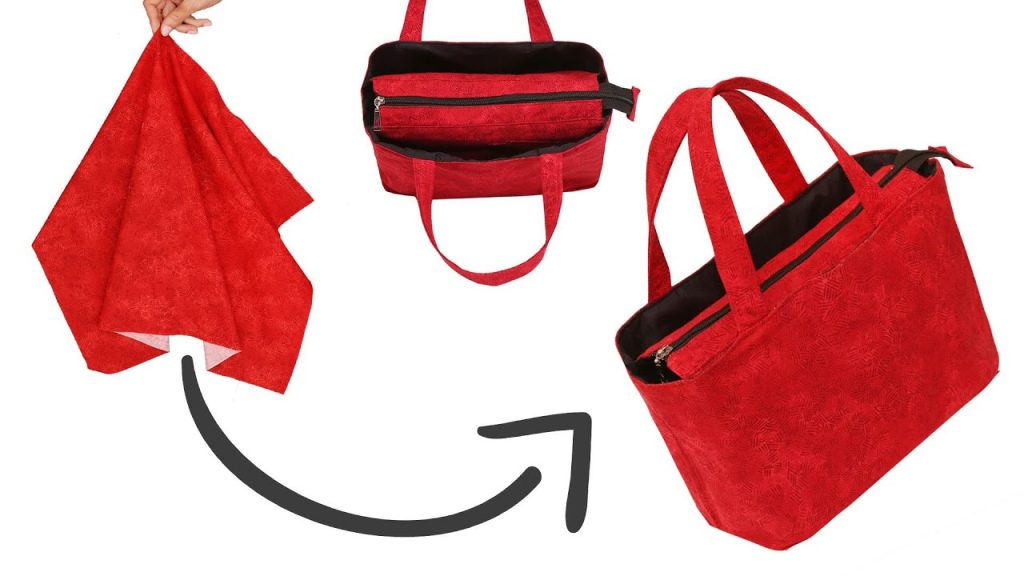
Step 3: Assembling the Outer Shell and Handles
While the interior is the brains, the exterior is the beauty.
- Outer Shell Assembly: Stitch the main body front and back panels to the side/bottom gusset piece, forming the three-dimensional exterior shell. Press the seams open for a clean look.
- Prepare Handles/Strap: Cut two long strips of your exterior fabric (or webbing) for the handles. Stitch them, turn them, and top-stitch down both sides for a durable finish. Attach the finished handles securely to the top edge of the bag’s exterior body, using a reinforcement stitch (like a box or double-stitch).
Step 4: Integrating the 3-Sections (The Pouch Method)
This is where the three compartments come together.
- Prepare the Lining: Sew the lining pieces together exactly as you did the outer shell, but do not attach the top edges yet, and leave a 4-5 inch opening in the bottom seam for turning.
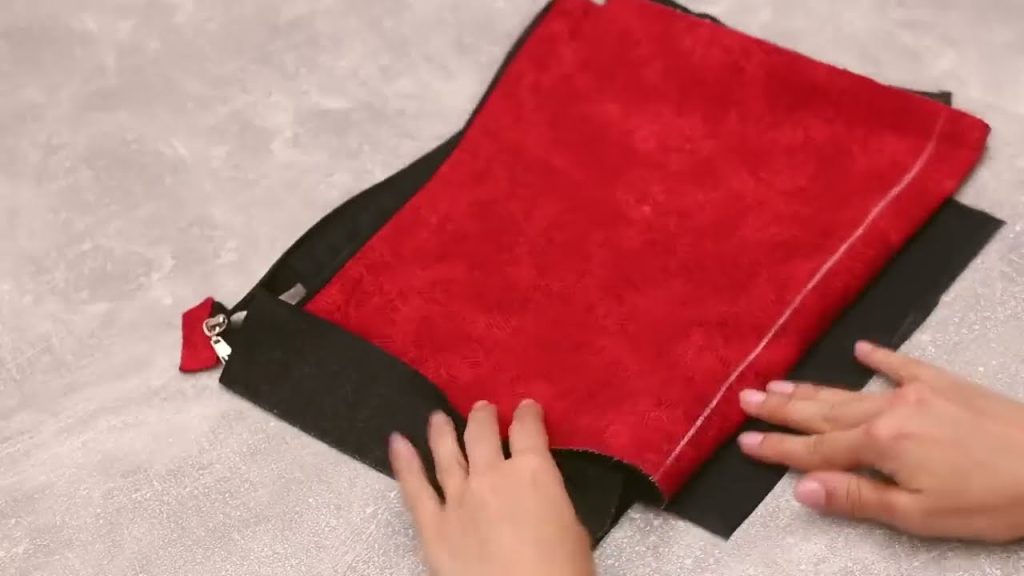
- Install the Divider: Pin the prepared Central Zippered Divider (from Step 2) into the middle of the lining assembly, aligning the bottom edge of the divider with the bottom seam of the lining. Stitch the divider into place only at the top edges of the lining. You should now have the three separate sections defined within the lining.
Step 5: The Final Join and Turning
- Nesting the Shells: Insert the assembled Outer Shell (right side out) into the assembled Lining (right side out). The right sides of the fabric should be facing each other.
- Stitching the Top Edge: Pin the top edges of the exterior and lining all the way around, ensuring the handles are tucked safely inside. Stitch the top seam closed (this attaches the lining to the shell).
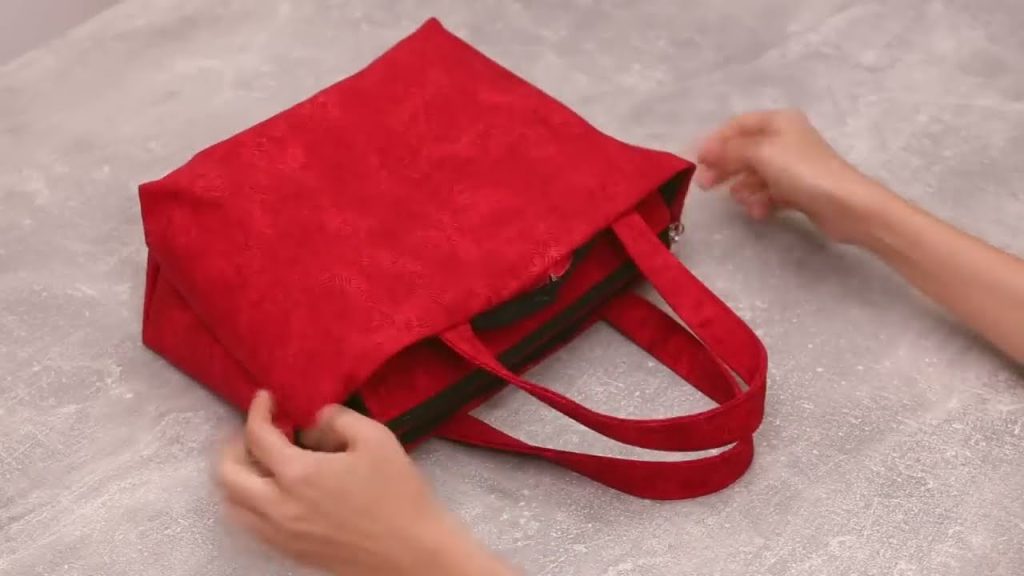
- The Reveal: Pull the entire bag right-side-out through the 4-5 inch opening in the bottom of the lining. Push the lining into the bag, smoothing the edges.
Step 6: The Professional Finish
- Close the Lining: Hand-stitch the opening in the lining closed with a neat slip stitch, or machine stitch it right along the edge.
- Top Stitching: The key to a professional, structured bag is top-stitching. Sew a line of stitching approximately 1/8 to 1/4 inch from the top edge of the entire bag. This secures the lining, reinforces the handles, and gives your bag a crisp, tailored finish.
✨ Styling and Conclusion: Carry Clutter-Free
Your meticulously constructed, custom three-section handbag is complete! This pattern results in a bag that is not only organized but also stands up on its own—a true mark of a quality build.
- Organized Living: Use the central zippered section for money/ID. Dedicate one open compartment for work (notebook, pens, cables) and the other for personal items (makeup, water bottle).
- Professional Polish: The structured silhouette created by the heavy interfacing makes this bag ideal for professional settings, contrasting nicely with the softer, more casual feel of many tote bags.
By taking the time to sew a multi-compartment bag, you’ve invested in more than just an accessory—you’ve invested in daily efficiency and sustainable style. Happy sewing!
Video tutorial: