by
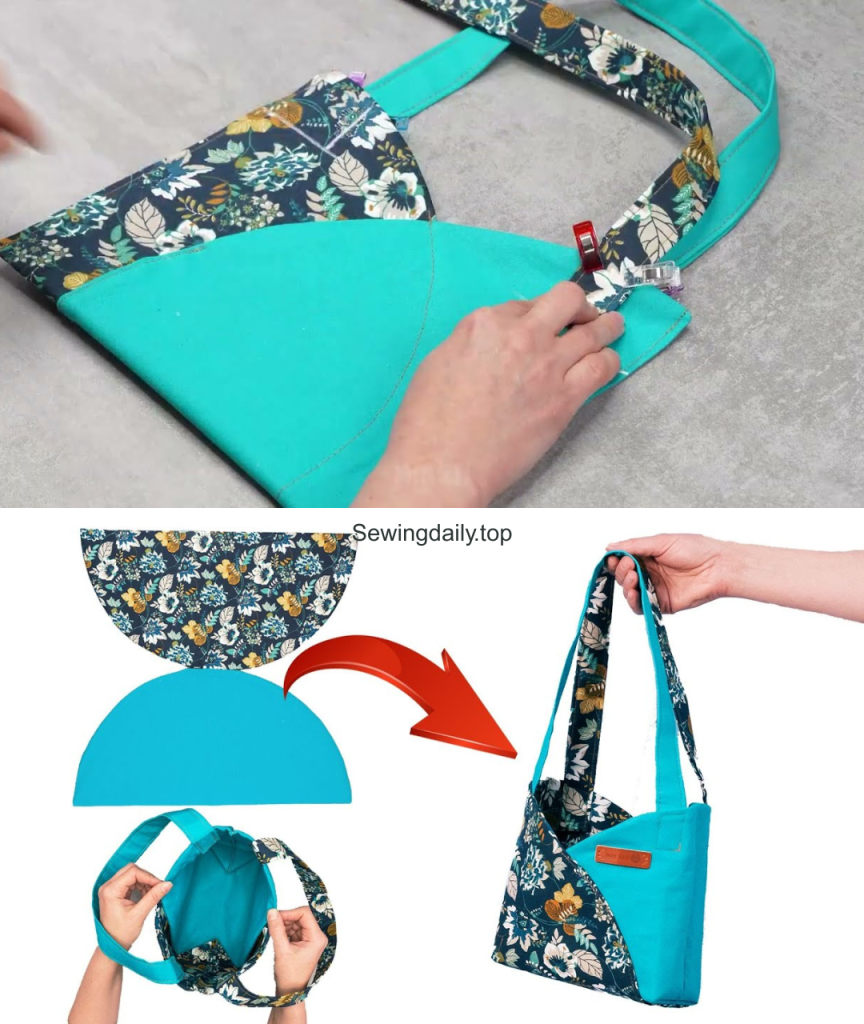
by Hello, minimalists and quick-sew experts! Do you love the idea of a fully lined bag but hate dealing with fiddly pieces and confusing assembly? I am thrilled to share the pattern for the Two-Panel Traveler Sling Bag—a chic, sturdy, and highly efficient bag that is sewn from just two main rectangles of fabric.
Inspired by a fantastic tutorial that shows an amazing idea for a simple bag sewn from only two pieces, this pattern uses clever folding and slicing to create the body, lining, and pocket in a nearly seamless process. It’s the perfect project for showcasing a bold fabric print or utilizing a remnant of a thick, luxurious material like faux leather or velvet.
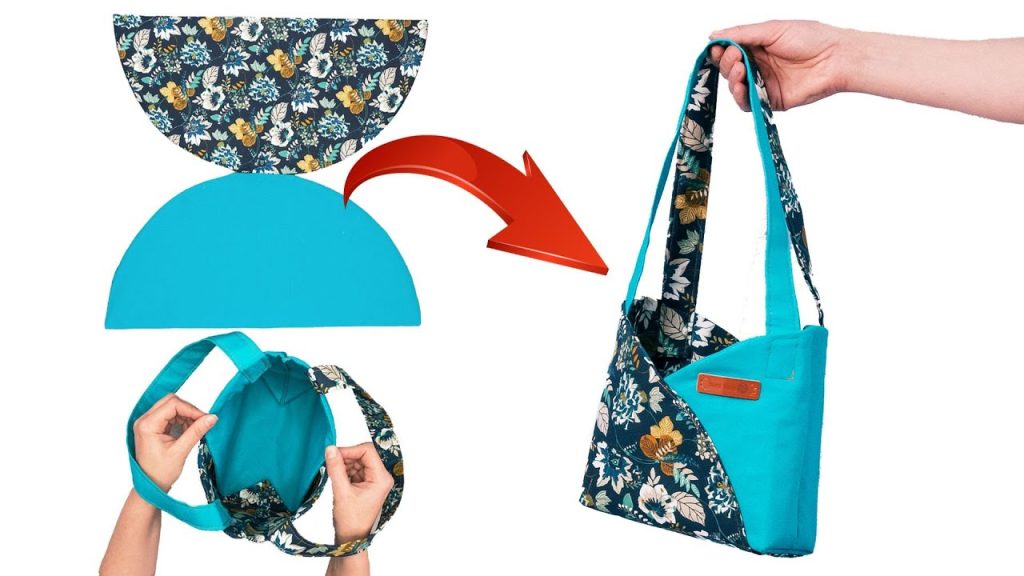
Grab your two coordinating fabrics and let’s create this impressive, deceptively simple sling!
Why You’ll Love Making This Bag:
- Two-Piece Magic: The entire bag (outer shell, lining, and pocket) is created from just two rectangular pattern pieces.
- Virtually Seamless: The bottom and most of the sides are created by folding, minimizing stitching and increasing durability.
- Quick & Easy: Perfect for a determined beginner; you can finish this project in under two hours.
- High-End Look: The resulting bag has a clean, professional, and contemporary silhouette.
What You’ll Need:
- Fabric 1 (Outer Shell & Strap): 1 yard of sturdy fabric (canvas, denim, twill, or faux leather). This fabric should be a single, large piece.
- Fabric 2 (Lining & Pocket): 1 yard of contrasting cotton print or a soft cotton for the lining and inner pocket. This should also be a single, large piece.
- Fusible Interfacing: 1 yard of medium-weight fusible interfacing (highly recommended for structure).
- Zipper: One plastic coil zipper, 10–12 inches (25–30 cm) long.
- Tools:
- Sewing Machine and Zipper Foot.
- Iron and Ironing Board (essential for pressing and folding).
- Sharp Scissors or Rotary Cutter and Ruler.
- Pins or Clips.

Measurements & Cutting List
The final bag size will be approximately 10 inches wide x 12 inches high x 2.5 inches deep. All measurements include a 1/2-inch (1.2 cm) seam allowance.
| Piece | Fabric | Dimensions (Width x Height) | Quantity | Interfacing? | Notes |
| A: Main Outer Panel | Fabric 1 | 24 in. x 30 in. | 1 | Yes | The body, strap base, and back. |
| B: Main Lining Panel | Fabric 2 | 24 in. x 30 in. | 1 | No | The lining, flap, and pocket. |
| C: Zipper Tab | Fabric 1 or 2 | 2 in. x 4 in. | 1 | Yes | Small piece to finish the zipper end. |
Construction: Building the Two-Panel Traveler
Part 1: Preparing the Fabric
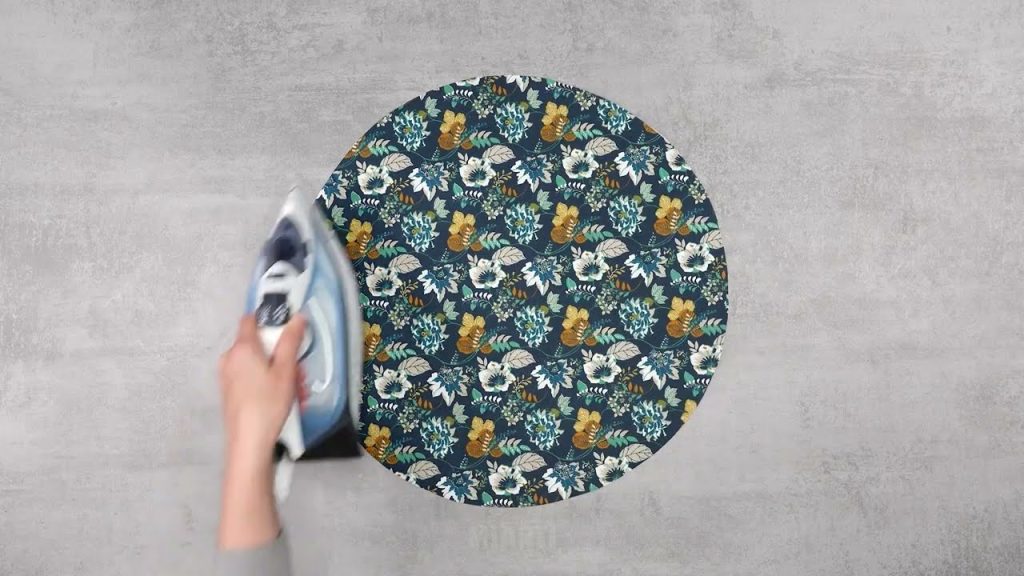
- Fuse Interfacing: Apply medium-weight fusible interfacing to the wrong side of the entire (A) Main Outer Panel and the (C) Zipper Tab.
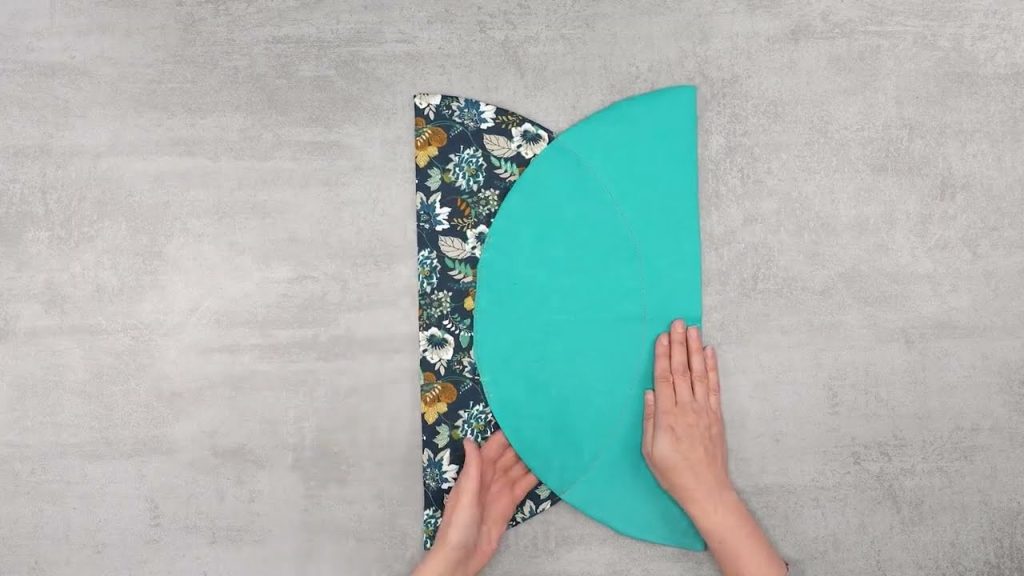
- Mark Panel Centers: Fold both (A) and (B) panels in half lengthwise (to 12 in. x 30 in.) and mark the center fold line (this will be the bottom of the bag).
- Create the Inner Pocket:
- On the (B) Lining Panel, measure 3 inches (7.5 cm) down from one short edge. This will be the top of the pocket.
- On the lining panel, stitch a vertical line down the center crease line, starting at the 3-inch mark and running for 8 inches (20 cm). This divides the lower section into two pocket areas.
Part 2: Forming the Bag Body and Lining
- Sew Outer Sides: Take the (A) Outer Panel. Fold it in half lengthwise (12 in. x 30 in.), right sides together.
- Starting 1 inch (2.5 cm) from the marked bottom crease, sew the two long sides together with a 1/2-inch seam allowance. Stop sewing 12 inches (30 cm) from the top raw edge. This creates the main body tube and leaves the top open for the flap/strap.
- Sew Lining Sides: Repeat Step 1 with the (B) Lining Panel. Crucial: When sewing the sides, leave a 4-inch (10 cm) gap unstitched along one of the side seams. This is the turning hole.
- Box the Corners: Measure 1.25 inches (3 cm) from the two bottom corners of both the Outer Bag and the Lining Bag. Draw a straight line and sew across it to create a 2.5-inch deep box corner. Trim the excess fabric.
Part 3: The Zipper and Flap/Strap
- Attach Zipper Tab: Sew the (C) Zipper Tab to the end of your zipper, creating a finished pull tab.
- Attach Zipper: Open the zipper halfway. Lay the Outer Bag flat. Pin the zipper along the top 10-inch raw edge, with the zipper tape centered on the seam allowance. Baste securely.
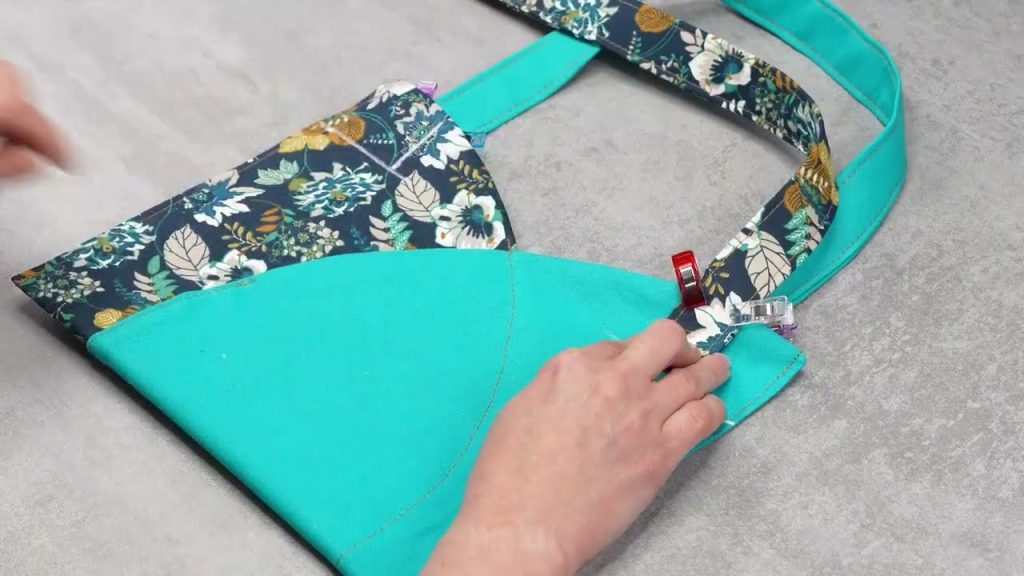
- Prepare Strap/Flap Edge: Fold the two top raw edges of the Outer Bag and the Lining Bag toward the center, creating the top opening. Pin the strap ends together at the top center of the Outer Bag.
- Nest the Shells: Turn the Lining Bag right-side out. Insert the Outer Bag (still inside out) into the Lining Bag, aligning the top seams and the zipper tape. Pin the zipper tape sandwiching the top raw edges of the outer and lining panels.
- Final Seam: Sew the top edge along the perimeter, securing the Outer Panel, the Lining Panel, and the zipper tape together.
Part 4: Finishing and Straps
- Turn Right-Side Out: Reach into the 4-inch turning hole in the lining and gently pull the entire bag right-side out.
- Close Hole: Stitch the turning hole in the lining closed (by hand or machine).
- Press and Topstitch: Tuck the lining neatly inside the Outer Bag. Press the zipper area flat. Topstitch along the top perimeter of the bag, close to the zipper, for a professional finish.
- Form the Strap: The remaining long, unsewn top section of the Outer Panel forms the strap. Fold the raw edges of this strap section inward, press, and then fold the entire strap in half.
- Stitch Strap: Topstitch along both long edges of the strap section to finish it securely.
- Attach Strap to Body: Sew the unsecured end of the strap to the bottom corner of the Outer Bag. This converts the bag from a tote to a true sling/backpack.
Congratulations! Your Two-Panel Traveler Sling Bag is complete—an incredibly simple design with a surprisingly sophisticated, functional finish.
Video tutorial: