 by
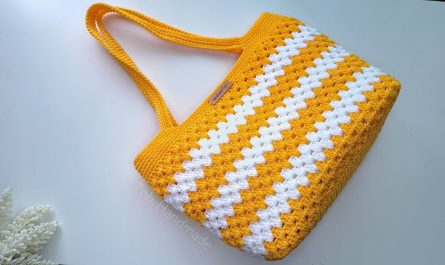
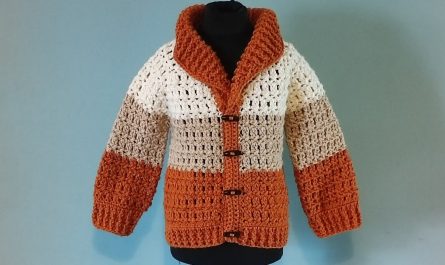
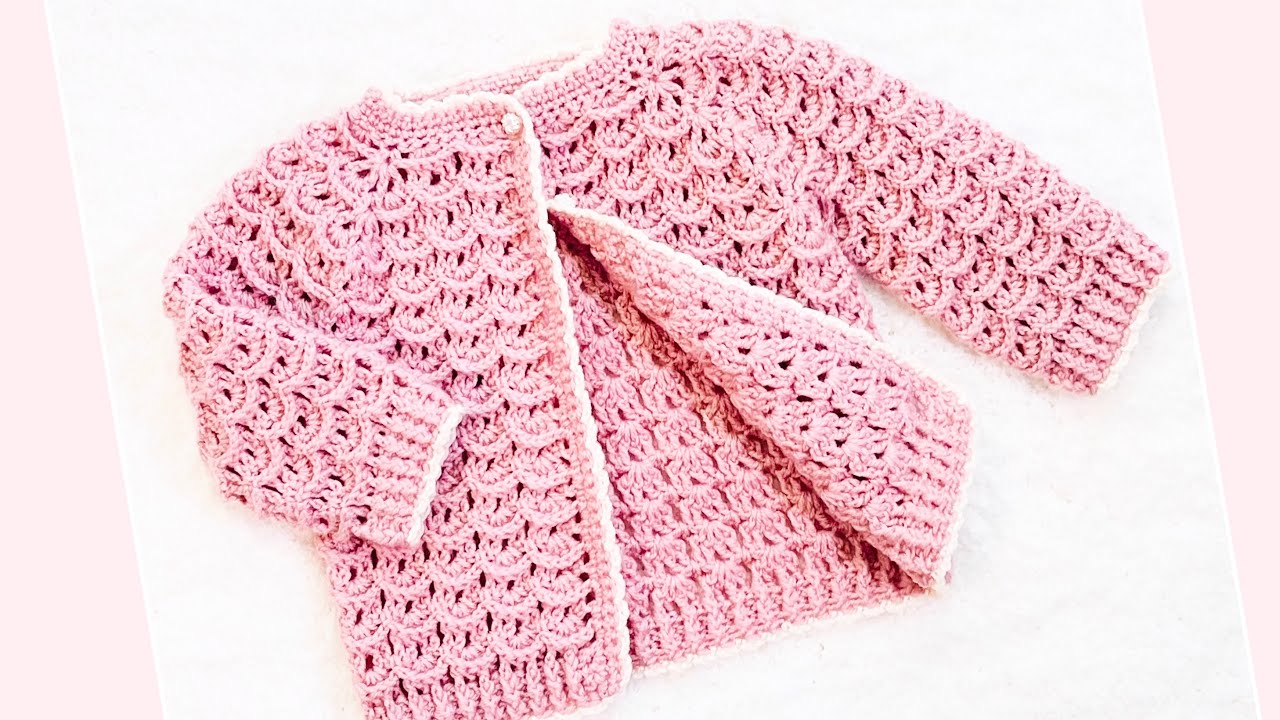
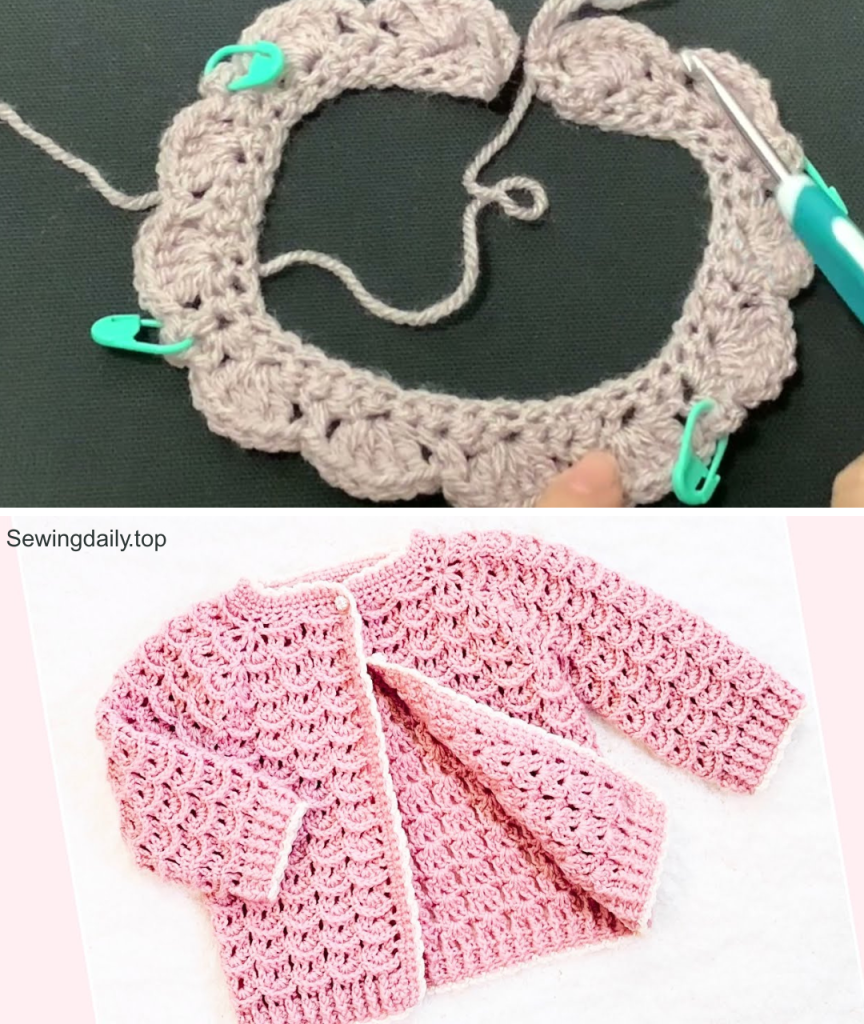
by Imagine a little one looking absolutely adorable and feeling snug as a bug in a custom-made, beautifully textured cardigan. This detailed tutorial, inspired by the wonderful “Crochet cardigan sweater or Jacket, for girls EASY CROCHET PATTERN various sizes crochet for baby” video by Crochet for Baby, will guide you through creating a charming and versatile cardigan or jacket. Featuring a delightful shell stitch pattern and designed with adaptability in mind, this project is perfect for keeping little girls warm and stylish.
Whether you’re a seasoned crocheter or looking to expand your garment-making skills, this pattern offers clear, step-by-step instructions to create a cherished piece for a special child in your life.
Why This “Little Shells” Cardigan Will Be a Favorite
This cardigan is more than just a piece of clothing; it’s a labor of love with several irresistible qualities:
- Adorable Design: The repetitive shell stitch creates a beautiful texture that’s visually appealing and comfortable to wear.
- Customizable Sizing: Designed to be easily adaptable, you can make this cardigan for baby girls from 3-6 months up to 12-18 months.
- Skill-Building: Practice fundamental stitches, precise shaping (yoke, armholes), and adding neat finishing touches.
- Perfect Gift: A handmade cardigan is a thoughtful and treasured gift for baby showers, birthdays, or holidays.
- Cozy & Practical: Made with soft yarn, it’s perfect for layering on chilly days.
Materials You’ll Need:
Having your materials ready before you start will make your crocheting journey smooth and enjoyable.
- Yarn: DK weight (number 3) yarn. The creator specifically mentions using an 8-ply yarn if you’re in Australia. You’ll need approximately 200-300 grams, depending on the size.
- Tip: Choose a soft, child-friendly fiber like acrylic, superwash merino, or a cotton blend for comfort and ease of care.
- Crochet Hook: 4 mm crochet hook.
- Optional: A 4.5 mm hook for the bottom of the body if you want extra fullness, as demonstrated in the video for the skirt effect.
- Buttons: 6 buttons (11mm or 7/16 inch recommended, as these fit through the stitch spaces).
- Stitch Markers: 4 stitch markers (essential for marking corners of the yoke).
- Tapestry Needle: For weaving in ends and seaming.
- Scissors
- Measuring Tape
The Heart of the Project: Sizing and Gauge
Achieving the correct size is crucial for any garment. Don’t skip these steps!
- Check Your Gauge: Make a swatch using the main stitch pattern. Chain about 25-30 stitches and work in the shell pattern for approximately 10-15 rows. Measure your swatch to ensure your stitches per inch match the pattern’s requirements. Adjust your hook size if necessary.
- Refer to Sizing Chart: The creator provides a sizing chart with starting chain lengths and yoke heights. Use this as your primary guide for the child’s age you are making the cardigan for.
Stitch Guide (Common Abbreviations):
- ch: chain
- sc: single crochet
- dc: double crochet
- sl st: slip stitch
- fpdc: front post double crochet
- bpdc: back post double crochet
- hdc: half double crochet
- fphdc: front post half double crochet
- bphdc: back post half double crochet
- sk: skip
- st(s): stitch(es)
- ch-sp: chain space
- shell: (4 dc in indicated space) – Unless otherwise specified, a shell in this pattern consists of 4 double crochets.
Step-by-Step Tutorial: Crocheting the “Little Shells” Cardi-Coat
This cardigan is worked from the top down, starting with the yoke.
Phase 1: The Yoke – Foundation and Divisions
The yoke forms the upper part of the cardigan, separating the front panels, sleeves, and back.
- Starting Chain: Begin with your 4mm hook. Chain the number of stitches specified in your sizing chart (e.g., 50 chains for 9-12 months, measuring about 28 cm or 11 inches).
- Row 1 (Foundation Row): Sc in the 2nd ch from the hook and in each ch across. You should have one less sc than your starting chain (e.g., 49 sc). Ch 1, turn.
- Row 2 (Shells and Corners): This row establishes the shell pattern and the four corners of the yoke.
- Sc in the first sc. Ch 1, sk 1 sc.
- Front Panel 1: Work 2 shells, separated by (ch 1, sk 1 sc, sc in next sc, ch 1, sk 1 sc).
- Corner 1: In the next sc: (sc, ch 2, sc). Place a stitch marker in the ch-2 space.
- Sleeve 1: Work 2 shells, separated by (ch 1, sk 1 sc, sc in next sc, ch 1, sk 1 sc).
- Corner 2: In the next sc: (sc, ch 2, sc). Place a stitch marker.
- Back Panel: Work 4 shells, separated by (ch 1, sk 1 sc, sc in next sc, ch 1, sk 1 sc).
- Corner 3: In the next sc: (sc, ch 2, sc). Place a stitch marker.
- Sleeve 2: Work 2 shells, separated by (ch 1, sk 1 sc, sc in next sc, ch 1, sk 1 sc).
- Corner 4: In the next sc: (sc, ch 2, sc). Place a stitch marker.
- Front Panel 2: Work 2 shells, separated by (ch 1, sk 1 sc, sc in next sc, ch 1, sk 1 sc).
- Finish with (ch 1, sk 1 sc, sc in last sc).
- Total shells for Row 2: 12 shells. Ch 3, turn.
- Row 3 (Front Post DC and V-Stitches): This row creates the post stitch texture and V-stitches at the corners.
- Fpdc around the first 2 dc of each shell, (ch 1), fpdc around the next 2 dc of the same shell.
- Corners: In each ch-2 corner space, remove marker, work (dc, ch 1, dc) – this is a V-stitch. Ch 1, work another V-stitch (dc, ch 1, dc) in the same space. Place a stitch marker in the ch-1 space between the two V-stitches.
- Continue this pattern around the entire yoke. Finish with a dc in the last sc of the previous row. Ch 1, turn.
- Rows 4-10 (Repeating Pattern & Increases):
- You will now alternate between two types of rows: a “shell row” (like Row 2, but adjusted for the increasing size) and a “front post dc row” (like Row 3).
- Shell Rows (e.g., Row 4): Sc in the first dc. Ch 1, shell in each ch-1 space of the fpdc shells from the previous row. Sc in the sc between shells.
- Corners in Shell Rows: In the marked ch-1 space between the two V-stitches, work (shell, ch 1, sc, ch 2, sc, ch 1, shell). Place marker in the ch-2 space.
- Front Post DC Rows (e.g., Row 5): Work fpdc shells around each shell and V-stitches at the corners as in Row 3.
- Continue repeating these two rows until your yoke reaches the desired height for your chosen size (e.g., 10 rows total, finishing on a shell row).

Phase 2: Separating Sleeves and Starting the Body
This phase shapes the garment, creating the armholes and beginning the main body.
- Row 11 (Divide Sleeves): This row is a front post dc row.
- Work the front panel in fpdc shells as usual.
- Armhole Creation: At the first corner (ch-2 space of the last corner shell of the front panel), work (2 dc, ch 1, 2 dc).
- Skip Sleeve: Ch 1. Skip all the shell stitches that form the sleeve panel.
- At the second corner, work (2 dc, ch 1, 2 dc) in the ch-2 space.
- Continue with the back panel in fpdc shells.
- Repeat the armhole creation and sleeve skipping for the second sleeve.
- Finish with the second front panel in fpdc shells.
- You should now have 5 shells for each front panel and 10 shells for the back panel.
- Row 12 (Body – Shells, Increased Hook Size):
- Change to a 4.5 mm hook (optional, for extra fullness). Ch 1, turn.
- Sc in the first dc. Ch 1, shell in each ch-1 space of the shells. Sc in the sc between shells.
- Underarm Increase: In the ch-1 space under each armhole, work a shell.
- You should now have 22 shells total for the body. Ch 3, turn.
- Row 13 (Body – Front Post DC): Work fpdc shells around each shell. Finish with a dc in the last sc. Ch 1, turn.
- Rows 14-27 (Body – Repeating Pattern): Continue alternating between the shell row (Row 12 type) and the front post dc row (Row 13 type) until you have a total of 17 rows from where the sleeves were divided. The total length from the top of the shoulder to the end of this section should be about 30 cm or 11.75 inches.

Phase 3: Finishing the Body – Ribbing and Edging
This section adds a nice ribbed border and edge to the bottom and front panels.
- Rows 28-30 (Body – Ribbing):
- Change back to the 4mm hook. Ch 1, turn.
- Hdc in the first st. Alternate between fphdc and bphdc around each hdc from the previous row.
- Repeat this for three rows total. Finish the last hdc in the second chain.
- Edging Along Front Panels and Neckline:
- Ch 1, turn. Sc along the entire front panel, around the neckline, and down the other front panel.
- Tip: Work 2 sc into rows that started with ch 3 and 1 sc into rows that started with ch 1. For turning the corners at the bottom of the front panels, work 2 sc in the last stitch. Along the neckline, work 1 sc in each chain.
- Ensure both front panels have the same number of single crochets (e.g., 43 sc).
- Row of Single Crochet (No Buttonholes):
- Ch 1, turn. Sc in each sc around the entire front panel and neckline. The existing spaces between shells are large enough for 11mm buttons.
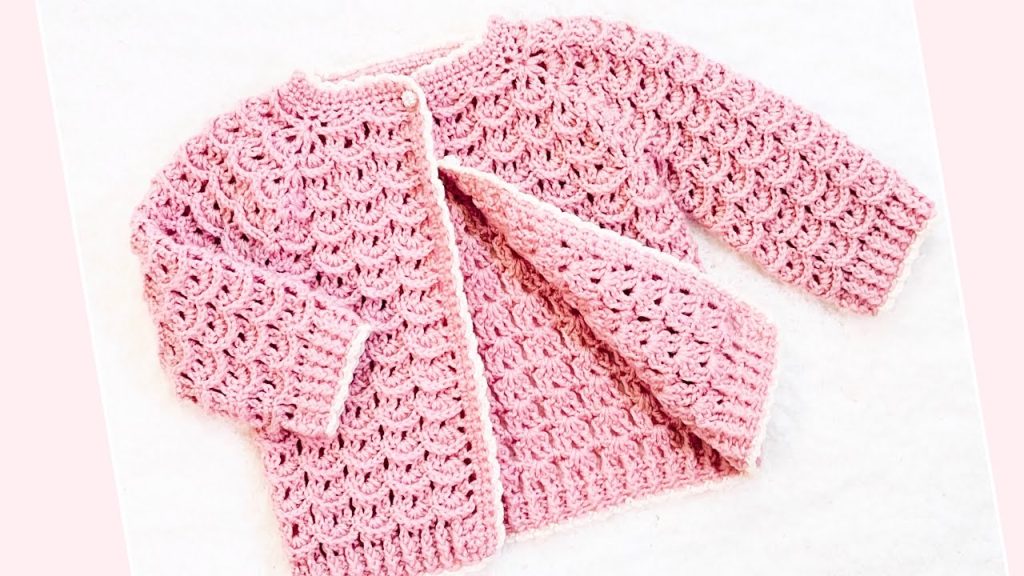
- Decorative Edging (Shell Trim):
- Using an off-white yarn (or contrasting color). Join yarn with a sl st to the bottom corner.
- (Ch 3, sk 1 sc, sl st in next sc). Repeat this pattern all along the front panels and around the neckline. Finish with a sl st and weave in ends.
Phase 4: Constructing the Sleeves
The sleeves are worked in the round, with slight variations for left and right to ensure the seam is on the underside.
- Sleeve 1 (Left Side – starting orientation):
- Join yarn (4mm hook) right under the sleeve, into the first gap next to the shell.
- (Ch 3, dc, ch 1, 2 dc) in the first gap. This creates the first shell.
- Work shells in each shell around the sleeve opening. Finish with a dc in the last sc of the sleeve.
- Join with a sl st to the top of the ch 3. Ch 1, turn.
- Sleeve 2 (Right Side – starting orientation):
- Join yarn (4mm hook) in the other gap under the arm, to start in the opposite direction.
- (Ch 3, dc, ch 1, 2 dc) in the first gap.
- Work shells in each shell around the sleeve opening.
- At the end of the row, work the last shell in the remaining gap. Join with a sl st to the top of the ch 3.
- Rows 2-17 (Sleeve Body – Repeating Pattern):
- Shell Rows: Ch 1, turn. Sc in the first st. Ch 1, shell in each ch-1 space. Sc between shells. (8 shells per round).
- Front Post DC Rows: Ch 3, turn. Fpdc shells around each shell. Sl st to top of ch 3.
- Repeat these two rows until you have a total of 17 rows for the sleeve.
- Rows 18-20 (Sleeve Cuff – Ribbing):
- Ch 1, turn. Hdc in the first st. Alternate between fphdc and bphdc around each hdc.
- Repeat this for three rows total. Each row should have 32 fphdc/bphdc. Join with a sl st, fasten off.
- Optional: If fphdc/bphdc is too challenging, work 3-4 rows of single crochet instead.
- Sleeve Decorative Edging:
- Join contrasting yarn with a sl st to the cuff. (Ch 3, sk 1 hdc, sl st in next hdc). Repeat around the cuff. Join with sl st, fasten off, and weave in ends.
Phase 5: Final Assembly and Details
- Weave in All Ends: Use your tapestry needle to neatly weave in all loose yarn tails throughout the cardigan.
- Attach Buttons: Sew the 6 buttons to the designated side of the cardigan. The spaces between the single crochets of the opposing front panel will serve as the buttonholes.
- Blocking (Optional): Gently wet the finished cardigan, shape it to the correct measurements, and lay it flat to dry. This helps to even out stitches and enhance the drape of the fabric.
Your beautiful, handmade “Little Shells” Cardigan is now complete! This cozy and cute jacket is sure to be a treasured garment for any little girl. You can find more sizing information in the video’s description box if you wish to adapt it further.
Happy crocheting, and enjoy watching your little one flutter around in this charming creation!
Video tutorial: