 by
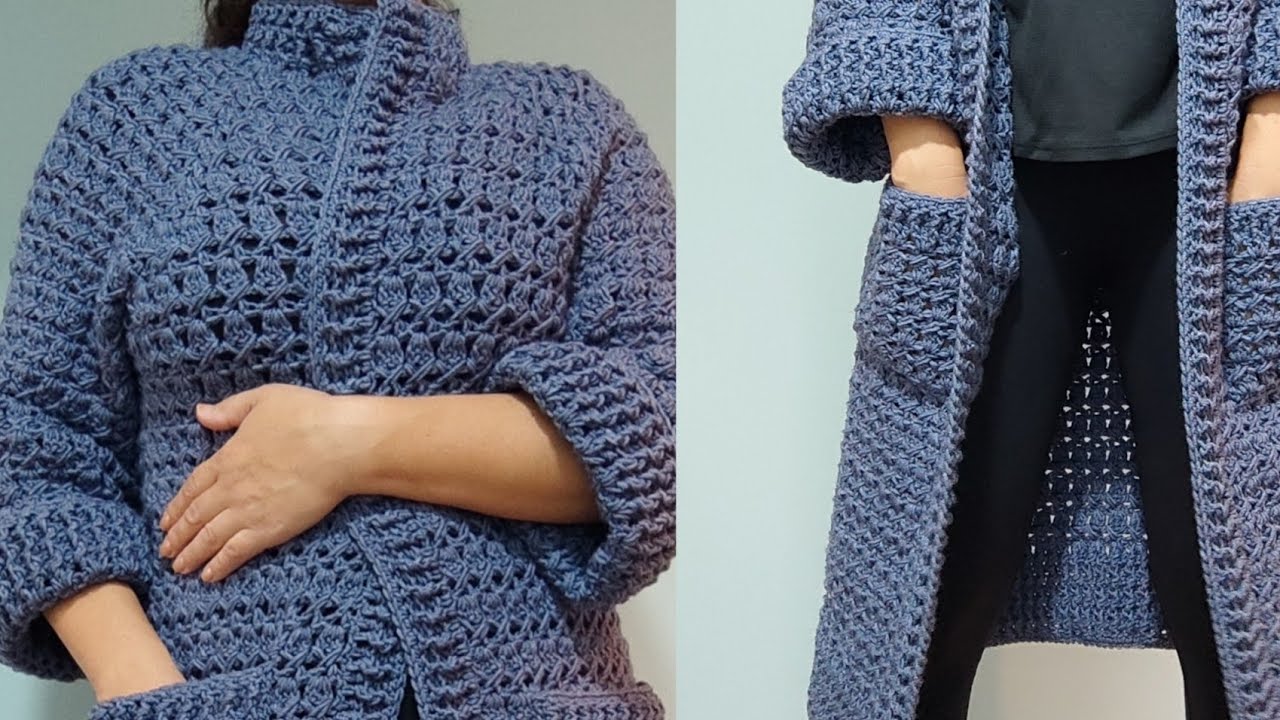
by There is nothing quite as comforting as wrapping yourself in a long, cozy cardigan on a crisp fall day. A handmade crochet cardigan offers the perfect blend of warmth, style, and personal touch. While a detailed pattern is full of specific numbers, this article is your guide to understanding the process of creating a beautiful, custom-sized cardigan. We’ll break down the essentials, from choosing your materials to constructing the pieces and adding those professional-looking finishing touches.

Before You Begin: The Foundational Steps
Taking the time to plan your project will save you from frustration later on. This is where you set yourself up for success.
1. Choosing Your Yarn and Hook
The yarn you select will determine the weight, feel, and drape of your finished cardigan.
- Weight: For a warm, chunky cardigan, opt for a worsted or bulky weight yarn. A lighter DK (double knit) yarn will produce a more drapey, lightweight fabric.
- Fiber: Acrylic and superwash wool are easy to care for. Merino wool and alpaca offer incredible warmth and softness, while blends provide a balance of properties.
- Hook Size: The yarn label will recommend a hook size. Use this as a starting point, but always be prepared to go up or down a size to achieve the correct gauge.
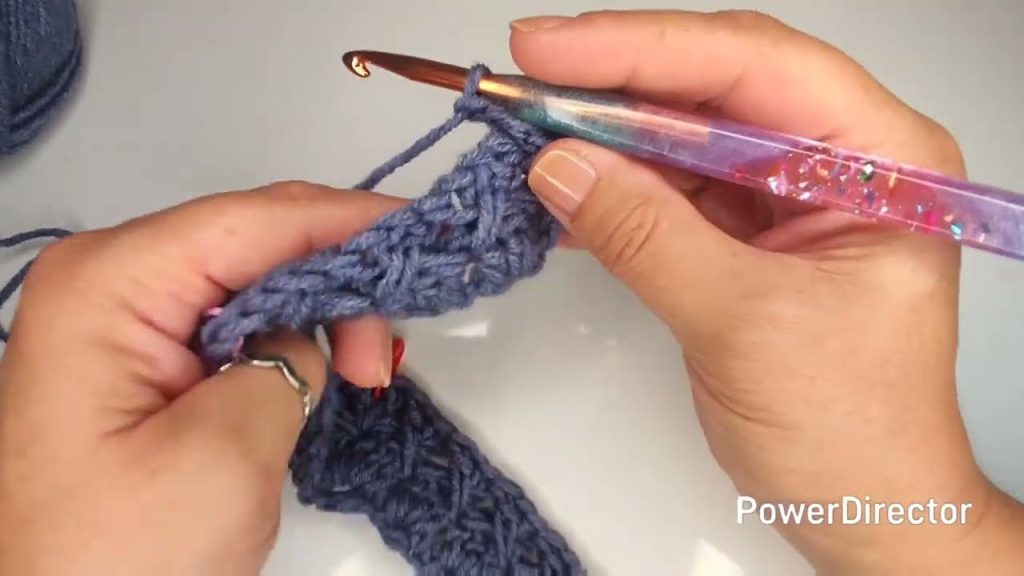
2. The All-Important Gauge Swatch
This step is non-negotiable for a garment. A gauge swatch is a small square you crochet to ensure your stitches match the pattern’s recommendations. Since we’re creating a custom piece, we’ll use a swatch to determine our own stitch count.
- Chain about 25 stitches.
- Work in your chosen stitch pattern (for example, double crochet) for about 20 rows.
- Measure the finished square. Count how many stitches and rows are in a 4×4-inch area.
- Use this number to calculate how many stitches you’ll need for each panel of your cardigan, based on your body measurements.
3. Taking Your Measurements
Grab a tape measure and a notepad.
- Bust/Chest: Measure around the fullest part of your bust.
- Length: Measure from the top of your shoulder down to where you want the hem to fall.
- Back Width: Measure across your upper back from armhole to armhole.
- Sleeve Length: Measure from the top of your shoulder to your wrist.
- Sleeve Circumference: Measure around the widest part of your upper arm.
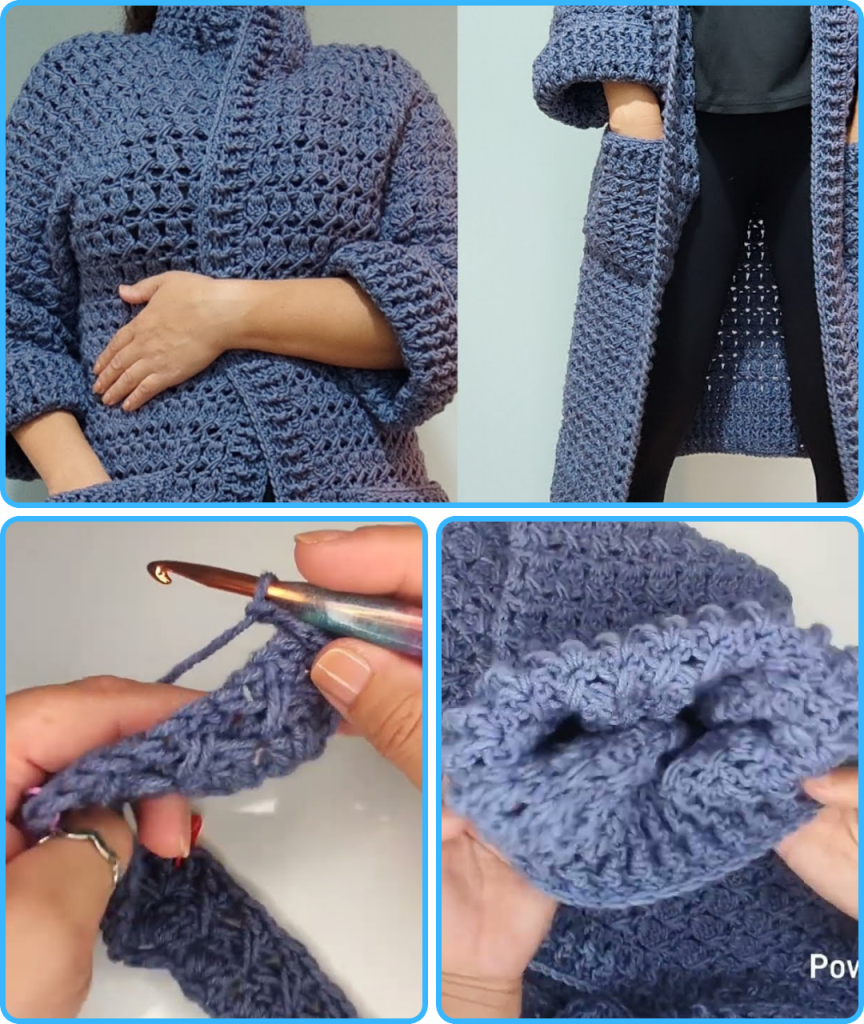
The Core Construction: Crocheting the Pieces
A long cardigan is typically made of five separate pieces: a back panel, two front panels, and two sleeves. We will seam them together at the end.

The Back Panel
- Chain: Based on your back width measurement and your gauge, chain the required number of stitches.
- Rows: Work in straight rows using a simple, repetitive stitch. Double crochet (dc) is a great choice for a balance of drape and warmth. Work until your panel reaches your desired length from the hem to the base of your neck.
- Finish: Fasten off and set aside.
The Front Panels
- Chain: Your front panels will be half the width of your back panel (accounting for some overlap at the front). Chain the required number of stitches.
- Rows: Work in rows just as you did for the back panel. Continue until your panels are the same length as your back panel, leaving a space at the top for the neckline and shoulders.
- Shape: To create the V-neck, you will need to decrease stitches on the neckline side as you work up the panel. The amount you decrease depends on how deep you want the V-neck to be. Remember to make a left front panel and a right front panel.
The Sleeves
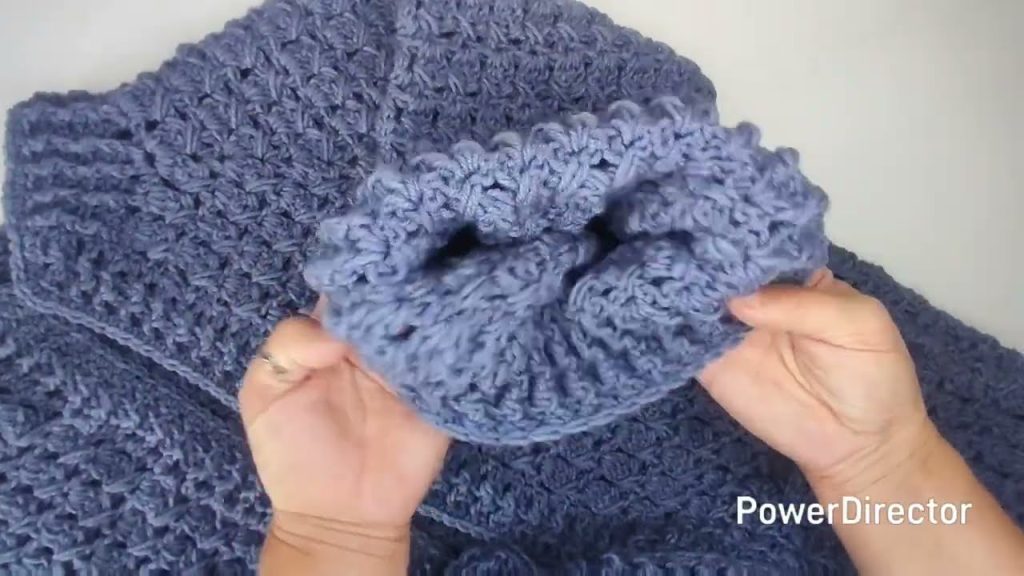
- Cuff: Chain the number of stitches for your wrist circumference.
- Increases: Work in rows or in the round, gradually increasing stitches to create a tapered shape. Continue until the sleeve reaches your upper arm circumference and your desired sleeve length.
- Finish: Fasten off and make a second identical sleeve.
Assembly and Finishing Touches
This is where the magic happens and your pieces become a beautiful garment.
Seaming the Panels
- Shoulders: Using a yarn needle and a long strand of yarn, sew the front and back shoulder seams together. Use a method like the mattress stitch for a clean, invisible seam.
- Sides: Sew the side seams of the body, from the armpit down to the hem.
- Sleeves: Fold each sleeve in half lengthwise and sew the side seam. Then, insert each sleeve into the armhole and sew it into place.
The Button Band and Collar
This is the final, defining feature of your cardigan.
- Stitches: Join your yarn at the bottom of a front panel. Work an even number of single crochet (sc) stitches all the way up the front, around the neckline, and down the other front panel. The key is to avoid bunching or stretching the fabric.
- Rows: Work in rows back and forth. You can use sc or a ribbed stitch like half double crochet in the back loop only (hdcblo). Work about 6-8 rows to create a nice, thick band.
- Buttonholes: If you want buttonholes, work them into one of the rows. A simple buttonhole can be made by skipping two stitches and chaining two.
Final Details
- Weave in All Ends: Use a yarn needle to neatly tuck in all the loose ends.
- Blocking: Pin your finished cardigan to a mat, spritz it with water, and let it dry. This will help even out your stitches, set the shape, and give the fabric a beautiful drape.
Your handmade fall cardigan is now complete, a unique piece created just for you.
Video tutorial: